Category: Uncategorized
Mixing Concrete Properly
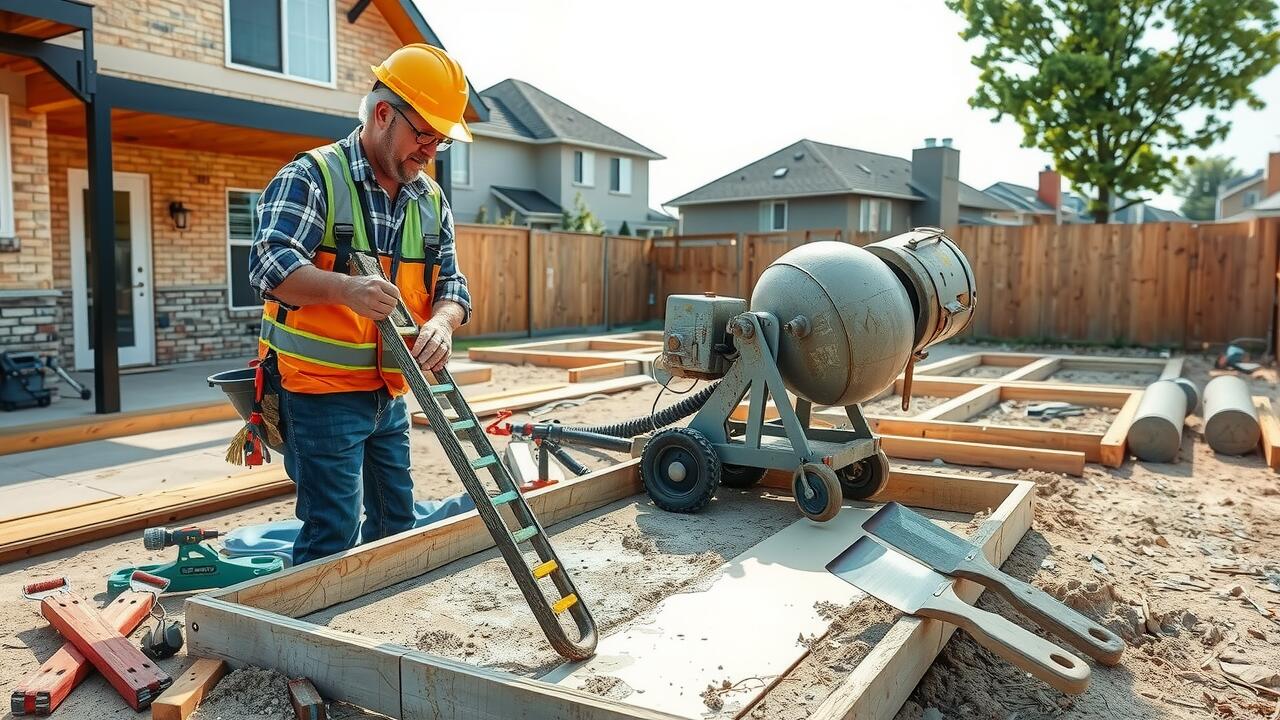
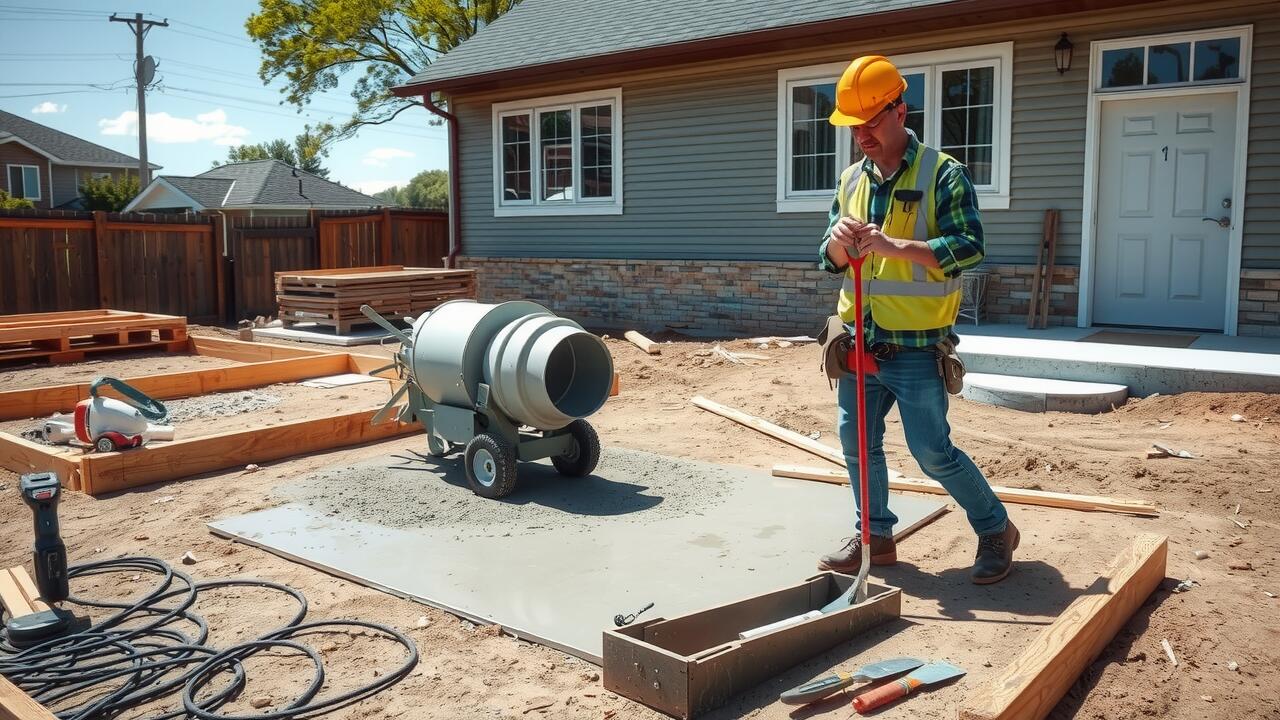
Mixing concrete properly is crucial for successful concrete slab installation. Start by gathering the correct materials, including cement, sand, gravel, and water. A common ratio is 1 part cement, 2 parts sand, and 3 parts gravel. Ensure you use clean water to achieve the desired consistency. Using a concrete mixer can help achieve a uniform blend, but a wheelbarrow or bucket can suffice for smaller projects.
Attention to detail during mixing affects the final outcome. Aim for a consistency akin to thick mud. This will allow for easier pouring and help prevent air pockets from forming in the slab. Incorporating additives can enhance strength and durability, especially if the slab will endure heavy loads. Always measure components carefully for optimal results in concrete slab installation.
Tips for Achieving the Right Consistency
Achieving the right consistency for your concrete mix is crucial during concrete slab installation. Start by combining the dry ingredients, including cement, sand, and gravel, in correct ratios as specified in your concrete mix design. Avoid using too much water, as it can weaken the mixture. A typical water-to-cement ratio ranges from 0.4 to 0.6, so it’s essential to measure accurately. Mix the components thoroughly until you achieve a uniform texture.
Once mixed, the concrete should hold its shape when formed into a ball but also be easy to spread. Test the consistency by performing a simple slump test. Take a small amount of concrete in a cup or mold, and tap it gently to check for movement. If it slumps slightly without collapsing completely, you’re on the right track. Adjust the water content as necessary, but always ensure that you do not compromise the strength and durability of your concrete slab during installation.
Pouring the Concrete Slab
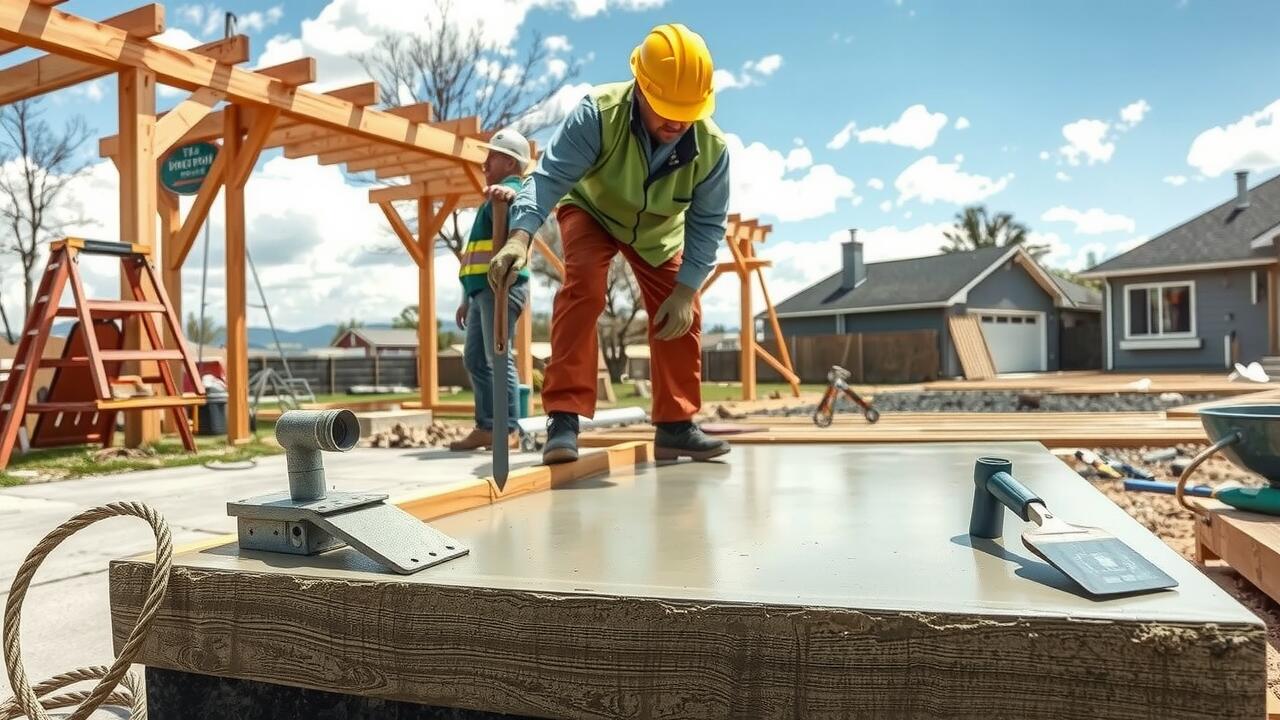
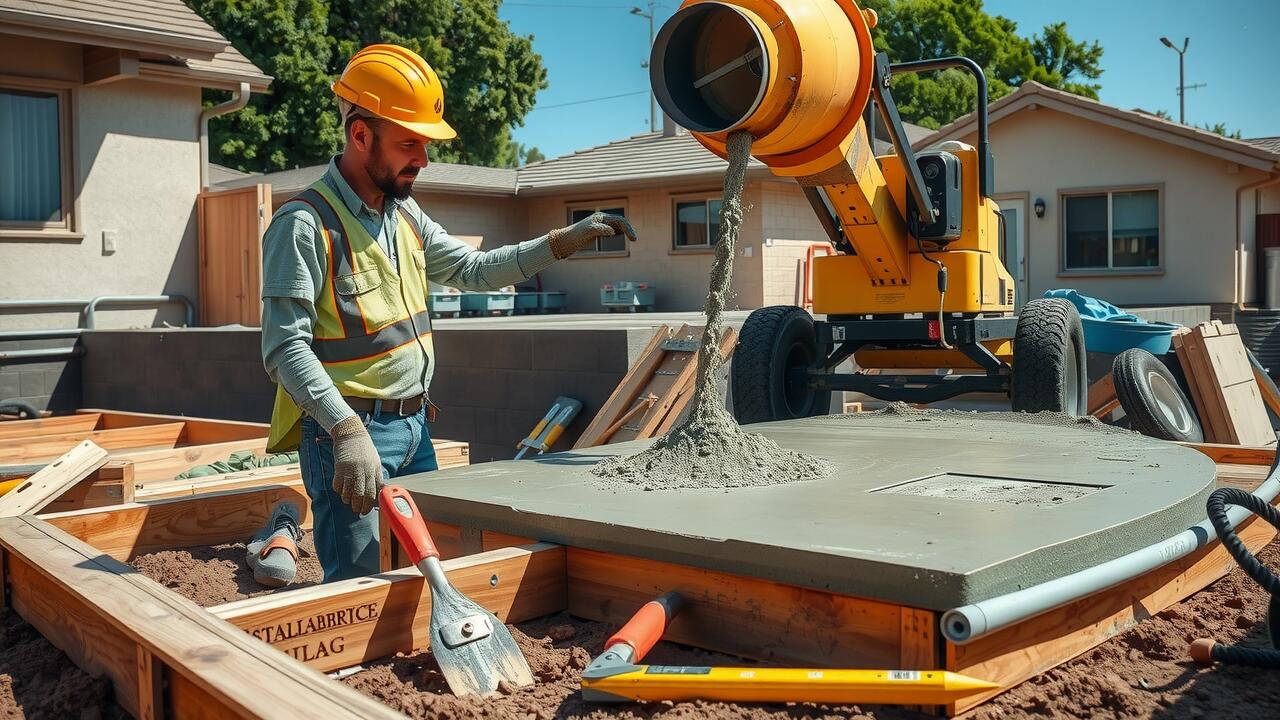
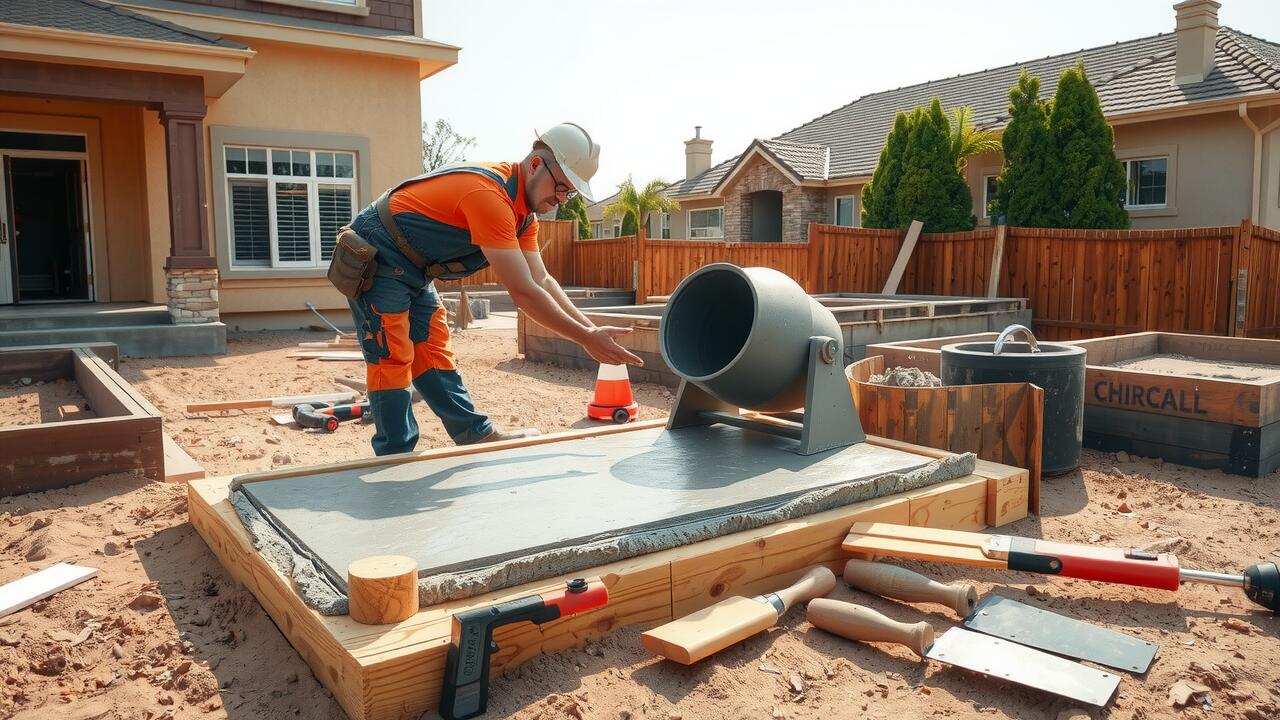
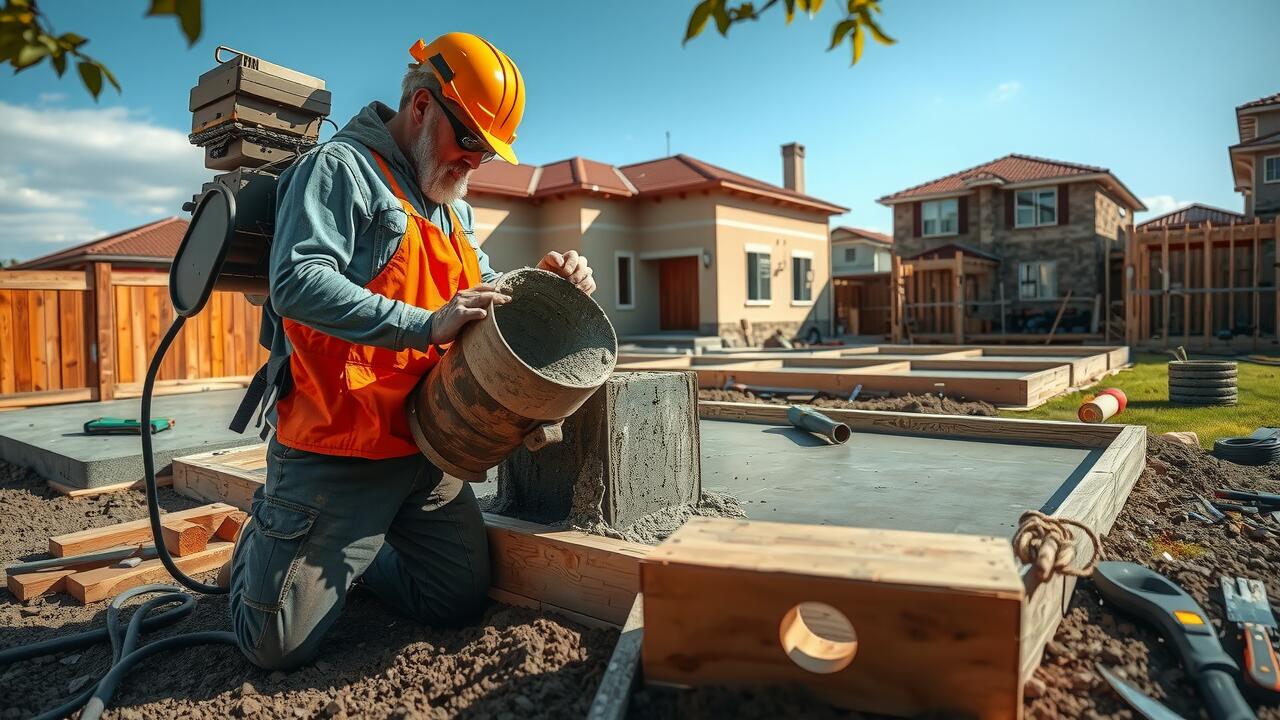
When it comes to Concrete Slab Installation, timing is key. Once the concrete is mixed to the desired consistency, it should be poured promptly to prevent premature setting. Begin by positioning the chute or wheelbarrow at one end of the prepared area. Pour the concrete evenly across the formwork, ensuring that it reaches all corners and edges. Avoid overfilling any sections to minimize waste and facilitate the leveling process.
As you pour, consider using a straightedge or screed board to help level the surface of the concrete. Gently drag the screed across the top of the forms while moving from one end to the other. This technique ensures that the concrete is evenly distributed, avoiding any low spots that can cause complications later. Continuous adjustments may be necessary to maintain an even surface, so keep the screed moving and check your progress regularly.
Techniques for Even Distribution
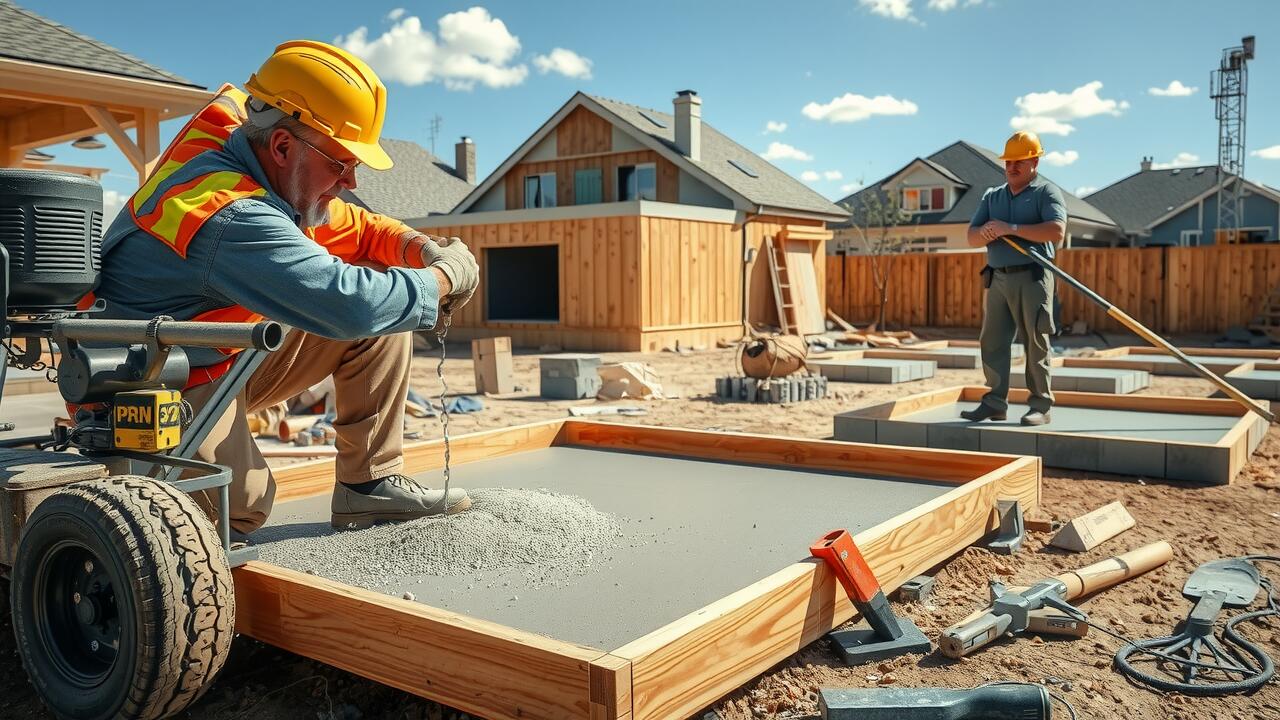
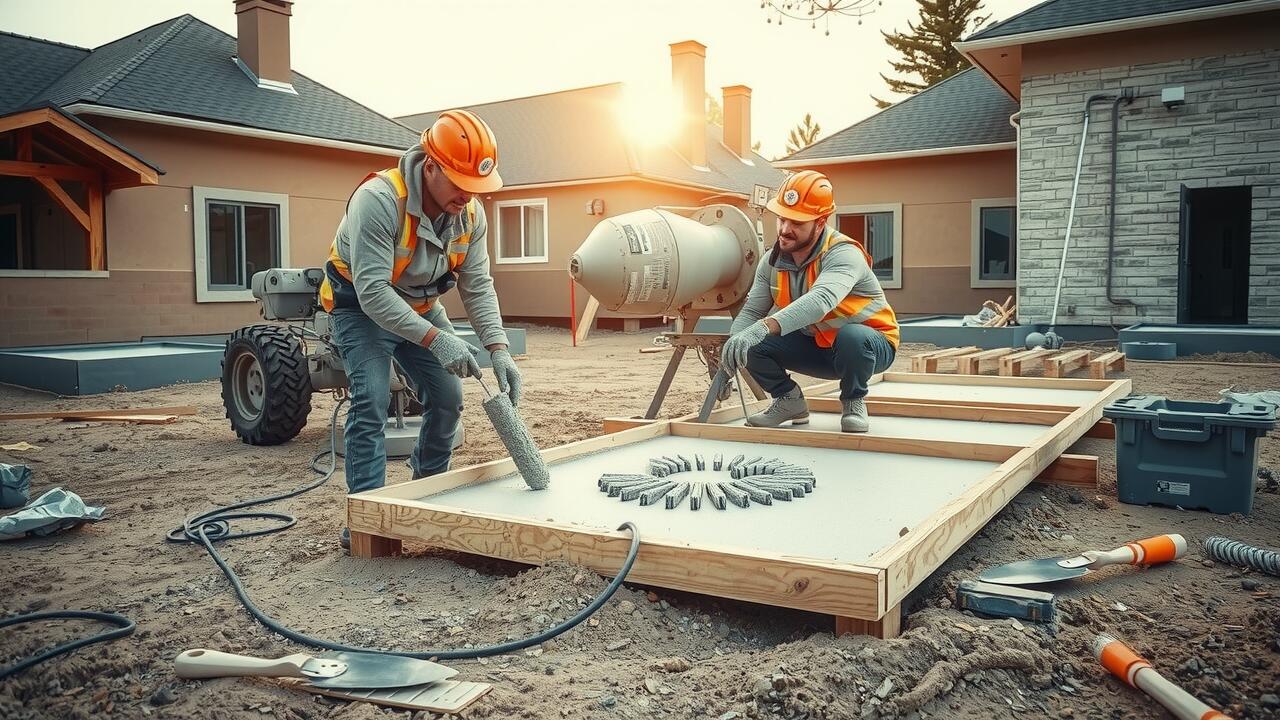
Achieving an even distribution of concrete during slab installation requires careful planning and technique. Begin by positioning your concrete forms properly to ensure they are level and secure. Using a wheelbarrow or concrete pump can help transport the mixture to the pouring area, while aiming for a steady flow. Pour the concrete into one corner of the form and allow it to flow naturally to fill in the space, minimizing the amount of time spent moving the mixture by hand.
As the concrete fills the form, use a screeding tool to level the surface and push excess concrete toward areas that need more material. This process helps create a smooth finish while ensuring the slab is evenly distributed throughout. For larger pours, it may be beneficial to work in sections, allowing for better control and more accurate leveling. Achieving an even distribution during concrete slab installation is essential for structural integrity and longevity.
Finishing the Surface
Achieving a smooth and polished surface is crucial in the finishing process of your concrete slab installation. Once the concrete has been poured and is beginning to set, you can start the finishing work. Using a bull float helps to level the surface and eliminate any imperfections. This tool also helps in bringing the cream—the fine particles of cement and water—to the surface, which leads to a more polished finish.
For added texture and slip resistance, consider using a broom after the initial finishing has been done. A simple broom drag across the slab can provide a non-slip surface ideal for outdoor areas. Pay attention to the timing when finishing; too early and the surface can be damaged, too late and it may be hard to create the desired effect. Careful execution during this phase ensures that your concrete slab installation is both functional and visually appealing.
Methods for Smoothing and Texturing
Achieving a smooth finish on your concrete slab is essential for both aesthetics and functionality. After pouring, utilize a bull float to work the surface and remove any imperfections. This tool helps to level the concrete and pushes excess water to the top, making it easier to achieve a smooth finish. Once the concrete begins to set, use a trowel to refine the surface. This step allows for more detailed smoothing and helps create a polished look. Pay attention to the edges while troweling to ensure a consistent finish across the entire slab.
Texturing the surface of your concrete slab may enhance its appearance and improve its traction. Various methods can achieve this, such as using a broom to create a finish with a non-slip surface. Simply drag a broom across the wet concrete in a straight line for a uniform texture. For a more decorative effect, consider stamping the surface with rubber mats, which can create the look of natural stone or bricks. Adding texture during the Concrete Slab Installation phase not only improves the slab’s durability but also enhances its overall visual appeal.
FAQS
Is it possible for a beginner to pour a concrete slab by themselves?
Yes, a beginner can pour a concrete slab by themselves, but it requires careful preparation, the right tools, and a basic understanding of mixing, pouring, and finishing concrete.
What materials do I need to pour a concrete slab?
You will need concrete mix, water, a mixing tool (like a wheelbarrow or concrete mixer), measuring tools, a trowel, a float, and forms to hold the slab in place.
How do I ensure the concrete has the right consistency before pouring?
To ensure the right consistency, mix the concrete until it is workable and resembles thick peanut butter. Conduct a slump test by forming a cone shape and checking its stability.
What techniques can I use for evenly distributing the concrete during the pour?
Techniques for even distribution include using a screed board to level the surface and moving the concrete back and forth in a sweeping motion to fill in low spots.
How can I achieve a smooth finish on the concrete slab?
You can achieve a smooth finish by using a steel trowel after the surface has set slightly. For added texture, consider using a broom or stamp before the concrete fully cures.
Related Links
Weight Distribution and Stability
When considering concrete slab installation, effective weight distribution and stability are essential. A concrete slab must endure significant loads, which makes the choice of base material critical. Properly compacted gravel provides a robust foundation, allowing for even weight distribution across the entire area. This setup helps to prevent stress concentrations that could lead to cracking or settling over time.
In contrast, using dirt or soil without additional support can lead to instability. Soil can shift or compress, especially when wet, creating an uneven surface that compromises the integrity of the concrete slab. Therefore, incorporating gravel beneath the slab enhances drainage and minimizes the risk of moisture-related issues, leading to a more durable and long-lasting structure.
The Structural Advantages of Gravel
Gravel offers several structural advantages when used as a base for concrete slab installation. It creates a robust foundation that can effectively distribute the weight of the concrete, minimizing the risk of cracking or settling over time. The interlocking nature of gravel particles allows for better drainage, reducing the likelihood of water pooling beneath the slab, which can compromise its integrity. This drainage capability helps maintain a stable subgrade, making it less susceptible to erosion or shifting due to moisture saturation.
Using gravel also enhances the overall longevity of the concrete slab installation. Its porous structure provides an escape route for excess moisture, preventing it from being trapped under the slab. This moisture control is crucial, as stagnant water can lead to freeze-thaw cycles that damage concrete. By ensuring that the base remains dry and well-drained, gravel contributes to a more durable and resilient slab, ultimately extending its lifespan and reducing maintenance needs.
Preparing the Site
Proper site preparation is essential for any successful concrete slab installation. Begin by clearing the area of any vegetation, rocks, or debris that could interfere with the foundation. Ensuring a clean and stable base helps prevent future issues such as settling or cracking. Additionally, consider the drainage patterns around the site to prevent water accumulation underneath the slab.
Once the area is cleared, it’s important to establish the desired dimensions and levels for the concrete slab installation. Use stakes and string lines to outline the perimeter. This visual guide will assist in maintaining straight edges and uniform thickness. Checking for level across the entire area will ensure that the concrete slab sits evenly, which is critical for weight distribution and load-bearing capacity.
Steps for Laying a Proper Foundation
Laying a proper foundation requires careful site preparation to ensure longevity and stability. Start by clearing the area of any debris, vegetation, and topsoil. This step allows you to evaluate the underlying soil and determine if it needs additional treatment. Depending on the soil’s composition, it may be beneficial to compact it to reduce the risk of settling later on. A well-compacted subgrade provides a solid base for the foundation.
Once the site is prepared, it is essential to introduce an appropriate layer of gravel or crushed stone before the concrete slab installation. This layer improves drainage and helps distribute weight evenly, minimizing the potential for cracking or shifting over time. Ensure the gravel is spread evenly and compacted adequately. Taking the time to set up this base properly can significantly enhance the performance of the concrete slab once it’s poured.
Common Mistakes to Avoid
When undertaking a concrete slab installation, one significant mistake is neglecting the importance of proper compaction of the base material. Whether using gravel or dirt, insufficient compaction can lead to settling issues in the long term. Over time, this can cause cracks in the concrete slab, compromising its integrity and durability. Properly compacted base material creates a solid foundation that supports the weight of the concrete and any additional loads placed upon it.
Another common error occurs during the selection of base materials. Some individuals may opt for dirt due to its lower cost, mistakenly believing that it will suffice for concrete slab installation. However, dirt can be prone to shifting and settling, leading to potential slab failure. Choosing gravel offers enhanced drainage and stability, reducing the likelihood of moisture issues that can further complicate the concrete’s performance over time. Prioritizing the right materials can significantly impact the success of the installation.
Issues with Incorrect Base Materials
Using incorrect base materials can lead to significant problems during concrete slab installation. When dirt is chosen as a base, it often compresses over time, resulting in settling. This settling can create uneven surfaces and cracks in the concrete, severely affecting its longevity and performance. Additionally, soil that retains moisture can cause frost heave during colder months, further compromising the structural integrity of the slab.
Another common mistake involves inconsistent material thickness. If gravel is not evenly distributed, it can lead to sections of the slab experiencing different weights and stresses. This inconsistency might result in weak points that become prone to cracking under load. Ensuring a uniform base helps to distribute weight evenly across the entire slab, promoting better durability and preventing structural failures in the long run.
FAQS
Do I need to put gravel under my concrete slab?
Yes, it is generally recommended to use gravel under a concrete slab as it provides better weight distribution, drainage, and stability.
Can I use dirt instead of gravel under my concrete slab?
While you can use dirt, it is not advisable as it can lead to settling and cracking of the concrete over time. Gravel is a more stable and reliable option.
What are the advantages of using gravel under a concrete slab?
Gravel offers several advantages, including improved drainage, enhanced stability, and better weight distribution, which can help prevent cracking and settling.
How do I prepare the site for laying a concrete slab?
To prepare the site, you should clear the area of debris, level the ground, and then lay down gravel to create a solid foundation before pouring the concrete.
What common mistakes should I avoid when laying a concrete slab?
Common mistakes include using inadequate base materials, failing to compact the gravel properly, and neglecting to account for drainage, all of which can compromise the integrity of the slab.
Related Links
Estimating the Number of Bags Required
Calculating the number of bags of concrete needed for a 10×10 slab involves determining both the volume of concrete required and the size of the concrete bags available. A standard concrete slab typically requires a depth of 4 inches. To find the volume, multiply the length, width, and depth together. For a 10×10 slab at 4 inches deep, you will convert the depth into feet, resulting in a volume calculation of 10 x 10 x (4/12), which equals approximately 3.33 cubic feet.
Next, you must consider the bag sizes commonly available on the market. Most bags of concrete come in 60-pound or 80-pound sizes. An 80-pound bag of concrete typically yields about 0.6 cubic feet, while a 60-pound bag yields about 0.45 cubic feet. To complete your Concrete Slab Installation, divide your total cubic feet requirement by the yield of the bag size you choose. This will give you a clear indication of the number of bags needed to effectively carry out your project.
Bag Sizes and Coverage Information
Concrete bags come in various sizes, typically ranging from 40 pounds to 80 pounds. The coverage provided by each bag depends on its size and the thickness of the concrete slab you are installing. For a standard 10×10 slab poured to a thickness of 4 inches, you can expect approximately 0.3 cubic yards of concrete. Understanding the volume each bag covers is essential for accurate calculations, which can help streamline the concrete slab installation process.
When using standard 80-pound bags, each one generally covers about 0.6 cubic feet. This means you will need around 10 to 15 bags for a 10×10 slab, depending on the mixing method and any variations in thickness. Smaller bags, while easier to handle, may require more frequent trips to the store since they cover less area. Knowing the coverage information for each bag size will facilitate precise planning for your concrete slab installation, reducing the risk of underestimating your material needs.
Accounting for Waste and Spillage
When planning for a concrete slab installation, it’s essential to account for waste and spillage. Concrete can be lost during the mixing, transporting, or pouring stages due to spillage or errors in measurement. Even experienced contractors may inadvertently create more waste than anticipated. This potential loss should be factored into your overall calculations to ensure that you have enough concrete to complete the project without running short.
A common practice is to add an additional 10% to your total estimate to accommodate for these uncertainties. This extra percentage helps cover the material lost during the process while providing a buffer for any changes or miscalculations. By considering waste and spillage in your planning, you can ensure a smoother and more efficient concrete slab installation, reducing the likelihood of delays or complications.
Recommended Percentage for Overages
When planning for Concrete Slab Installation, it is essential to account for potential waste and spillage. Several factors can influence the amount of concrete lost during the process. These may include overpouring, spillage on the worksite, and any mistakes made while mixing or pouring. To ensure a successful project, it’s wise to budget for extra material to cover these unexpected losses.
A commonly recommended percentage for overages is around 10% to 15% of the total concrete needed. This extra concrete will help accommodate any unforeseen circumstances that might arise. By including this buffer in your calculations, you can avoid delays and additional costs associated with last-minute purchases. Planning for overages not only secures the quality of your installation but also enhances the overall efficiency of your project.
Selecting the Right Concrete Mix
When planning for concrete slab installation, choosing the right concrete mix is essential. Different projects may require specific strengths, textures, or finishes. For a standard 10×10 slab, ready-mix concrete is commonly used. This blend generally includes cement, aggregates, and water, allowing for a durable and consistent result. Depending on the intended use of the slab, such as a patio or foundation, selecting a mix that meets engineering specifications is crucial.
Consider various types of concrete available for your project. Standard mixes provide adequate strength for most residential applications, while high-performance mixtures are ideal for areas with heavy loads or exposure to extreme weather. For decorative options, there are mixes designed to be stained or stamped, enhancing aesthetic appeal. Understanding the requirements for your concrete slab installation will guide you in making the most suitable choice for your needs.
Different Types of Concrete Available
There are various types of concrete mixes available for slab projects, each designed for specific applications and performance characteristics. Standard concrete, often a blend of cement, sand, gravel, and water, is suitable for most residential concrete slab installations. Its durability and strength make it a popular choice.
For specialized needs, high-strength concrete may be necessary. This type is formulated to withstand greater stress, making it ideal for heavy commercial use or areas subject to heavier load-bearing conditions. Additionally, there are mixes designed for quick-setting purposes, which can be advantageous in projects requiring expedited completion. Understanding these options will aid in making the right choice for concrete slab installation.
FAQS
How do I calculate the amount of concrete needed for a 10×10 slab?
To calculate the amount of concrete needed, first determine the volume of the slab by multiplying the length, width, and depth. For a 10×10 slab that is 4 inches deep, the volume would be 10 x 10 x (4/12) = 33.33 cubic feet. You then convert this volume to cubic yards by dividing by 27, resulting in approximately 1.23 cubic yards of concrete.
What sizes of concrete bags are available?
Concrete bags typically come in sizes of 40 pounds, 60 pounds, and 80 pounds. Each size has a different coverage capacity, with an 80-pound bag covering approximately 0.6 cubic feet.
Should I account for waste when estimating concrete?
Yes, it’s important to account for waste and spillage when estimating the amount of concrete needed. A common recommendation is to add an additional 10% to your total to cover any excess that may be needed due to errors or spillage.
What is the best concrete mix for a slab?
The best concrete mix for a slab typically depends on the intended use. For general use, a standard mix such as a 3000 or 4000 psi mix is commonly recommended. If the slab will be exposed to harsh weather conditions, consider using a mix that includes additives for improved durability.
Can I use leftover concrete from my project?
Yes, leftover concrete can be used for smaller projects or repairs, provided it has not started to set. However, it’s important to ensure that the leftover concrete is stored properly and used within a reasonable timeframe to maintain its quality.
Related Links
Seasonal Considerations
Seasonal considerations play a critical role in the overall success of a concrete slab installation. Weather conditions, particularly temperature and moisture levels, can significantly impact the curing process. During cooler months, the risk of freezing can compromise the integrity of the slab. Conversely, extreme heat can lead to rapid evaporation, causing surface cracking. Planning the installation around more moderate weather conditions often results in a more durable and long-lasting concrete slab.
Rain and high humidity also introduce challenges to concrete slab installation. Wet conditions can complicate site preparation, making excavation and grading more difficult. Additionally, pouring concrete in damp environments necessitates extra precautions to ensure proper curing. Understanding how seasonal variations affect the installation process will help homeowners and contractors alike make informed decisions to achieve optimal results.
Impact of Weather on Concrete Pouring
Weather conditions significantly influence the process of Concrete Slab Installation. High temperatures can accelerate the curing process, potentially leading to cracks if not properly managed. On the other hand, pouring concrete during cold weather can hinder curing, as the mixture requires a specific temperature range to set correctly. Contractors often take care to monitor these conditions closely, making adjustments to the pouring schedule when the forecast indicates extreme temperatures.
Rain is another vital factor to consider during Concrete Slab Installation. Wet weather can compromise the integrity of the slab if it disrupts the curing process. For instance, heavy rain can wash away essential surface material before it has the chance to set. To mitigate these risks, crews may use coverings or postpone work until conditions improve, ensuring the longevity and durability of the finished product. Proper planning around weather conditions is essential for a successful installation.
Preparing the Site for a Concrete Slab
Proper preparation of the site is essential for ensuring a successful concrete slab installation. This involves clearing the area of any vegetation, debris, and existing structures. Furthermore, leveling the ground is crucial to prevent future settling or cracking. Soil quality also plays a significant role; compacted or stable soil will enhance the slab’s strength and durability.
Excavation and grading are key steps in this process, often requiring heavy machinery for larger projects. The depth of excavation may vary based on the expected load on the slab and local building codes. Depending on the soil type and conditions, additional steps such as adding a gravel base may be necessary to improve drainage and prevent moisture issues. Accurate site preparation lays the foundation for a lasting concrete slab installation.
Excavation and Grading Costs
Excavation and grading are essential steps in the concrete slab installation process. These tasks ensure that the site is properly prepared to support the weight of the concrete and any structures built on top of it. The costs associated with excavation depend on the depth of the materials that need to be removed and the type of soil present. Heavy clay or rocky soil may require more intensive digging, which can increase labor and equipment expenses.
Grading involves leveling the excavated area to create a stable base for the concrete. The quality of grading can significantly affect the longevity and performance of the slab. Poor grading may lead to uneven surfaces or drainage issues over time. While the expense for grading may vary based on site conditions, investing in proper excavation and grading services contributes to a successful concrete slab installation.
Reinforcement Options for Concrete
Reinforcing concrete is crucial for ensuring the strength and durability of a concrete slab installation. There are several options available, each suited for different needs and budgets. Rebar, made of steel reinforcement bars, is widely used for its high tensile strength. It is typically placed in a grid pattern within the slab to help resist cracking and structural failure. Another option is wire mesh, a lighter alternative that can also improve stability and reduce shrinkage cracks.
Choosing the right reinforcement method depends on factors such as load requirements and environmental conditions. Rebar offers superior strength, making it ideal for heavy loads, while wire mesh serves well in less demanding applications. Considering these options during the concrete slab installation process helps ensure the longevity and performance of the slab under various conditions.
Importance of Rebar and Wire Mesh
Rebar and wire mesh play crucial roles in the structural integrity of concrete slabs. These reinforcement materials help control cracking, which can arise from temperature fluctuations and drying shrinkage. During Concrete Slab Installation, incorporating rebar or wire mesh adds strength that supports the weight of the slab while enhancing its durability over time.
The selection between rebar and wire mesh often depends on the specific requirements of the project. Rebar, typically made of steel, provides greater tensile strength and is suitable for heavier loads. Wire mesh, although less robust, can still offer adequate support for smaller slabs. Understanding the importance of these reinforcement options can help ensure a successful Concrete Slab Installation that meets both aesthetic and functional needs.
FAQS
What is the average cost of laying a 20×20 concrete slab?
The average cost to lay a 20×20 concrete slab typically ranges from $1,200 to $2,500, depending on factors such as materials, labor, and site preparation.
What seasonal considerations should I keep in mind when planning to pour a concrete slab?
Seasonal considerations include the temperature and humidity levels. It’s best to pour concrete in mild weather, avoiding extreme heat or cold, as these conditions can affect curing and overall slab quality.
How does weather impact concrete pouring?
Weather can significantly affect the curing process of concrete. Rain, high humidity, or extremely cold temperatures can lead to improper curing, cracking, or other issues, making it essential to monitor the forecast before pouring.
What are the excavation and grading costs associated with preparing a site for a concrete slab?
Excavation and grading costs can vary widely but generally range from $1 to $3 per square foot, depending on the soil condition and the amount of work needed to prepare the site for a concrete slab.
Why is reinforcement, such as rebar or wire mesh, important for a concrete slab?
Reinforcement is crucial for enhancing the strength and durability of a concrete slab, helping to prevent cracking and structural failure over time. It distributes loads evenly across the slab, improving overall performance.
Related Links

Reinforcement Options for Concrete Slabs
Reinforcement options for concrete slabs play a crucial role in enhancing the structural integrity of the finished product. Commonly used materials include rebar and wire mesh, both of which provide support against bending and cracking. Rebar consists of steel bars placed in strategic orientations throughout the slab, offering high tensile strength. Wire mesh, on the other hand, is a grid of thin steel wires that is typically laid flat in the wet concrete. Both options are vital for ensuring that the slab can withstand various loads and environmental stresses during its life.
During concrete slab installation, the choice between rebar and wire mesh often depends on the specific requirements of the project. Rebar allows for greater flexibility in terms of spacing and orientation, making it a preferred option for areas subjected to heavy loads. Wire mesh can be more cost-effective and easier to handle for smaller slabs or residential projects. Considering the conditions and purpose of the slab helps to determine the best reinforcement method to use, ensuring durability and performance for years to come.
Comparing Rebar and Wire Mesh
When considering reinforcement options for concrete slab installation, rebar and wire mesh often come to the forefront. Rebar, which consists of steel bars, offers significant tensile strength and can withstand heavy loads. When properly placed within the slab, rebar helps prevent cracking by distributing stress throughout the concrete. Wire mesh, typically made of welded steel wires, provides a different layer of support. It is easier to handle and place, but may not offer the same load-bearing capabilities as rebar.
The choice between rebar and wire mesh depends on several factors, including the intended use of the slab and local building regulations. Rebar is generally preferred for heavier applications, such as driveways or industrial floors, due to its greater structural integrity. Conversely, wire mesh can be suitable for lighter slabs like sidewalks and patios where moderate reinforcement is sufficient. Understanding the distinctions between these options ensures that your concrete slab installation meets both your structural requirements and local codes.
Ensuring Proper Drainage
Proper drainage is essential during concrete slab installation to prevent water accumulation, which can lead to structural problems. Before pouring the concrete, it is crucial to evaluate the site’s grading to ensure it slopes away from the foundation. This helps direct rainwater and surface runoff away from the slab, reducing the risk of water infiltration and weakening the concrete over time. A well-drained area not only preserves the integrity of the slab but also safeguards against potential damage caused by freeze-thaw cycles.
In addition to grading, installing drain pipes or gravel beds can enhance water management beneath the slab. These features facilitate quick drainage and prevent water buildup, which is especially vital in areas prone to heavy rainfall. Incorporating these elements during the concrete slab installation process creates a solid foundation that supports long-term durability. By addressing drainage concerns upfront, future issues related to water damage and erosion can be significantly minimized.
Techniques for Effective Water Management
Effective water management is crucial during concrete slab installation to ensure the durability and stability of the slab. Proper grading around the site helps direct water away from the slab, preventing issues such as erosion or settling. Installing drainage trenches or systems can also aid in managing water runoff, which is especially important in areas prone to heavy rainfall. Regularly checking the surrounding landscape for any blockages will support optimal water flow and reduce the risk of water pooling near the slab.
Another method to bolster water management is to use a moisture barrier beneath the slab. This barrier can prevent ground moisture from seeping into the concrete, which may lead to cracking and weaken the overall structure. Additionally, incorporating slopes or slopes can further enhance drainage. By paying attention to these techniques during the concrete slab installation process, one can significantly improve the longevity and integrity of the slab.
Setting Up Forms for Concrete
Setting the forms for concrete is a crucial step in the concrete slab installation process. These forms, typically made of wood or metal, serve as a mold to hold the concrete in place until it cures. It is important to ensure that the forms are level and firmly secured to the ground to prevent shifting during the pouring process. Attention should be paid to the dimensions of the forms, as they dictate the final shape and thickness of the slab.
In addition to leveling, the installation of stakes or braces can help maintain the stability of the forms against the weight of the concrete. The edges should be checked and adjusted so that they align properly, creating a straight and smooth finish. Proper form setup will contribute significantly to the quality of the finished concrete slab, making it essential for achieving a durable and aesthetically pleasing result. Careful planning and execution at this stage can help avoid complications later in the project.
Steps to Build Sturdy Forms
Creating sturdy forms is essential for the success of concrete slab installation. Begin by selecting high-quality materials such as plywood or dimensional lumber, as these will provide the necessary strength to hold the concrete in place. Ensure that the forms are cut to the correct size and are straight. Use a level to check that the forms are even, which will help prevent issues during the pouring process. Secure the forms tightly to the ground with stakes driven into the earth at regular intervals to avoid shifting during the concrete pour.
After establishing the outer perimeter, focus on reinforcing the forms to ensure they stay intact when filled with concrete. Consider using screws instead of nails for added stability, as they can provide a firmer hold. Fill gaps with dirt or gravel to help create a solid base along the edges. Regularly check for level and alignment as you work, making adjustments as necessary to maintain a straight and true form. This attention to detail is crucial for a successful concrete slab installation, impacting both the strength and appearance of the finished product.
FAQS
What materials should be placed under a concrete slab?
Before pouring a concrete slab, it’s essential to use a layer of gravel or crushed stone for drainage and stability, as well as a vapor barrier to prevent moisture from seeping through.
Is it necessary to use rebar or wire mesh in a concrete slab?
Yes, both rebar and wire mesh can provide reinforcement to a concrete slab. They help to prevent cracking and improve the overall strength of the slab.
How thick should the gravel layer be under a concrete slab?
A gravel layer of about 4 to 6 inches is typically recommended to ensure proper drainage and support for the concrete slab.
What is the purpose of a vapor barrier?
A vapor barrier is used to prevent moisture from the ground from rising into the concrete slab, which can lead to issues such as mold growth and damage to the concrete over time.
How can I ensure proper drainage around my concrete slab?
To ensure proper drainage, you can create a slope away from the slab, install drainage pipes or channels, and use landscaping techniques to direct water flow away from the concrete.
Related Links
Site Preparation Requirements
Concrete slab installation requires thorough site preparation to ensure a stable foundation. This process often begins with clearing the area of any vegetation, debris, or existing structures. Proper grading of the site is essential to promote adequate drainage and prevent future issues, such as cracking or settling. A level surface also helps the concrete slab cure evenly, reducing the risk of irregularities. In some cases, excavation may be necessary if the ground is not at the desired depth or if there are issues like rocks and roots that need removal.
Soil testing can be a critical component of site preparation. Different soil types react differently when wet or dry, impacting how they support the concrete slab. If the soil is too loose or unstable, additional reinforcement may be required. This could involve the use of gravel or a compacted fill material to enhance stability. Assessing the site’s condition upfront can save time and costs during the concrete slab installation, as addressing these factors early on can prevent complications later in the process.
Excavation and Grading Considerations
Excavation and grading are crucial steps in the concrete slab installation process. Proper excavation ensures that the site is ready for the installation of the slab, requiring the removal of topsoil and any debris. The depth of excavation will depend on the specific slab thickness and any underlying conditions. It’s important to evaluate the soil type and its load-bearing capacity, as this can impact the overall stability of the slab. Grading helps achieve a level surface, preventing water pooling and ensuring adequate drainage, which is essential for the longevity of the concrete.
Cost considerations for excavation and grading can vary significantly based on the site’s size, soil condition, and accessibility. In some cases, additional earth-moving equipment may be necessary, leading to higher costs. If extensive grading is required or if the site is particularly challenging to work on, expenses can increase accordingly. Property owners should consult with contractors to assess site conditions thoroughly and receive accurate estimates for excavation and grading as part of the concrete slab installation.
Permits and Regulations
Navigating the permits and regulations is a crucial step in the concrete slab installation process. Many local governments require specific permits before any ground-breaking work begins. These permits often ensure that the installation complies with zoning laws, building codes, and safety regulations. Failing to secure the necessary permits can lead to penalties and costly delays in your project.
Different municipalities have their own set of requirements regarding concrete slab installation. Some areas may mandate inspections during various stages of the project to ensure compliance with safety and construction standards. It’s essential to check with local authorities to obtain the specific regulations that apply to your location. This may involve reviewing documentation or even attending meetings to clarify any uncertainties about the permit process.
Local Government Requirements
Local governments often have specific regulations concerning concrete slab installation. Typically, these regulations include requirements for permits, which ensure that the work complies with local building codes and safety standards. Homeowners or contractors must often submit plans detailing the intended use of the slab, drainage systems, and any potential environmental impact. The approval process may involve inspections during various phases of construction to verify compliance with established guidelines.
In addition to permits, some areas may enforce zoning laws that dictate where a concrete slab installation can occur on a property. These laws may restrict placement based on property lines, easements, or existing structures. It is essential for property owners to check with their local building department to understand all relevant rules. This diligence helps prevent costly delays and ensures that the installation meets all legal requirements from the outset.
Weather Impacts on Costs
Weather conditions play a significant role in the overall costs associated with concrete slab installation. Extreme temperatures can affect both the pouring and curing processes. Hot weather can cause the concrete to set too quickly, necessitating additional measures to ensure the proper strength and finish. Conversely, cold weather can result in longer curing times, which may lead to delays and potentially increased labor costs.
Additionally, rainy or wet conditions can further complicate the installation. Excess moisture can weaken the concrete’s integrity and lead to issues like cracking or uneven surfaces. Contractors may need to implement protective measures or even postpone the installation to ensure quality, ultimately impacting project timelines and associated costs. Understanding these weather-related factors is essential for accurate budgeting and planning.
Seasonal Considerations for Installation
Seasonal considerations play a vital role in determining the timing and cost of concrete slab installation. Summer months often provide an ideal environment for this process, with warmer temperatures aiding in the curing of concrete. However, extreme heat can pose challenges, as it may lead to rapid evaporation of moisture, affecting the integrity of the slab. Contractors may need to implement additional measures such as misting the surface or using curing compounds to mitigate these effects.
Winter presents a unique set of challenges for concrete slab installation. Cold temperatures can hinder the curing process, resulting in slower setting times and potentially compromised strength. In areas where freezing temperatures are common, contractors might use heated enclosures or special additives to ensure proper hydration and curing. Understanding these seasonal dynamics is essential for homeowners and builders aiming for a successful concrete project.
FAQS
What is the average cost to install a concrete slab?
The average cost to install a concrete slab typically ranges from $3 to $10 per square foot, depending on various factors such as thickness, materials used, and labor costs.
What factors influence the cost of concrete slab installation?
Factors that influence the cost include site preparation requirements, excavation and grading considerations, local permits and regulations, and weather impacts during the installation process.
Do I need a permit to install a concrete slab?
Yes, in many cases, you will need a permit to install a concrete slab. It is essential to check with your local government requirements to ensure compliance with zoning and building codes.
How does weather affect the cost of installing a concrete slab?
Weather can impact the installation of a concrete slab by affecting the curing process. Extreme temperatures or rain may delay the project, potentially increasing labor and material costs.
Are there any additional costs associated with site preparation for a concrete slab?
Yes, additional costs for site preparation may include excavation, grading, and clearing the area, which can vary based on the site’s existing conditions and any required drainage solutions.
Related Links
Soil Compaction Techniques
Soil compaction is essential for ensuring the stability of a concrete slab installation. Properly compacted soil creates a strong foundation that minimizes the risk of settling, cracking, or shifting after the slab is poured. Techniques such as using a mechanical compactor or a hand tamper can effectively increase soil density. The goal is to eliminate air pockets and create a solid base that will support the weight of the concrete and any structures built on top of it.
Different soil types require specific compaction techniques to achieve optimal results. For sandy soils, a higher level of compaction is often necessary due to their loose nature. In contrast, clay soils may require moisture adjustment before compaction to avoid issues with shrinking or swelling. Assessing the type of soil can inform the best compaction method for a successful concrete slab installation.
How to Properly Compact Dirt Before Pouring
Proper compaction of dirt is essential for a successful concrete slab installation. Begin by removing any debris or vegetation from the area to ensure a clean and stable surface. Once cleared, use a hand tamper or a mechanical compactor to compress the soil uniformly. Focus on smaller sections at a time to achieve a more consistent compaction. Aim for a depth of around six inches, compacting each layer before adding more soil. This layering approach aids in avoiding settling issues after the concrete is poured.
After compacting, assess the moisture content of the soil. Ideally, the dirt should be slightly damp but not saturated. If the soil is too dry, adding water can help with compaction, but excessive moisture can lead to instability when the concrete is placed. Regularly check the surface for any soft spots, as these weak areas can compromise the integrity of your concrete slab installation. Ensuring all sections are well-compacted and at an appropriate moisture level will provide a solid foundation for longevity and performance.
Moisture Considerations
Moisture levels beneath a concrete slab play a critical role in the overall integrity and durability of the installation. Excess moisture can lead to issues like cracking, warping, and even mold growth over time. Prior to beginning any concrete slab installation, it is essential to assess the moisture content of the ground. If the soil is overly saturated, it may be necessary to implement drainage solutions or allow the soil to dry out before proceeding.
On the other hand, insufficient moisture can also be problematic. Extremely dry soil may lead to uneven settling after the concrete has cured. To achieve the best results, it is advisable to maintain balanced moisture levels. This could involve wetting the soil lightly prior to the slab pour to encourage proper bonding and reduce potential shrinkage during the curing process. Taking these moisture considerations into account ensures that the concrete slab installation will be stable and reliable for years to come.
Managing Water Levels Beneath Concrete
Managing water levels beneath concrete is essential to ensure the longevity and stability of the structure. Excess moisture can lead to soil displacement, resulting in cracks and shifts within the concrete over time. It is vital to assess the drainage capabilities of the area before proceeding with the concrete slab installation. Implementing proper drainage systems can help redirect water away from the concrete and prevent pooling beneath the surface.
Additionally, understanding the moisture content of the soil before pouring concrete is crucial. Saturated ground can create challenges that affect the curing process and overall integrity of the slab. To mitigate these risks, consider using moisture barriers or geotextiles that can help in managing water intrusion. These measures are particularly important in areas prone to heavy rainfall or flooding, where the risk of water accumulation beneath the slab significantly increases.
Alternative Substrates for Concrete
When considering alternatives to dirt for base materials in concrete slab installation, various substrates offer enhanced stability and support. Gravel is a popular choice due to its drainage capabilities and ability to compact effectively. A well-prepared gravel base reduces the risk of settling and cracking over time. Additionally, crushed stone can serve similarly by providing a solid foundation that resists shifting and erosion.
Another option is to utilize a prepared aggregate base, which involves a mix of sand, gravel, and crushed stone. This combination enhances load distribution and increases the durability of the concrete slab installation. Using a geo-textile fabric can further improve stability by preventing soil movement while allowing water to drain properly. Each alternative substrate contributes to a longer-lasting and more reliable concrete structure.
Exploring Other Materials for Better Stability
When considering alternatives to traditional dirt as a substrate for concrete, various materials can enhance stability and longevity. Gravel is a popular option due to its excellent drainage capabilities. It helps prevent water pooling beneath the concrete slab, reducing the risk of cracking and settling over time. This medium also provides a solid foundation that can better support the weight of the concrete.
Another alternative is a compacted crushed stone base, which offers superior strength and stability compared to loose dirt. The interlocking nature of the stones allows for better load distribution. Additionally, this material promotes airflow, which aids in moisture management underneath the concrete slab. Proper preparation with these materials can significantly improve the outcome of a Concrete Slab Installation.
FAQS
Can I pour concrete directly on dirt?
While it is technically possible to pour concrete directly on dirt, it is not recommended due to the risk of uneven settling and cracking. Proper soil preparation and compaction are essential for a stable concrete foundation.
What are soil compaction techniques?
Soil compaction techniques involve methods to increase the density of the soil beneath your concrete. This includes using tools such as a plate compactor or roller, and may involve techniques like tamping or vibrating to ensure the soil is solid and stable.
How can I properly compact dirt before pouring concrete?
To properly compact dirt, first clear the area of debris, then moisten the soil slightly to enhance compaction. Use a plate compactor or hand tamper to compact the soil in layers, ensuring that each layer is well compacted before adding more.
What moisture considerations should I keep in mind when pouring concrete?
Managing moisture levels is crucial; too much water can weaken the concrete, while too little can lead to cracking. It’s important to ensure the soil is damp but not saturated, and to monitor weather conditions before and after pouring.
Are there alternative substrates for concrete that offer better stability?
Yes, alternative substrates such as gravel or crushed stone can provide better stability than dirt. These materials allow for better drainage and can help prevent settlement issues, making them a more reliable base for concrete.
Related Links

Repair and Replacement Costs
Repair and replacement costs are significant factors in deciding between concrete and slabs. Concrete has a reputation for durability, often requiring fewer repairs over time. However, when damage does occur, the costs can be high, particularly if extensive work is needed to replace a large section. In contrast, paver slabs can be easier and more cost-effective to replace on an individual basis, allowing homeowners to address issues without needing a complete overhaul.
Concrete slab installation can also entail additional expenses associated with curing and settling over time. While the initial investment might be higher for concrete, the longevity often offsets future repair needs. On the other hand, although slabs may be more affordable upfront, they can require routine maintenance, such as sealing or joint repairs, leading to fluctuating costs throughout their lifespan.
Long-term Financial Implications
The long-term financial implications of choosing between concrete and slabs are essential to consider. Concrete slab installation may incur higher upfront costs, but this can be offset by its durability and longevity. Over time, well-installed concrete can require less maintenance compared to individual slabs, which may shift or crack, leading to additional repair expenses. Homeowners must weigh these potential savings against the initial investment to determine the most cost-effective solution for their specific needs.
In evaluating the long-term value, it’s also crucial to consider the potential resale advantages of concrete installations. Properties featuring concrete slabs often appear more polished, appealing to buyers looking for low-maintenance options. This aesthetic appeal can translate into a stronger market position should the property be sold in the future. Therefore, the choice of concrete slab installation can influence not only immediate costs but also long-term financial returns.
Environmental Impact
The environmental impact of concrete slab installation is significant due to the materials used and the processes involved. Concrete production generates a considerable amount of carbon emissions, primarily from the cement component. This process requires large amounts of energy, often sourced from fossil fuels. Additionally, extracting raw materials can lead to habitat destruction and increased soil erosion, further contributing to environmental degradation.
Sustainability considerations have become a vital part of assessing the overall impact of concrete slab installation. While concrete is durable and long-lasting, its production poses challenges in terms of ecological footprint. Alternatives like permeable pavers or recycled materials can mitigate some negative effects. Such options may provide better drainage possibilities and reduce runoff, thereby enhancing local ecosystems. Embracing these alternatives can lead to a more sustainable approach to installation and construction.
Sustainability Considerations
Concrete Slab Installation can have notable sustainability implications. The production of concrete involves significant energy consumption and carbon emissions, primarily due to the cement manufacturing process. However, advancements in technology are leading to the development of eco-friendly concrete mixes that utilize recycled materials or alternative binders. These innovations not only reduce the carbon footprint of concrete but also enhance overall durability, making it a more sustainable option over time.
In contrast, using concrete slabs may require fewer natural resources if they are manufactured with high levels of recycled content. Additionally, the longevity of slabs minimizes the frequency of replacements, further conserving materials and reducing waste. When considering sustainability, it’s essential to evaluate the entire lifecycle of both options, from production through to installation and eventual removal. Making informed choices can lead to a reduced environmental impact while still meeting practical needs in construction and landscaping.
Local Market Variations
Local market variations can significantly influence the cost of concrete slab installation. Factors such as local demand for construction materials, availability of skilled labor, and regional competition play vital roles in pricing. Urban areas often experience higher costs due to increased labor expenses and a greater volume of construction projects. Conversely, rural locations may offer lower prices because of reduced demand and less competition for services.
Additionally, the type of soil and infrastructure in different regions can impact the overall cost of installation. Areas with challenging soil types may require more extensive preparation work, which can increase the overall expenditure. Local regulations and permit requirements also differ, adding another layer of complexity to the pricing landscape for concrete slab installation. Understanding these regional differences is essential for homeowners and contractors alike when budgeting for a project.
Regional Pricing Differences
Regional variations play a significant role in determining the cost of concrete and slab installations. In urban areas, where demand for construction services is typically higher, prices may be elevated due to increased labor costs and logistical complexities. Conversely, in rural regions, the overall expenses may be lower, reflecting fewer industry demands and reduced living costs.
Local suppliers and contractors also influence pricing, impacting the overall affordability of concrete slab installation. Certain states or cities may have specific regulations and building codes that can affect availability and materials required. This can lead to fluctuations in pricing between different locales, making it essential for homeowners to compare costs in their specific regions before committing to a project.
FAQS
What is generally cheaper to install, concrete or slabs?
The cost can vary depending on several factors, including materials, labor, and local market conditions. However, in many cases, laying concrete can be cheaper than installing pre-cast slabs due to the lower material costs and simpler installation process.
Are there long-term financial benefits to choosing slabs over concrete?
While slabs may have higher initial costs, they can offer long-term benefits such as reduced maintenance and improved durability. This can lead to lower repair and replacement costs over time, making slabs a more economical choice in certain situations.
How does the environmental impact differ between concrete and slabs?
Concrete production is generally associated with higher carbon emissions, whereas some slab materials can be more sustainable. It’s essential to consider the environmental impact of your choice, including factors like material sourcing and potential for recycling.
Do local market prices significantly affect the cost of concrete and slabs?
Yes, local market variations can greatly influence the pricing of both concrete and slabs. Prices can differ based on regional demand, availability of materials, and local labor costs, so it’s advisable to get quotes from local suppliers.
What factors should I consider when deciding between concrete and slabs?
When choosing between concrete and slabs, consider factors such as initial cost, long-term maintenance, environmental impact, and local market conditions. Evaluating your specific needs and circumstances will help you make the best decision for your project.
Related Links
Permits and Regulations
Before starting any concrete slab installation, it’s essential to understand any permits and regulations that apply in your area. Local building codes can vary significantly, so it’s advisable to check with your city or county office. Some regions may require specific permits to ensure that the construction meets safety and zoning standards. Failing to secure the necessary permits can lead to fines or even the need to demolish the slab.
Additionally, regulations may dictate the thickness of the slab, the types of materials used, or how the site should be prepared. Environmental considerations may also influence what is allowed, especially if your project is near protected areas. Thorough research and communication with local authorities will help ensure a smooth concrete slab installation process, minimizing potential setbacks down the line.
Understanding Local Building Codes
Understanding local building codes is essential before starting any construction project, including concrete slab installation. These regulations vary significantly from one locality to another, and they outline the required standards for various construction practices. Compliance with these codes ensures that the structure adheres to safety, environmental, and aesthetic considerations. Failure to obtain the proper permits or to follow local codes can result in costly fines or the need for additional modifications later.
It is advisable to consult with local building authorities or a qualified contractor who is familiar with the specific codes in your area. They can provide valuable insights into necessary permits and the specific structural requirements needed for concrete slab installation. This proactive approach helps streamline the construction process while avoiding potential legal and financial pitfalls that can arise from non-compliance.
Cost Over Time
Cost considerations go beyond the initial expense of Concrete Slab Installation. Over time, property owners must account for maintenance and potential repairs. Concrete slabs can crack or settle due to environmental factors, requiring additional investments in repair work. Regular sealing can extend the life of the slab, which introduces another layer of expense that needs to be factored into the overall cost assessment.
Long-term durability also plays a significant role in determining overall value. While the initial cost of Concrete Slab Installation might seem high, the lifespan of a well-maintained slab often outstrips that of alternative materials. This longevity can offset some initial costs by reducing the frequency of replacement or significant repairs. Homeowners must weigh these aspects carefully to understand the full financial impact over time.
Longevity and Maintenance Expenses
A well-installed concrete slab typically boasts a lifespan of 30 years or more, making it a durable choice for various applications. Concrete’s inherent strength allows it to withstand heavy loads and resist wear from weather conditions, contributing to its longevity. However, environmental factors such as freeze-thaw cycles can lead to surface cracks over time if not addressed properly. Regular inspections are essential for identifying early signs of wear that may need attention.
Maintenance costs for a concrete slab can be minimal compared to other materials, primarily involving occasional sealing and repairs of any cracks that may develop. The initial investment in concrete slab installation may be higher than that of alternative materials, but its longevity often results in lower overall maintenance expenses. Homeowners should budget for routine upkeep to maximize the lifespan of their concrete slab, ensuring it remains functional and aesthetically pleasing throughout the years.
Alternatives to Concrete Slabs
When considering alternatives to concrete slabs, various materials can provide functional and aesthetic benefits. Options such as asphalt, gravel, and pavers offer different levels of durability and maintenance requirements. Asphalt, for instance, provides a smooth surface suitable for driveways but may necessitate frequent resurfacing. Gravel presents a more permeable option that is often favored for cost-effectiveness and ease of installation. Pavers, while stylish, typically involve a more complex installation process compared to concrete slab installation.
In addition to traditional materials, emerging alternatives like permeable concrete and recycled composites are gaining popularity. These options cater to environmental concerns while still delivering the strength needed for heavy loads. Permeable concrete allows for better water drainage, reducing runoff issues. On the other hand, recycled composites can offer a more eco-friendly choice without compromising design flexibility. Each alternative has its pros and cons, so careful consideration is crucial when selecting the right material for a specific project.
Comparing Material Options
When considering alternatives to a concrete slab, various materials offer distinct advantages. Asphalt is a popular option due to its cost-effectiveness and quick installation process. It is often used for driveways and garages but may not provide the same level of durability as concrete. Pavers, another common choice, offer versatility and aesthetic appeal. They can mimic the look of stone or brick, making them suitable for patios and walkways.
Fiberglass reinforced concrete is gaining traction as a lightweight alternative. This material is less prone to cracking, making it ideal for areas with significant temperature changes. When opting for any alternative, it’s essential to weigh long-term costs against initial investment. Concrete slab installation tends to have a higher upfront cost, but it often results in lower maintenance expenses over time compared to some of its competitors.
FAQS
What is the average cost of a 40×60 concrete slab?
The average cost of a 40×60 concrete slab typically ranges from $6,000 to $10,000, depending on factors such as location, materials, and labor.
Are there any permits required for pouring a concrete slab?
Yes, most local jurisdictions require permits for pouring a concrete slab. It’s essential to check with your local building department to understand the specific requirements.
How long does a concrete slab last?
A well-installed concrete slab can last anywhere from 20 to 30 years with proper maintenance, making it a durable option for various applications.
What are some alternatives to concrete slabs?
Alternatives to concrete slabs include asphalt, pavers, and gravel. Each option has its own benefits and costs, so it’s important to compare them based on your project needs.
Do I need to consider maintenance costs for a concrete slab?
Yes, while concrete slabs are low maintenance, occasional sealing and crack repairs may be necessary, which can incur additional costs over time.
Related Links
Permits and Regulations Impacting Costs
When planning a 20×20 porch construction, obtaining the necessary permits is a crucial step that can affect overall costs. Local building codes often dictate specific regulations regarding design, materials, and safety standards. Compliance with these regulations ensures that the construction is not only legal but also safe for use. Many jurisdictions require permits for new structures, which can add to the project’s expense.
Factors such as the type of foundation you choose, particularly for Concrete Slab Installation, can influence both permit fees and inspections needed throughout the construction process. A concrete slab is a popular choice for porch foundations due to its durability and ease of maintenance. However, the permitting process for concrete work can be more stringent because it requires adherence to local environmental and structural regulations. Understanding these requirements upfront can help homeowners budget more accurately for their porch projects.
Understanding Local Building Codes
Local building codes vary widely depending on the jurisdiction and can significantly affect the construction of a 20×20 porch. These codes dictate various aspects of the build, including structural requirements, materials used, and safety standards. Before beginning any project, it’s essential to check with your local building department to ensure compliance. This may involve specific permits or inspections, which can add to the overall cost.
One common requirement in many areas involves proper foundation work. For a porch of this size, concrete slab installation is often necessary to provide a stable base. Adhering to the local code regarding foundation depth, reinforcement, and moisture barriers can help avoid future structural issues. Ensuring your porch design aligns with these regulations will not only meet legal standards but also enhance the durability and safety of the space.
Typical Cost Range for a 20×20 Porch
The cost of constructing a 20×20 porch typically falls within a range of $10,000 to $25,000. Variables such as materials, design complexity, and labor costs play significant roles in determining the final price. For instance, choosing high-end materials like composite decking or custom railings can push costs toward the higher end of the spectrum. Additionally, labor rates can fluctuate based on location and contractor experience.
One essential aspect of many porch constructions is the Concrete Slab Installation. This foundational element is crucial for structural integrity and can add an average of $3,000 to $5,000 to the overall project. The choice to incorporate additional features, such as built-in seating or lighting, may further influence the price. Homeowners should carefully consider their budget alongside desired features to ensure a satisfactory outcome.
Breakdown of Average Expenses
When budgeting for a 20×20 porch, it is essential to consider various expenses that contribute to the overall cost. A significant portion of the budget typically goes toward materials, which can vary depending on the chosen design and features. For example, high-quality decking, railings, and roofing can increase expenses, while simpler designs may help keep costs down. Labor is another crucial factor, as skilled contractors often command higher wages for installation work.
Concrete Slab Installation is typically one of the early expenses in the construction process. The cost for this foundational element can fluctuate based on the thickness, type, and region. Additionally, permits and inspections may introduce added fees that must be included in your overall calculations. Once these initial costs are accounted for, homeowners can better assess their total investment in a new porch.
Financing Options for Porch Construction
When considering the financing options for a 20×20 porch, homeowners have several paths available to them. One popular choice is a personal loan, which can provide quick access to funds without requiring collateral. Many banks and credit unions offer competitive interest rates, making this an attractive option for those looking to finance renovations. Another avenue is the use of home equity lines of credit (HELOCs), which allow homeowners to borrow against the equity built in their homes. This option typically offers lower interest rates compared to personal loans and can be especially beneficial for larger projects, such as concrete slab installation.
Home improvement loans can also serve as a viable alternative for financing a porch project. These loans are specifically tailored for renovations, often providing flexible terms and lower interest rates. It’s important for homeowners to evaluate their financial situation and determine what fits best within their budget. Additionally, talking to a financial advisor or contractor can help in understanding the associated costs of constructing a porch, including any expenses related to concrete slab installation, ensuring that homeowners are well-prepared to make informed financing decisions.
Exploring Loans and Home Equity Lines
When considering financing options for constructing a 20×20 porch, many homeowners explore loans and home equity lines of credit. These financial products can provide the necessary funds for various expenses, including materials, labor, and Concrete Slab Installation, making the project more manageable. Home equity lines of credit allow you to borrow against the equity in your home, offering flexibility in borrowing amounts and repayment terms. This can be especially useful if your project requires additional unexpected costs.
Personal loans are another option for financing a porch renovation. These loans tend to offer fixed repayment schedules and interest rates, making it easier to budget for your project. Homeowners can apply for these loans through banks, credit unions, or online lenders. As with any financial decision, it is crucial to weigh the terms and interest rates before committing to ensure that the financing supports your overall budget for the porch construction without putting you in financial strain.
FAQS
What factors influence the cost of building a 20×20 porch?
Several factors influence the cost, including local building codes, materials used, labor rates, and any permits required by your municipality.
How much can I expect to pay for a 20×20 porch?
The typical cost range for a 20×20 porch varies widely, but you can expect to spend anywhere from $10,000 to $30,000, depending on the materials and complexity of the design.
Are there additional costs I should be aware of when building a porch?
Yes, additional costs may include permits, inspections, landscaping, and any necessary site preparation, which can add to the overall expense.
Can I finance the construction of my porch?
Yes, there are several financing options available, including personal loans and home equity lines of credit, which can help manage the costs of construction.
Do I need a permit to build a 20×20 porch?
In most cases, a permit is required to build a porch, as it must comply with local building codes and regulations. It’s advisable to check with your local building department for specific requirements.