Category: Uncategorized
Curing Process
The curing process plays a crucial role in ensuring the longevity and durability of a Quikrete overlay on existing concrete. After application, the material needs time to gain strength while adequately hydrated. If the surface dries too quickly, it can lead to cracks and other issues that compromise the overall integrity. Following the manufacturer’s instructions regarding curing time and methods is essential for achieving optimal results.
Proper curing requires maintaining moisture on the surface to help facilitate the chemical reactions that strengthen the Concrete Repair. This is often achieved by keeping the area damp through light misting or covering it with a wet burlap or plastic sheeting. It’s important to avoid any disturbances during the curing period to ensure that the Quikrete adheres properly and develops the desired robustness.
Importance of Proper Curing for Longevity
The curing process is essential for ensuring the longevity of any concrete project, including instances where Quikrete is applied over existing concrete surfaces. Proper curing allows the hydration process to occur, which strengthens the bond between the materials. Without adequate curing, the Quikrete may not reach its full potential, leading to premature cracking or surface deterioration. This is particularly important in concrete repair, where the integrity of the existing surface directly impacts the success of the new layer.
Taking the time to cure the newly applied Quikrete properly can yield significant benefits. It helps maintain the moisture levels necessary for optimal hardening and minimizes the risk of thermal stress during temperature fluctuations. By prioritizing curing, you can extend the life of your concrete repair project, ensuring it remains durable and visually appealing for years to come. Proper attention to curing can save time and money in future repairs or replacements.
Maintenance Tips
Regular maintenance of your Quikrete surface will ensure longevity and prevent unnecessary repairs. Begin by cleaning the area with a broom or pressure washer to remove dirt and debris. Avoid using harsh chemicals that could damage the surface. Depending on use, a sealant may be necessary to protect against moisture and stains. Inspect for any cracks or damage periodically and address these issues promptly to avoid further deterioration.
In addition to cleaning, avoid heavy loads on your Quikrete surface for the first few weeks after application. This preventive measure reduces the risk of cracks forming in your new surface. If you notice any wear over time, consider a light resurfacing to keep the area looking fresh. Remember that proper maintenance contributes significantly to the success of any Concrete Repair efforts you undertake in the future.
Keeping Your Quikrete Surface in Top Condition
To maintain your Quikrete surface, regular cleaning is essential. Use a broom or a leaf blower to remove debris. For tougher stains, a mild detergent with water can help. Avoid using abrasive cleaners that may scratch the surface. After cleaning, rinse with plenty of water to prevent residue from setting in. This routine upkeep not only enhances the appearance of the surface but also wards off potential damage that could necessitate concrete repair.
Monitoring the surface for cracks or wear should be part of your maintenance routine. Early detection of problems allows for timely repairs, which can extend the lifespan of your Quikrete application. If you notice any significant wear or cracking, consider using a concrete repair product to address the issue promptly. This proactive approach can save you time and money in the long run, ensuring that your surface remains both functional and visually appealing.
Common Mistakes to Avoid
Many homeowners underestimate the importance of preparing the existing surface before applying Quikrete. A common mistake involves skipping the cleaning process, which can lead to poor adhesion. Dust, dirt, and grease can compromise the bond between the new layer and the old concrete. Not addressing cracks and spalling can further deteriorate the integrity of the repair. If these issues are left unresolved, the new surface may crack or flake over time, necessitating more extensive concrete repair.
Another frequent oversight is applying Quikrete in unsuitable weather conditions. High temperatures can cause the material to set too quickly, preventing proper curing. Conversely, applying it during heavy rain can wash away the mixture or lead to uneven surfaces. Proper timing for installation plays a crucial role in the longevity of the project. Adequate weather conditions support better results and minimize the need for future concrete repair.
Pitfalls When Applying Quikrete Over Existing Concrete
When applying Quikrete over existing concrete, one common pitfall is inadequate surface preparation. Failing to clean the old concrete properly can result in bonding issues, leading to cracks or peeling over time. It is essential to remove any dirt, oil, or loose materials to ensure a strong bond between the new and old surfaces. Not using a bonding agent may also compromise the long-term durability of the repair.
Another mistake is applying Quikrete during extreme weather conditions. High temperatures can cause rapid drying, while cold temperatures may hinder proper curing. Both scenarios can negatively impact the effectiveness of your Concrete Repair. It is crucial to check the weather forecast and choose an appropriate time to work. By considering these factors, you can improve the overall quality and lifespan of your Quikrete application.
FAQS
Can I apply Quikrete directly over existing concrete?
Yes, you can apply Quikrete over existing concrete, but it is essential to prepare the surface properly to ensure good adhesion.
What preparation is needed before putting Quikrete on old concrete?
Before applying Quikrete, clean the existing concrete surface thoroughly to remove dirt, oil, and debris. Any cracks or damage should be repaired beforehand.
How long should I wait before using the newly applied Quikrete surface?
It’s recommended to wait at least 24 to 48 hours before using the surface, but full curing may take up to 28 days depending on the thickness and environmental conditions.
What are some common mistakes to avoid when applying Quikrete over existing concrete?
Common mistakes include not cleaning the surface properly, neglecting to repair cracks, applying a thick layer of Quikrete, and failing to follow the curing process.
How can I maintain my Quikrete surface after installation?
To maintain your Quikrete surface, keep it clean, avoid heavy impacts, and periodically seal the surface to protect it from weather damage and wear.
Related Links

Applying Quikrete to Concrete
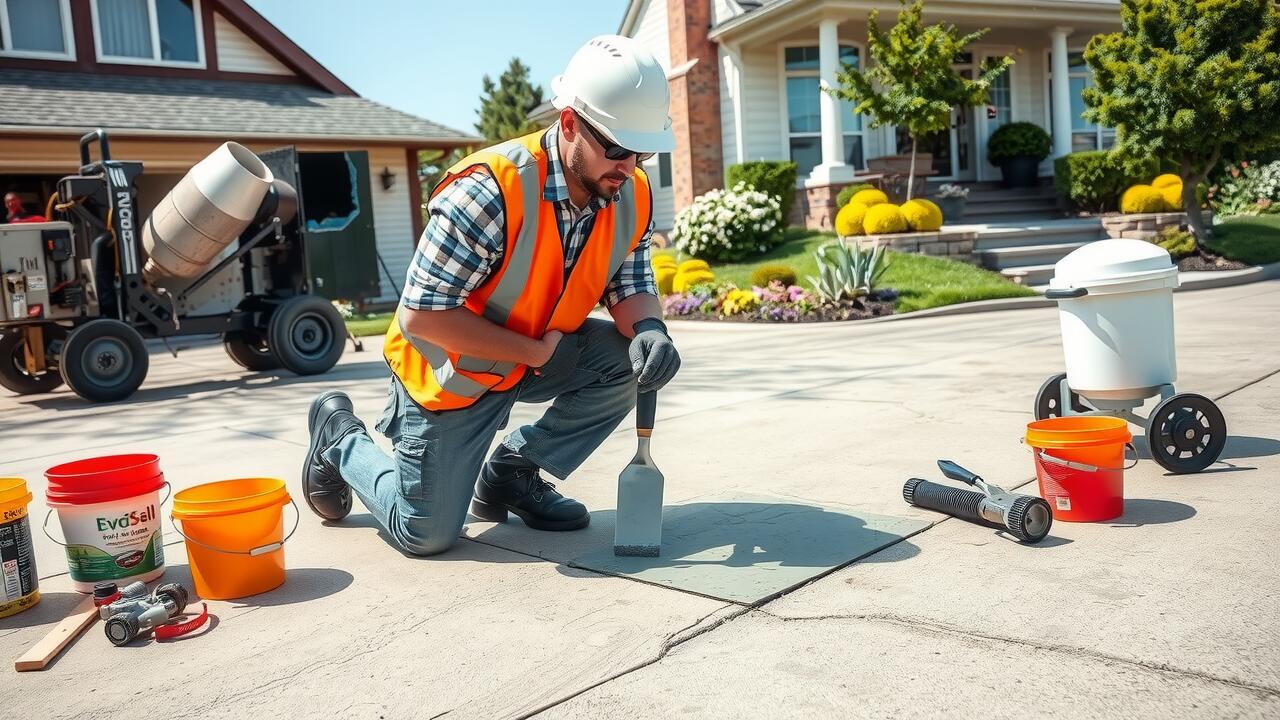
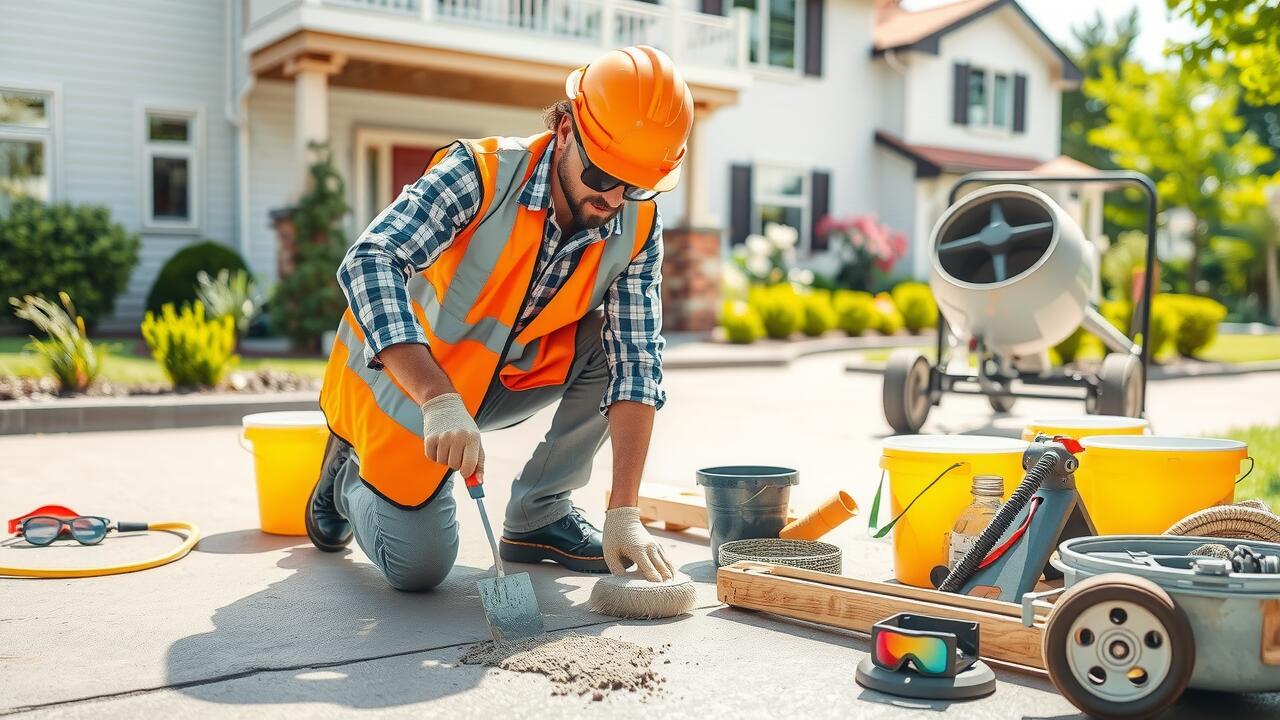
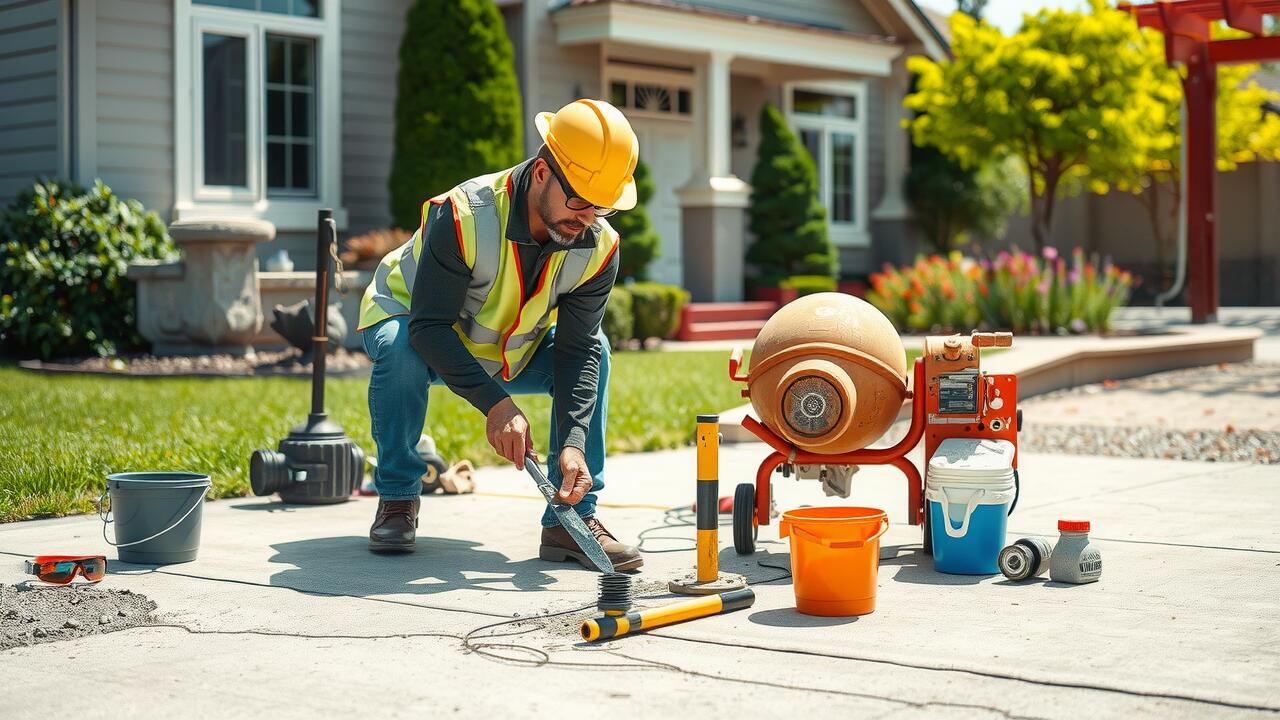
Quikrete offers a range of products specifically designed for concrete repair, making it a popular choice for homeowners and professionals alike. Before applying, it is essential to prepare the concrete surface thoroughly. Start by cleaning the area to remove any debris, dirt, or loose material. Any oil or grease should also be wiped away to ensure a solid bond between the Quikrete and the existing concrete. Once cleaned, the surface may need to be pre-dampened, especially if the concrete is very dry, which helps with adherence during the application process.
After preparation, mixing the Quikrete product according to the manufacturer’s instructions is crucial for achieving effective results in concrete repair. Pour the mixed material into the prepared area, working quickly to ensure it fills all voids and cracks adequately. Using a trowel, spread the mixture smoothly to match the surrounding concrete surface. Ensuring proper application techniques will significantly enhance the longevity and durability of the repair. Following these steps will help create a robust repair that can withstand the test of time.
Techniques for Effective Application
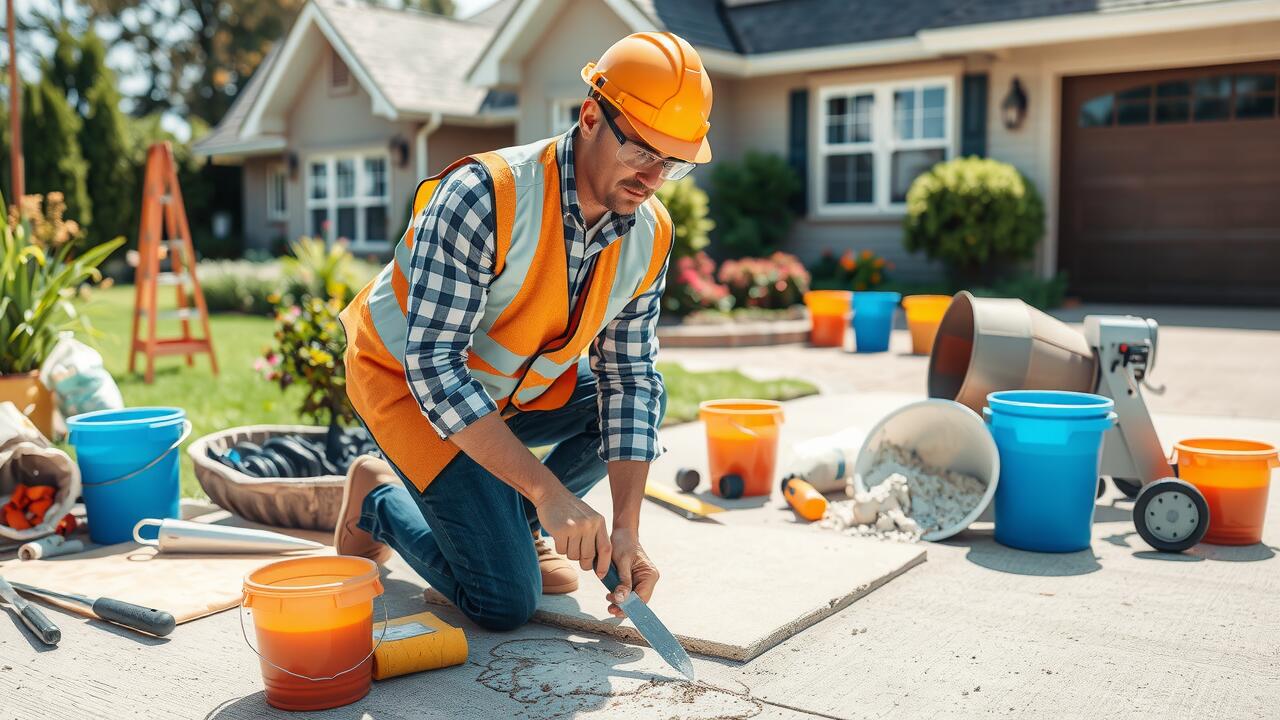
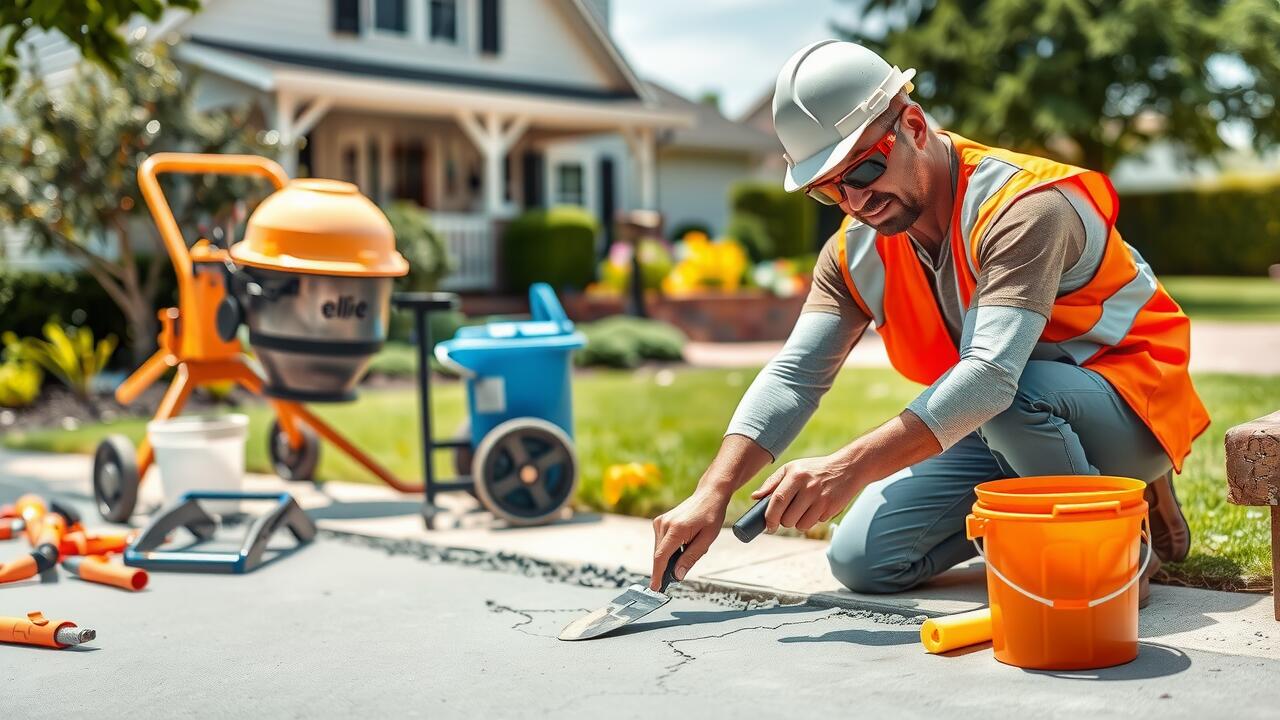
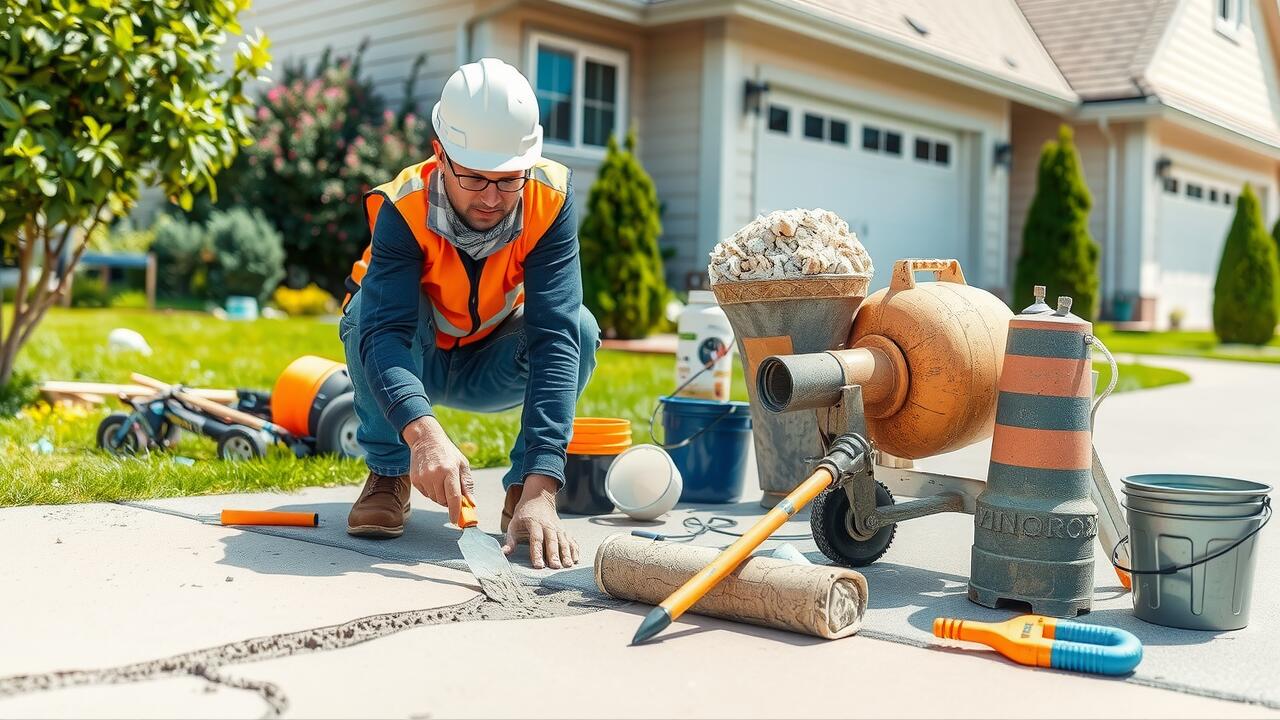
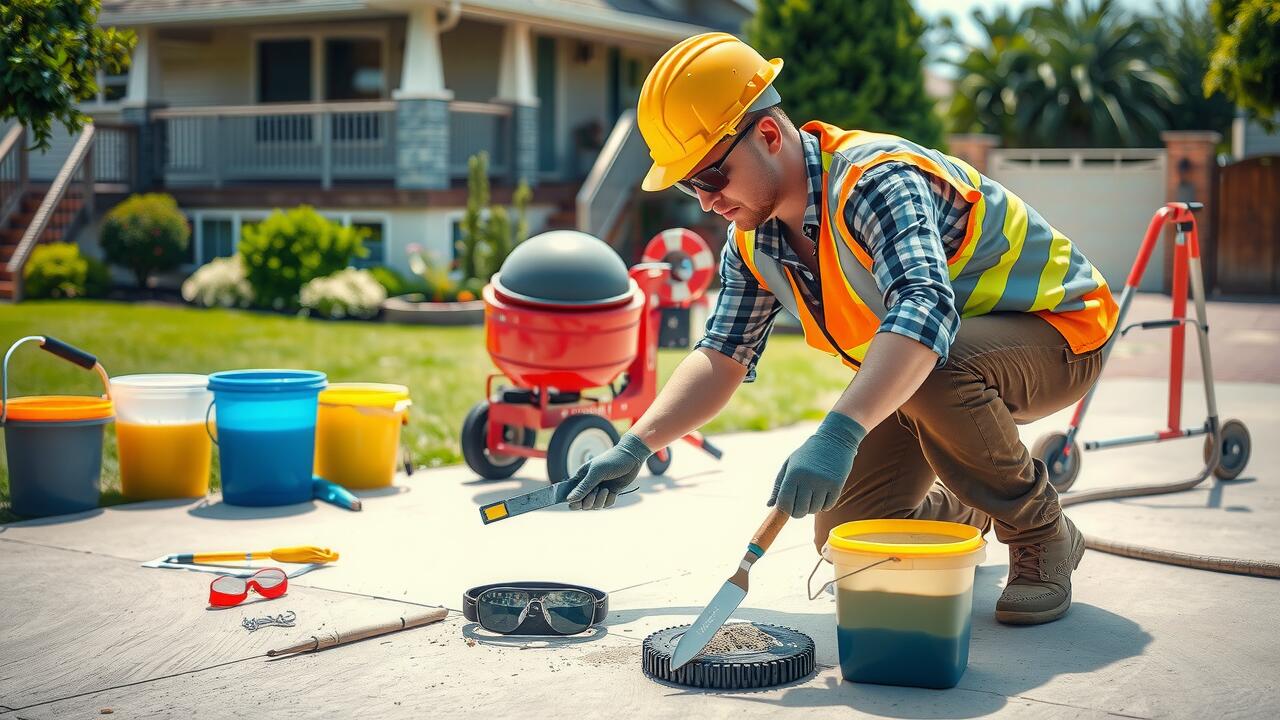
When performing concrete repair using Quikrete, proper surface preparation is crucial for optimal adhesion. Start by cleaning the area to remove any dirt, oil, or loose debris. Use a wire brush or a pressure washer to ensure the surface is free from contaminants. If the concrete is severely damaged, consider chiseling out the deteriorating sections to create a clean, stable base for the repair material. Once the surface is prepared, dampening the area with water can help improve adhesion, but avoid oversaturation.
The application of Quikrete requires careful attention to detail. Mixing should follow the manufacturer’s instructions closely to achieve the right consistency. Applying the product while the mixture is still workable ensures that it bonds effectively. Use a trowel or putty knife for spreading the Quikrete evenly across the damaged area, filling any gaps or voids. After application, smoothing out the surface enhances the aesthetic appeal and aids in blending the repair with the existing concrete.
Curing Process for Quikrete
Curing Quikrete is an essential step after applying it for concrete repair. This process helps ensure that the material gains the strength and durability necessary for long-lasting results. It is recommended to keep the surface moist for several days after application. Watering the area lightly with a hose or using a curing compound can help maintain the proper moisture level.
The importance of proper curing cannot be overstated. Adequate curing minimizes the risk of cracking and enhances the bond strength of the Quikrete. Without sufficient moisture, the material may dry too quickly, leading to weakened repairs. It is vital to follow the manufacturer’s instructions and be attentive to environmental conditions, such as temperature and humidity, to achieve the best outcomes in concrete repair.
Importance of Proper Curing
Proper curing is essential for the success of any concrete repair project. Curing ensures that the quikrete achieves maximum strength and durability. Without adequate moisture control, the repair may dry too quickly, leading to cracks or weak spots in the finished surface. It allows the hydration process to continue effectively, which is crucial for the chemical reactions that increase strength over time.
Incorporating proper curing techniques can significantly extend the lifespan of your concrete repair. Keeping the newly applied quikrete adequately moist prevents rapid evaporation, which can compromise the bond and integrity of the material. Simple methods, such as covering the area with wet burlap or using curing compounds, can aid in maintaining optimal conditions. These practices are vital when embarking on any concrete repair endeavor.
Common Mistakes to Avoid
One common mistake to avoid during concrete repair with Quikrete is neglecting surface preparation. Properly cleaning and profiling the surface ensures optimal adhesion of the repair material. Any dust, dirt, or loose debris can compromise the bond, leading to premature failure. Additionally, addressing cracks and damaged areas effectively makes a significant difference in the overall strength and longevity of the repair.
Another frequent pitfall is failing to follow the manufacturer’s instructions regarding mixing and application. Each Quikrete product has specific requirements for water ratios, mixing times, and the recommended tools. Skipping these steps can result in a weaker repair. It is essential to carefully read the guidelines to achieve the best possible outcome for your concrete repair project.
Pitfalls in Concrete Repair with Quikrete
One common pitfall in concrete repair with Quikrete is not adequately preparing the surface before application. Dust, grease, or loose debris can prevent the Quikrete from adhering properly to the existing concrete. Without proper preparation, the repair may fail prematurely, leading to additional costs and labor in the future. Techniques like pressure washing or using a wire brush can improve adhesion and ensure a solid bond.
Another mistake often made during concrete repair is applying Quikrete in unfavorable weather conditions. Extreme heat or cold can affect the curing process, potentially compromising the integrity of the repair. High temperatures can cause rapid drying, while low temperatures can delay curing time. It is crucial to monitor weather forecasts and plan repairs accordingly to achieve the best results with Quikrete.
FAQS
Can I use Quikrete to repair cracked concrete?
Yes, Quikrete is specifically designed for concrete repair and can effectively fill and seal cracks in concrete surfaces.
How long does Quikrete take to cure?
The curing time for Quikrete can vary depending on the product and environmental conditions, but generally, it takes around 24 to 48 hours for the initial set and up to 28 days for full strength.
What are the best techniques for applying Quikrete?
For effective application, ensure the surface is clean and free of debris, mix the product according to instructions, apply it evenly, and use tools such as trowels or putty knives to achieve a smooth finish.
Are there common mistakes to avoid when using Quikrete?
Yes, common mistakes include failing to properly clean the surface, mixing the product incorrectly, applying too thick of a layer, and not allowing sufficient time for curing.
Can Quikrete be used for outdoor concrete repairs?
Absolutely, Quikrete products are suitable for both indoor and outdoor concrete repairs, making them a versatile option for various projects.
Related Links
Labor Costs for Concrete Repair
Labor costs for concrete repair can vary greatly depending on the complexity of the job and the region where the work is being completed. Typically, rates range from $30 to $100 per hour for professional services. Factors influencing these costs include the level of expertise required, equipment availability, and local market rates. Hiring experienced labor often ensures a higher quality of work, which can be beneficial when dealing with extensive damage.
For those considering a DIY approach to concrete repair, labor costs may be significantly reduced. However, it’s important to factor in the value of personal time and the potential for mistakes that could lead to larger expenses down the line. Simple repairs like patching cracks may be manageable for a determined homeowner. More extensive work, such as re-leveling or replacing sections of concrete, might still require professional assistance to achieve the best results.
Hiring Professionals vs. DIY
When considering concrete repair, homeowners often debate between hiring professionals and taking the DIY route. Hiring experts can ensure that the repair is completed correctly and efficiently. Professionals typically possess the necessary experience and access to specialized tools, which can significantly speed up the process. Additionally, they can assess the damage more accurately, preventing future issues that may arise from improper repairs.
On the other hand, DIY concrete repair can be a cost-effective solution for minor issues. For those with some basic skills and knowledge, tackling small cracks or surface repairs can be manageable and rewarding. However, this option does come with risks. Without proper techniques, DIY repairs may lead to further complications. Understanding the complexity of the damage is key to deciding whether to call in professionals or to proceed independently.
Assessing the Extent of the Damage
Assessing the extent of the damage is a critical first step in planning for concrete repair. Visible cracks, spalling, or settling can indicate a range of issues, from minor surface damage to significant structural problems. Inspecting the area carefully helps differentiate between cosmetic repairs and those needing deeper intervention. A detailed examination allows homeowners to understand the severity of the problem and the potential costs involved.
In addition to visual inspections, other methods can help gauge the extent of damage. For instance, tapping the surface can reveal hollow spots, while a moisture meter can check for underlying water issues. Understanding these aspects is crucial. A thorough assessment not only influences the choice of repair technique but also guides the budgeting process for concrete repair. Taking these steps upfront can lead to more effective and cost-efficient solutions.
Visual Inspections
Visual inspections are a crucial first step in the concrete repair process. They allow homeowners and contractors to assess the current condition of concrete surfaces and identify areas requiring attention. Observing cracks, surface spalling, or discoloration can provide insights into the underlying issues that may need to be addressed. This preliminary evaluation not only helps pinpoint the damaged sections but also assists in determining the most effective repair methods.
Professionals often recommend conducting visual inspections periodically, especially in environments subject to extreme weather conditions. Seasonal changes can exacerbate minor defects, leading to more significant problems over time. By carefully examining the concrete surfaces, one can proactively address potential issues, ensuring that concrete repair efforts are timely and effective. Ignoring minor signs of wear can lead to increased costs down the line if repairs are postponed.
Impact of Weather on Repair Costs
Weather significantly influences concrete repair costs due to the conditions required for effective application. Extreme temperatures can hinder the curing process, making repairs less effective. In colder climates, freezing temperatures can lead to the need for additional materials or methods to ensure the repair bond remains intact. Similarly, high humidity or rain can require postponements, increasing labor costs and extending project timelines.
Seasonal considerations also play a role in determining the overall expense of concrete repair. Spring and fall generally offer more stable weather, making these seasons ideal for repairs. However, winter can introduce increased costs due to the need for specialized equipment or additives in cold weather. In contrast, summer can see higher demand for repair services, potentially leading to increased labor rates. By factoring in these weather-related aspects, homeowners can better prepare for the financial implications of their concrete repair projects.
Seasonal Considerations
Seasonal fluctuations can significantly influence the costs associated with concrete repair. In winter months, colder temperatures can complicate the curing process, resulting in the need for additional materials or preventative measures. Professionals might charge more during this season due to the extra precautions necessary to ensure proper bonding and durability of the repair.
Conversely, summer can also present challenges. High heat can accelerate drying times, leading to the risk of cracks if the repair is not monitored closely. As demand for construction services typically rises during warmer months, homeowners may encounter higher labor rates. Planning ahead and considering these seasonal impacts can help in managing the overall costs of concrete repair effectively.
FAQS
What factors influence the cost of concrete repair?
The cost of concrete repair is influenced by several factors, including the extent of the damage, labor costs, materials used, and whether you hire professionals or choose to do it yourself.
Is it cheaper to hire a professional or to do concrete repairs myself?
While DIY repairs may save money on labor costs, hiring a professional can ensure the job is done correctly and efficiently, potentially preventing future issues that could incur additional costs.
How can I assess the extent of damage to my concrete?
You can assess the extent of damage through visual inspections, looking for cracks, spalling, or uneven surfaces. For severe damage, it may be best to consult a professional for a thorough evaluation.
Does weather affect the cost of concrete repair?
Yes, weather can significantly impact repair costs. Seasonal considerations, such as temperature and precipitation, can affect both the materials used and how long repairs will take, potentially leading to increased costs.
What is the average cost for concrete repair?
The average cost for concrete repair can vary widely based on several factors, but it typically ranges from $3 to $10 per square foot, with more extensive damage or specialized repairs potentially costing more.
Related Links

Long-term Benefits of Repairing Concrete
Concrete repair offers significant long-term benefits that can enhance the structural integrity of a property. By addressing cracks, spalling, and other damages promptly, homeowners can prolong the lifespan of their concrete surfaces. This maintenance reduces the likelihood of needing extensive repairs in the future, ultimately saving money and resources. Regular attention to concrete surfaces can prevent water intrusion, which may lead to further deterioration and costly fixes down the line.
Additionally, investing in concrete repair can improve the overall aesthetics of a property. Well-maintained concrete not only looks better but also contributes to the value of a home. Many potential buyers prefer properties with well-kept outdoor spaces and pathways. Thus, timely concrete repair can be viewed as a strategic investment that not only maintains functionality but also enhances curb appeal and marketability.
Improving Longevity and Durability
Repairing concrete not only enhances aesthetics but also significantly improves its longevity and durability. Over time, concrete surfaces can develop cracks and surface flaws that compromise their structural integrity. By addressing these issues promptly, homeowners and property managers can prevent further deterioration. Concrete repair techniques, ranging from crack injection to resurfacing, can effectively restore the material’s strength, allowing it to withstand weather elements and heavy loads over the years.
Investing in concrete repair can also lead to long-term financial benefits. Properly maintained concrete lasts longer, reducing the frequency of replacements. Addressing minor issues before they escalate into major problems saves money in the long run. Additionally, durable repairs decrease safety hazards, making properties safer for occupants and visitors. Consequently, the decision to repair rather than ignore deteriorating concrete proves wise in both immediate and future contexts.
DIY vs. Professional Concrete Repair
When considering concrete repair, many homeowners face the choice between tackling the project themselves or hiring a professional. DIY concrete repair can be appealing due to the potential cost savings. With a wealth of online resources and tutorials available, motivated individuals may feel equipped to handle smaller cracks or surface issues. Basic tools and materials can often be obtained at local hardware stores, making it seem more feasible for those willing to invest their time.
On the other hand, professional concrete repair services bring a level of expertise that can ensure a job is done correctly and efficiently. Professionals have access to advanced materials and techniques that might not be readily available to the average homeowner. Additionally, they can evaluate the extent of damage and provide solutions that prevent future issues. This proactive approach can save money in the long run as it addresses underlying problems rather than just cosmetic fixes.
Weighing the Pros and Cons
When considering whether to undertake concrete repair, it’s essential to weigh the benefits against the potential drawbacks. On one hand, timely repair can extend the life of existing structures, improving overall safety and aesthetics. Repairing concrete can also prevent more significant issues down the line, saving homeowners money in the long run. Additionally, it can enhance property value, making it an attractive choice for those looking to sell.
On the other hand, DIY concrete repair projects may seem cost-effective, but they often require specific skills and tools. Improper repairs can lead to further damage, resulting in higher costs later. Hiring professionals for concrete repair can ensure durable results, but it comes with a higher upfront expense. Ultimately, the decision should reflect personal priorities regarding finances, time investment, and the desired outcome.
Environmental Impact of Concrete Repair
Concrete repair plays a significant role in reducing environmental impact, primarily by extending the life of existing structures. By addressing issues like cracks and surface deterioration, repairing concrete minimizes the need for new materials, resulting in less waste in landfills. This practice not only conserves resources but also decreases the carbon footprint associated with producing fresh concrete, which is resource-intensive and emits considerable amounts of greenhouse gases.
Sustainable practices in repairing concrete further enhance its ecological benefits. Utilizing eco-friendly repair materials and techniques can help lessen the environmental footprint even more. For example, employing recycled aggregates or low-emission resins in repairs can reduce the overall energy consumption and material usage. As the demand for sustainable construction practices grows, concrete repair presents an opportunity to contribute positively to environmental preservation while maintaining structural integrity.
Sustainable Practices in Repairing Concrete
Sustainable practices in concrete repair focus on minimizing waste and utilizing eco-friendly materials. When addressing cracks or surface deterioration, many repair solutions now incorporate recycled aggregates, reducing the demand for new raw materials. Additionally, using low-VOC (volatile organic compound) sealers can help maintain air quality while prolonging the service life of the restored surfaces. These techniques contribute to a lower environmental footprint and promote a more sustainable approach to managing concrete structures.
Incorporating energy-efficient methods during concrete repair can further enhance sustainability. Techniques such as thermal imaging and moisture analysis allow for accurate assessments of existing problems, preventing unnecessary repairs. Moreover, choosing repair systems designed for longevity helps reduce the frequency of future maintenance. By focusing on these sustainable options, property owners make informed decisions that not only benefit their immediate needs but also support broader environmental goals in the construction industry.
FAQS
What are the long-term benefits of repairing concrete?
Repairing concrete can significantly improve its longevity and durability, preventing further damage and costly replacements in the future. It also enhances the overall appearance of your property and can increase its value.
Is it better to repair concrete myself or hire a professional?
The decision to repair concrete yourself or hire a professional depends on the extent of the damage and your level of expertise. DIY can be cost-effective for minor repairs, but professional services may be necessary for larger, more complex issues to ensure quality and safety.
What are the pros and cons of DIY concrete repair?
The pros of DIY concrete repair include cost savings and the satisfaction of completing a project yourself. However, cons include the risk of improper repairs, which can lead to further damage, and the time required to learn and execute the repair properly.
How does concrete repair impact the environment?
Concrete repair can have a positive environmental impact by extending the life of existing structures and reducing waste. Sustainable practices, such as using eco-friendly materials and methods, can further minimize the environmental footprint associated with concrete repair.
What sustainable practices can be used in concrete repair?
Sustainable practices in concrete repair include using recycled materials, opting for low-VOC (volatile organic compound) products, and employing methods that reduce resource consumption. These practices help lessen the environmental impact while maintaining the integrity of the repairs.
Related Links
Choosing the Right Patch Material
Selecting the appropriate patch material is essential for successful concrete repair. Various types of patching compounds exist, each designed for specific applications and conditions. When considering options, look for materials that offer good adhesion to existing concrete and possess similar properties to the original slab. Some products are pre-mixed, while others require mixing with water or additives. Understanding the product specifications can help ensure you choose a patch that will bond well and withstand environmental stresses.
Another important factor to consider is the setting time of the patch material. Quick-setting compounds may be suitable for projects that need to be completed rapidly, while slower-setting options might allow for more working time. Additionally, assess the shrinkage characteristics of the material since excessive shrinkage can lead to cracking. Matching the patch material with the conditions of the repair site will contribute significantly to the longevity and durability of the concrete repair.
Types of Concrete for Patching
When considering types of concrete for patching, several options are available to meet various needs. Pre-mixed patching compounds are designed specifically for repairing damaged concrete surfaces. These products often contain additives that enhance bonding, flexibility, and durability. Another choice is using standard concrete mix, which can be suitable for larger repairs or when matching existing concrete is important. Selecting the right type ensures that the patched area blends well with the surrounding surfaces.
Epoxy and polymer-modified concrete are also viable options in concrete repair situations. Epoxy offers superior adhesion and is resistant to chemicals, making it ideal for areas exposed to harsh conditions. Polymer-modified concrete includes additional polymers that improve workability and reduce cracking. Both types provide exceptional strength and longevity, making them an excellent choice for repairing damaged structures. Understanding these options helps in making an informed decision for effective concrete repair projects.
Step-by-Step Patching Process
When embarking on a concrete repair project, preparation is key. Start by thoroughly cleaning the area that needs to be patched. This often involves removing any loose material, dirt, or debris that may hinder adhesion. Using a pressure washer can be an effective way to ensure the surface is free of contaminants. Once cleaned, allow the surface to dry completely before proceeding. If the damage is significant, you may need to create a rough texture on the old concrete to improve the bond with the new mix.
After preparing the surface, mix the new concrete according to the manufacturer’s instructions. It is crucial to achieve the right consistency, ensuring it flows easily into the damaged areas without becoming too runny. Use a trowel or a similar tool to apply the mixed concrete, filling in cracks and voids carefully. Smooth the surface to match the surrounding area, taking care to avoid overworking the patch. Allow the repair to set adequately before moving on to curing, which is essential for achieving the best strength and durability for your concrete repair.
Applying the New Concrete
Before applying the new concrete, ensure that the surface is adequately prepared. Remove any loose debris, dirt, or old sealants from the area to create a strong bond between the old and new material. Use a wire brush or pressure washer for thorough cleaning. If necessary, moisten the old concrete lightly to aid in adhesion. The foundation has to be sound for effective concrete repair.
Once the surface is ready, mix the new concrete according to the manufacturer’s instructions. It’s essential to achieve the right consistency to prevent cracking and ensure a durable finish. Pour the mixed concrete into the repaired area, using a trowel to spread it evenly. Aim to fill any cracks or low spots completely. Once applied, smooth the surface to match the surrounding area and remove any excess material.
Curing and Setting Requirements
Curing is a crucial phase in the concrete repair process, as it significantly affects the strength and durability of the newly applied surface. Proper curing ensures that the new concrete maintains the right moisture levels, preventing it from drying out too quickly. The methods used for curing can vary, including covering the surface with wet burlap, applying curing compounds, or simply misting the surface with water. Each method serves to keep the concrete hydrated, which is essential for achieving optimal performance and longevity.
Setting requirements play a vital role in how quickly the new concrete can be subjected to stress or load. Typically, newly patched concrete requires at least 24 to 48 hours to set properly, depending on environmental conditions and the specific materials used. During this time, it is important to protect the area from traffic and other disturbances that could compromise the integrity of the repair. Following the manufacturer’s guidelines on setting times can help ensure that the concrete repair adheres well and remains durable for years to come.
Importance of Proper Curing
Proper curing is essential for successful concrete repair. Insufficient curing can lead to several issues, including cracking, shrinkage, and weakened structural integrity. The hydration process, which solidifies the new concrete by chemical reaction with water, requires a controlled environment to occur effectively. Without adequate moisture, the concrete cannot achieve its intended strength and durability, leaving repairs vulnerable to damage over time.
Maintaining ideal curing conditions involves keeping the patch damp during the initial curing phase. Depending on the type of patch material used, this process may last several days to weeks. Covering the patched area with plastic sheeting or wet burlap can help retain moisture and create a stable environment. Observing these curing practices significantly enhances the longevity of the concrete repair, ensuring that it adheres properly to the old surface and withstands environmental stressors.
FAQS
Can you patch old concrete with new concrete?
Yes, you can patch old concrete with new concrete. It’s a common practice to repair cracks, holes, or surface damage by applying a new layer of concrete over the existing surface.
What materials are best for patching old concrete?
The best materials for patching old concrete include specialized concrete patching compounds, which can be found in most hardware stores. You can also use hydraulic cement or ready-mix concrete for more extensive repairs.
How do I prepare the old concrete for patching?
To prepare old concrete for patching, clean the surface thoroughly to remove dirt, dust, and debris. You may also need to remove any loose or crumbling concrete and use a wire brush or grinder to create a rough texture for better adhesion.
How long does it take for the patch to cure?
The curing time for a concrete patch can vary depending on the type of material used and environmental conditions, but generally, it takes about 24 to 48 hours for initial setting and up to a week for full curing.
Is proper curing really necessary for concrete patches?
Yes, proper curing is essential for concrete patches as it helps to prevent cracking and ensures that the patch achieves its maximum strength and durability. Keeping the patch moist and protected during the curing process is important for optimal results.
Related Links
Labor Charges for Concrete Contractors
Labor charges for concrete contractors can vary significantly based on factors such as location and the complexity of the project. Typically, contractors charge by the hour or offer a project-based rate. For straightforward tasks like concrete repair, hourly rates may range from $25 to $75, depending on the contractor’s experience and regional market conditions. More intricate projects that require specialized skills might command higher rates.
In addition to hourly rates, contractors may factor in the type of materials used and the overall scope of the work when estimating costs. Projects involving concrete repair could influence the final pricing, especially if extensive labor is needed to address underlying issues. Contractors often provide a detailed estimate outlining all potential charges, enabling clients to understand the total labor costs involved.
Hourly vs. Project-Based Rates
Concrete contractors typically charge based on two primary pricing structures: hourly rates and project-based rates. Hourly rates are common for smaller jobs or when the scope of work is difficult to define in advance. This model allows for flexibility as the contractor can bill based on the actual time spent on tasks such as concrete repair. Homeowners may appreciate this approach when unexpected issues arise during the project.
On the other hand, project-based rates are often used for larger, well-defined jobs. In this case, the contractor provides a fixed price for the entire project, including materials and labor. This pricing method can be beneficial for budget-conscious clients, as it offers a clear expectation of total costs upfront. Homeowners seeking specific enhancements, like decorative elements, often find project-based pricing appealing for projects that include detailed concrete work.
Custom Concrete Work Pricing
Custom concrete work pricing can vary significantly depending on the complexity and specifics of the project. Homeowners seeking unique designs or tailored solutions, such as decorative pathways or intricate patios, often face higher costs than standard concrete installations. Contractors consider factors like the materials used, design complexity, and the estimated time required for completion. Customization often includes specialized techniques to ensure that the final product meets the desired aesthetic and functional requirements.
Concrete repair is another aspect where pricing can fluctuate. If a property owner needs to fix cracks, uneven surfaces, or other types of damage, the costs may depend on the severity of the issue and the repair method. Routine repairs might have a fixed rate, while more extensive work requiring additional labor and materials can lead to higher expenses. It’s essential to consult with contractors for detailed estimates based on the specific needs of each project.
Decorative and Stamped Concrete
Decorative and stamped concrete has increasingly become popular for homeowners seeking to enhance the aesthetic appeal of their outdoor and indoor spaces. This type of concrete work allows for the creation of unique patterns and textures that can mimic more expensive materials like stone or brick. The cost of decorative concrete varies based on the complexity of the design, the materials used, and the area to be covered. Homeowners should expect to pay more than traditional concrete due to the specialized techniques and craftsmanship involved.
Additionally, contractors often incorporate decorative elements into projects that involve concrete repair. Restoring damaged concrete surfaces with decorative finishes not only improves durability but also elevates the overall look of the area. Pricing can fluctuate significantly based on the extent of the repair work needed and the finishing techniques chosen. Clients should communicate their design preferences clearly, as this will influence both the labor and material costs associated with the project.
Discounts and Promotions
Contractors often provide discounts and promotions to attract new clients or incentivize repeat business. Seasonal offers can be common, particularly during slower months when contractors may be looking to fill their schedules. Homeowners might find reduced rates for services like concrete repair during these promotional periods.
In addition to seasonal discounts, some contractors may offer loyalty programs or referral incentives. These initiatives encourage satisfied customers to recommend their services to others. This helps expand the contractor’s client base while allowing homeowners to take advantage of reduced costs for various projects, including concrete repair.
Seasonal Price Adjustments
Many contractors adjust their prices for concrete work based on seasonal factors. During peak construction seasons, typically in the spring and summer, demand for concrete services tends to increase. This heightened demand can lead to higher labor charges and material costs as contractors may be booked solid and need to prioritize their schedules. Conversely, in the off-peak months, such as late fall and winter, contractors might offer discounts to attract clients. Lower demand allows for more flexibility in pricing and scheduling.
For specialized services like concrete repair, seasonal pricing adjustments can be particularly relevant. In colder months, for example, repairing concrete surfaces may require additional materials or techniques to ensure proper bonding. This can influence labor costs and project timelines. Homeowners seeking concrete repair services during these off-peak times often have the opportunity to negotiate better rates, making it an ideal moment to undertake such projects.
FAQS
What is the average hourly rate for concrete contractors?
The average hourly rate for concrete contractors typically ranges from $45 to $75, depending on factors such as location, experience, and the complexity of the project.
How do project-based rates differ from hourly rates in concrete work?
Project-based rates are fixed prices agreed upon before starting a job, while hourly rates are charged based on the number of hours worked. Project-based rates may provide more predictability for larger projects.
What factors can affect the pricing of custom concrete work?
Factors that can affect the pricing of custom concrete work include the type of design, materials used, project size, and the complexity of the installation.
Are decorative and stamped concrete more expensive than regular concrete?
Yes, decorative and stamped concrete typically costs more than regular concrete due to the additional labor, materials, and expertise required to achieve the desired aesthetic.
Do concrete contractors offer discounts or promotions?
Many concrete contractors offer discounts or promotions, especially during off-peak seasons or for larger projects. It’s advisable to inquire about any available deals when obtaining quotes.
Related Links
Techniques for Pouring New Concrete
When considering the technique for pouring new concrete over old cracked concrete, it is essential to assess the condition of the existing surface. Any significant cracks must be addressed through concrete repair methods. This may involve filling gaps with an appropriate filler or resurfacer, which helps create a stable foundation for the new layer. Cleaning the surface thoroughly is also crucial, ensuring that dirt, debris, and loose particles do not interfere with bonding.
Once the surface is prepared, a bonding agent can be applied to enhance adherence between the old and new concrete. This step is vital in preventing future delamination. After the bonding agent has dried, a new layer of concrete can be poured. It’s important to work quickly, spreading the concrete evenly and thoroughly to minimize the risk of air pockets. Ensuring a consistent thickness across the entire area will contribute significantly to the durability of the new surface.
Step-by-Step Process for a Successful Application
The first step in pouring new concrete over old cracked concrete involves assessing the existing surface. It is crucial to evaluate the extent of the damage, as minor cracks may only require simple repairs. For deeper fissures, consider using a concrete repair compound to fill these gaps. Cleaning the surface thoroughly will ensure proper adhesion. Remove any debris, dirt, or loose material to create a solid base. A pressure washer or a wire brush can be effective tools for this task.
Once the surface is prepared and repaired, it’s time to apply a bonding agent. This product enhances the connection between the old and new concrete layers. Following the manufacturer’s instructions, spread the bonding agent evenly over the surface. After allowing the bonding agent to set, mix the new concrete. Pour it over the old surface, ensuring a consistent thickness. Use a trowel to smooth and level the new layer, making sure it meets the desired finish.
Curing New Concrete Properly
Proper curing is essential for ensuring the longevity and strength of new concrete applied over existing, cracked surfaces. The curing process helps retain the moisture necessary for the hydration of cement particles. Without adequate moisture levels, the new concrete can develop cracks and reduce its strength. Techniques such as covering the surface with wet burlap or plastic sheeting can be effective in maintaining the necessary humidity levels. The goal is to keep the surface moist for an extended period, typically at least seven days, to help the concrete gain optimal strength.
In addition to moisture retention, maintaining an appropriate temperature is critical during the curing process. High temperatures can accelerate evaporation and may necessitate more frequent watering. Conversely, cold weather may require insulation to prevent the new concrete from freezing. Regularly monitoring the curing conditions can help identify potential issues early on. For those considering concrete repair, understanding the importance of a proper curing regimen is vital for achieving durable results that withstand the test of time.
Best Practices for Ensuring Durability
Maintaining the durability of new concrete poured over old, cracked surfaces requires attention to both preparation and execution. Before starting, it is essential to conduct a thorough assessment of the existing concrete’s condition. Any loose materials or debris must be removed to ensure a strong bond between the new and old layers. Applying a concrete bonding agent can enhance adhesion, reducing the risks of future cracking. Properly filling any significant cracks or voids in the underlying concrete during the initial stages of Concrete Repair also plays a crucial role in creating a stable surface for the new layer.
Once the new concrete has been poured, curing becomes a vital step in ensuring its longevity. Keeping the surface moist and at an appropriate temperature allows for proper hydration, strengthening the material. Utilizing curing blankets or plastic sheeting can help regulate moisture levels and protect the surface from harsh environmental conditions. Regular monitoring during this period will facilitate the best results, ultimately contributing to the overall durability of the new concrete layer.
Understanding Cost Implications
When considering the costs associated with pouring new concrete over old cracked concrete, several factors come into play. The condition of the existing surface can significantly impact the overall expense. If the old concrete is extensively damaged, additional concrete repair measures may be necessary before applying a new layer. These repairs might involve patching cracks, resurfacing uneven areas, or even removing sections of the old slab, all of which contribute to the total investment.
Labor costs also factor prominently in the equation. Hiring skilled professionals to ensure proper installation and curing can enhance durability and longevity, but it may increase the initial expenditure. Tracking materials needed for both the new pour and any necessary concrete repair can help in creating a comprehensive budget. Other considerations include regional pricing variations and the scale of the project, which can further influence the overall cost.
Factors That Influence the Overall Expense
The overall expense of pouring new concrete over old cracked concrete can vary significantly based on several factors. One key element is the condition of the existing concrete. If the old surface is severely damaged or unstable, additional concrete repair may be necessary before a new layer can be poured. This repair work can increase both labor and material costs, affecting the budget.
Another factor is the thickness of the new concrete layer. Thicker applications often require more materials and time, which can drive up expenses. Additionally, geographic location plays a role in pricing. Labor rates and material costs can fluctuate widely from one region to another, impacting the total project expenditure. Understanding these elements helps in obtaining a more accurate estimate.
FAQS
Can you pour new concrete over old cracked concrete?
Yes, you can pour new concrete over old cracked concrete, but it’s important to properly prepare the surface to ensure a strong bond and prevent future issues.
What preparation is needed before pouring new concrete over old concrete?
Preparation involves cleaning the old concrete surface, repairing significant cracks, and potentially applying a bonding agent to enhance adhesion between the old and new concrete.
How long should I wait for new concrete to cure before using it?
It’s generally recommended to wait at least 7 days for the concrete to cure before using the surface, but full strength is usually achieved in about 28 days.
What are the common issues that can arise when pouring new concrete over old concrete?
Common issues include poor adhesion, cracking, and uneven surfaces, which can occur if the old concrete is not properly prepared or if the new concrete is not mixed or cured correctly.
How does the cost of pouring new concrete over old concrete compare to removing and replacing the old concrete?
Pouring new concrete over old concrete is often more cost-effective than removing and replacing it, as it typically requires less labor and disposal fees, but it may still be influenced by factors such as the condition of the existing concrete and the scope of the project.
Related Links
Curing and Drying Time
Curing and drying time play crucial roles in the success of concrete repair. Proper curing allows the new material to achieve its maximum strength and durability. Generally, the curing period can vary based on the type of product used and environmental conditions. Temperatures and humidity levels significantly impact how quickly the material sets and hardens. For best results, it’s essential to follow the manufacturer’s guidelines regarding the recommended curing time.
Often, drying time is shorter than the total curing time. While some products may feel dry to the touch within a few hours, they may still require several days or even weeks to fully cure. Rushing the process can lead to cracks or weakened areas in the concrete repair. Always take note of moisture conditions and ensure adequate time is given for the repair material to reach its full potential.
Importance of Proper Curing for Longevity
Proper curing is essential for the longevity of any concrete repair project. When concrete is freshly mixed and applied, it requires a specific environment to achieve optimal strength and durability. Curing allows the concrete to maintain adequate moisture levels, which facilitates chemical reactions critical for achieving the desired hardness. Without proper curing, the concrete may crack or become weak over time, leading to costly repairs and unsafe conditions.
The longevity of concrete repair directly correlates to the techniques used during the curing process. Techniques such as covering the newly laid concrete with wet burlap or applying curing compounds can help retain moisture and regulate temperature. Investing in proper curing not only enhances the structural integrity of the steps but also prolongs their lifespan. Homeowners should prioritize these practices to ensure that their concrete repair yields lasting results, thus making a significant improvement to their outdoor spaces.
Cost Comparison of Repair Products
When considering concrete steps repair, the range of products available on the market can create confusion regarding cost and effectiveness. Budget-friendly options often include patching compounds, which provide a temporary fix and are typically easy to apply. These products are suitable for minor cracks and surface imperfections but may require frequent reapplication. More premium choices, like high-strength epoxy or specialized concrete repair kits, offer enhanced durability and long-lasting results. While these approaches demand a higher initial investment, they can save money in the long run by reducing the need for repeated repairs.
The decision between budget-friendly and premium concrete repair products should be influenced by the specific condition of the steps and the anticipated traffic. If the concrete steps endure heavy foot traffic or harsh weather conditions, investing in higher-quality materials may yield better outcomes. Assessing the extent of damage is crucial in determining the suitable product. A well-thought-out choice not only ensures safety but also enhances the appearance and longevity of your concrete repair efforts.
Analyzing Budget-Friendly Options vs. Premium Choices
When considering concrete repair products, budget-friendly options often attract homeowners looking to save money. These products typically include basic patching compounds and fillers that may be less expensive but can lack the durability and longevity of more premium choices. Many of these options are effective for small cracks and cosmetic repairs but might not hold up well under heavy traffic or extreme weather conditions. Understanding that immediate savings could lead to additional costs from future repairs is crucial for informed decision-making.
On the other hand, premium concrete repair products often promise superior performance and longevity. They may incorporate advanced materials that provide better adhesion, flexibility, and resistance to harsh elements. While the initial investment is higher, the long-term benefits can outweigh the costs. Homeowners may find that investing more upfront results in a more durable solution, reducing the need for frequent repairs. This careful analysis of budget-friendly versus premium options can guide one toward the best choice for specific concrete repairs.
Safety Precautions During Repair
Repairing concrete steps can be a straightforward process, but safety should always be a priority. Wearing personal protective equipment (PPE) is crucial. Items such as gloves, safety goggles, and a dust mask help shield against the concrete dust and any potentially harmful chemicals in repair products. Ensure that you have sturdy footwear to protect your feet from falling debris or sharp tools during the repair process.
Additionally, working in well-ventilated areas is essential when using materials for Concrete Repair. Proper ventilation helps dissipate any fumes that could arise from adhesives or sealants. Be cautious with your tools, keeping them organized and away from high-traffic areas to prevent tripping hazards. Taking these precautions will not only enhance safety but also contribute to a smoother repair experience.
Essential Gear for Protecting Yourself
When embarking on a concrete repair project, safety should always be the top priority. Essential gear includes safety goggles to protect your eyes from dust and debris generated during the repair process. Additionally, wearing gloves can shield your hands from harsh chemicals in repair products. Sturdy footwear is another critical element, as it can provide traction and protect your feet from heavy materials or tools that may inadvertently drop.
Incorporating a dust mask is advisable when mixing or applying concrete repair products. This gear helps filter potentially harmful particles present in the air. Knee pads can enhance comfort if you need to work close to the ground. Overall, having the right protective equipment not only ensures personal safety but also allows for a more efficient repair process.
FAQS
What is the best product for repairing concrete steps?
The best product for repairing concrete steps typically includes epoxy fillers, concrete patching compounds, or resurfacing products. The choice depends on the extent of the damage and the specific requirements of your project.
How long does it take for concrete repair products to cure?
Curing times vary by product, but generally, most concrete repair products require at least 24 to 48 hours to cure properly. Always refer to the manufacturer’s instructions for specific curing times.
Are budget-friendly repair products effective?
Yes, budget-friendly repair products can be effective for minor repairs or surface damage. However, for more significant issues or long-term durability, investing in premium choices might be more beneficial.
What safety precautions should I take while repairing concrete steps?
It is important to wear safety gear such as gloves, goggles, and a dust mask to protect yourself from dust and chemicals. Additionally, ensure proper ventilation if working in enclosed spaces.
Can I repair my concrete steps myself, or should I hire a professional?
Many concrete repairs can be done by DIY enthusiasts with the right tools and products. However, if the damage is extensive or requires specialized knowledge, hiring a professional may be advisable.
Related Links
Curing Process for Overlay
The curing process plays a crucial role in the success of applying a thin layer of concrete over an existing surface. Proper curing ensures that the overlay achieves the desired strength and durability. During this stage, it is essential to keep the newly applied concrete moist. This can be achieved through various methods, such as using wet burlap, plastic sheeting, or curing compounds that retain moisture.
Once the overlay is applied, monitoring the temperature and humidity conditions is critical to prevent premature drying. Fluctuations in temperature can adversely affect curing, leading to cracking or delamination. Regularly inspecting the surface during the curing period helps ensure that the overlay adheres properly to the existing concrete. Overall, a well-executed curing process can significantly enhance the performance of concrete repair and extend the lifespan of the new surface.
Importance of Proper Curing
Proper curing is essential to ensure the durability and effectiveness of any concrete overlay. When a thin layer of concrete is applied over an existing surface, the hydration process must occur optimally to achieve the desired strength and bonding. Inadequate curing can lead to weak points within the overlay, predisposed to cracking and peeling. Without proper moisture retention, the surface may dry too quickly, negating the benefits of a meticulously applied layer. This is especially crucial in any concrete repair procedure to maintain structural integrity.
Moreover, the environmental conditions play a significant role in the curing phase. High temperatures and low humidity can accelerate the drying process, making it imperative to employ methods that promote slower evaporation rates. Utilizing curing compounds, wet coverings, or regular misting can maintain the necessary moisture. These practices are integral not just for the longevity of the overlay but also for the overall success of the concrete repair project. Maintaining optimal curing conditions ultimately leads to a more resilient surface that withstands wear and tear.
Common Mistakes to Avoid
One common mistake when applying an overlay is neglecting surface preparation. Properly cleaning and profiling the existing concrete is essential to ensure adequate bonding between the new layer and the old. Dirt, grease, and other contaminants can hinder adhesion, leading to premature failure of the overlay. Skipping this crucial step often results in costly repairs down the line, which can easily be avoided with thorough surface treatment.
Another significant error is overlooking the specific curing requirements for the overlay material. Different products have unique curing times and conditions that need to be adhered to for optimal performance. Improper curing can lead to cracking and peeling, compromising the integrity of the surface. Adhering strictly to the manufacturer’s guidelines on both application and curing can greatly enhance the durability of the overlay and reduce the need for concrete repair in the future.
Pitfalls that Can Affect Performance
Several pitfalls can significantly affect the performance of a thin concrete overlay. One common issue arises from inadequate surface preparation. If the old concrete is not cleaned thoroughly, contaminants can prevent proper bonding, leading to peeling or cracking of the overlay. Additionally, applying the overlay in unfavorable weather conditions, such as extreme heat or humidity, can negatively impact the curing process. This can result in a weakened bond and premature deterioration of the surface.
Another critical factor to consider is the thickness of the overlay itself. Applying a layer that is too thin may not provide the expected durability and strength, making the surface vulnerable to damage. Conversely, a layer that is excessively thick can lead to stress and cracking. Regular inspection and maintenance are essential to identify any signs of wear early. Addressing these concerns through timely Concrete Repair can help prolong the life of the overlay and maintain its functionality for years to come.
Maintenance of Overlayed Surfaces
Regular maintenance of overlayed surfaces is essential to enhance their durability and appearance. Begin by cleaning the surface regularly to remove dirt, debris, and chemical residues that can lead to deterioration. A gentle pressure wash or broom can suffice for routine cleaning. Sealants may be necessary to protect the surface against stains and moisture infiltration. This protective layer can prolong the life of the overlay and reduce the need for more extensive concrete repair later on.
Inspect the overlay periodically for signs of cracking or wear. Catching minor issues early allows for prompt repairs, preventing further damage. If cracks appear, they should be addressed with appropriate repair materials designed for concrete overlays. Moreover, avoid using harsh chemicals or de-icing agents on the surface during winter months as they can compromise the integrity of the overlay. Following these maintenance tips will help keep the overlay in good condition over time.
Tips for Longevity and Care
To ensure the longevity of an overlayed surface, regular maintenance is crucial. Routine cleaning helps prevent dirt and debris from accumulating, which can lead to deterioration. Using a pressure washer occasionally will effectively remove buildup without causing damage. Additionally, applying a sealant can protect the surface from moisture and harmful chemicals. This step is particularly important in areas with extreme weather conditions, as it adds an extra layer of defense against cracking and chipping.
Monitoring the surface for signs of damage is essential in maintaining the integrity of the overlay. Small cracks or wear should be addressed promptly to prevent further issues. Concrete Repair techniques can be employed for minor flaws. Homeowners should stay vigilant about any changes in the surface, such as discoloration or a porous appearance. Taking immediate action can save time and expense in the long run, ensuring the surface remains durable and visually appealing.
FAQS
Can you put a thin layer of concrete over existing concrete?
Yes, you can put a thin layer of concrete over existing concrete, often referred to as a concrete overlay. This technique can rejuvenate worn surfaces and provide a fresh, new look.
What is the curing process for a concrete overlay?
The curing process for a concrete overlay involves keeping the surface moist after application to allow the concrete to set properly. This typically requires covering the overlay with wet burlap or plastic sheeting for several days.
What are some common mistakes to avoid when applying a concrete overlay?
Some common mistakes include not properly preparing the existing surface, using the wrong mix of concrete, failing to cure adequately, and applying the overlay in unfavorable weather conditions.
How can I maintain an overlayed concrete surface?
To maintain an overlayed concrete surface, regularly clean it with mild soap and water, avoid using harsh chemicals, and seal it every few years to protect against moisture and stains.
What are the potential pitfalls that can affect the performance of a concrete overlay?
Potential pitfalls include inadequate surface preparation, improper application techniques, environmental factors such as extreme temperatures, and neglecting the curing process, all of which can lead to delamination or cracking.
Related Links
Filling Cracks in Concrete
Filling cracks in concrete is essential for maintaining the integrity and appearance of your surfaces. Over time, exposure to weather and wear can cause cracks to form, leading to potential structural issues. Assessing the size and depth of the cracks is a crucial first step in the concrete repair process. Smaller cracks can often be filled with a simple masonry crack filler or caulk, while larger cracks may require more specialized repair methods and materials.
Once the appropriate materials are selected, preparation is key. Clean the area thoroughly to remove dirt, debris, and any loose particles. This ensures proper adhesion of the filler material. After cleaning, apply the filler according to the manufacturer’s instructions, ensuring an even application that fills the crack completely. Smooth out the surface for a uniform look. Following these steps will help extend the life of your concrete and provide a more aesthetically pleasing finish.
Step-by-Step Crack Filling Process
Before beginning the crack filling process, gather the necessary materials such as a chisel, wire brush, and concrete repair compound. Start by cleaning the crack to ensure proper adhesion. Remove any loose debris and dust using a wire brush, and if the crack is deep, you may want to widen it slightly with a chisel to create a more effective bonding surface. This preparation step is vital for achieving a durable repair.
Once the crack is clean, apply the concrete repair compound. Use a putty knife or a similar tool to push the compound into the crack, ensuring it fills the entire space and adheres well to the surrounding concrete. Smooth out the surface with the tool for a neat finish. Follow the manufacturer’s instructions on drying time before exposing the repaired area to any load or moisture. Proper execution of these steps will contribute to a lasting concrete repair solution.
Resurfacing Concrete Surfaces
Resurfacing concrete surfaces is an effective method to restore their appearance and improve durability. Various types of resurfacing materials are available, allowing homeowners to choose one that best fits their needs. The process involves cleaning the surface thoroughly to ensure proper adhesion before applying the new layer. Depending on the condition of the existing concrete, a primer may also be necessary to enhance bonding.
After preparation, the resurfacer is mixed according to the manufacturer’s instructions. It’s crucial to apply the mixture evenly using a squeegee or trowel, ensuring complete coverage of the area. This technique not only addresses minor imperfections but also provides an opportunity for decorative finishes, transforming a worn surface into a visually appealing space. Effective concrete repair through resurfacing can significantly extend the life of the concrete and improve its overall functionality.
How to Apply a Concrete Resurfacer
Applying a concrete resurfacer involves several essential steps to ensure a smooth and durable finish. First, clean the surface thoroughly to remove any dirt, grease, or loose debris. This may require pressure washing or scrubbing with a concrete cleaner. Once the surface is clean, let it dry completely before proceeding to the next step. It’s also important to repair any cracks or spalling beforehand, as these issues can affect the quality of the resurfacing.
Mix the concrete resurfacer according to the manufacturer’s instructions, achieving a consistency that can be applied easily with a trowel or squeegee. Start at one corner of the area and apply the resurfacer evenly, working in small sections to avoid premature drying. Use a roller or trowel to smooth it out, ensuring a uniform thickness across the surface. Concrete repair requires careful attention during application to avoid trapped air or imperfections that may compromise the finished product.
Repairing Spalling Concrete
Spalling concrete occurs when the surface layer of concrete flakes or chips away, often due to moisture infiltration and freeze-thaw cycles. To effectively repair spalled areas, it is essential first to remove any loose debris and ensure the area is clean. Using a wire brush or a pressure washer can help in eliminating any dust, dirt, or deteriorating concrete. Once the surface is prepared, applying a concrete repair compound that adheres well to existing concrete can restore the integrity of the surface.
After applying the repair compound, it’s critical to allow it to cure properly. Follow the product instructions regarding drying times and conditions for optimal results. Keeping the repaired area moistened during the curing process can prevent new spalling from occurring. By taking these steps, homeowners can achieve a long-lasting repair that enhances both the durability and appearance of their concrete surfaces.
Effective Strategies for Spalling Repair
Spalling occurs when the surface layer of concrete begins to chip or flake away, often exacerbated by environmental factors or a lack of proper sealing. One effective strategy for repairing spalling concrete is to remove the damaged layer completely. Start by using a chisel or a grinder to remove the loose pieces and create a clean, solid surface. This preparation is crucial for ensuring that any repair materials bond properly to the remaining concrete.
After surface preparation, applying a concrete repair compound is essential. Choose a high-quality epoxy or polymer-modified repair mix designed for spalling. Follow the manufacturer’s instructions for mixing and application. Using a trowel, fill in the affected areas thoroughly, ensuring to smooth out the surface for a cohesive finish. This approach not only addresses existing damage but also helps prevent future spalling by providing a durable and resilient surface.
FAQS
What tools do I need to repair damaged concrete?
To repair damaged concrete, you typically need tools like a chisel, hammer, wire brush, concrete patching compound, trowel, and safety gear such as gloves and goggles.
How long does it take for concrete repair to set?
The setting time for concrete repairs can vary, but most patching compounds set within a few hours. However, it’s best to allow 24 to 48 hours for full curing before placing any weight on the repaired area.
Can I repair cracked concrete myself, or should I hire a professional?
Many minor concrete repairs, like filling cracks or resurfacing, can be done by homeowners with the right tools and materials. However, for extensive damage or structural issues, hiring a professional is recommended.
What is the difference between filling cracks and resurfacing concrete?
Filling cracks involves repairing specific fissures in the concrete surface, while resurfacing is a process that covers the entire surface with a thin layer of concrete to improve its appearance and durability.
How can I prevent future damage to my concrete surfaces?
To prevent future damage, ensure proper drainage, apply sealants, perform regular maintenance, and address any cracks or spalling as soon as they appear.