Category: Uncategorized
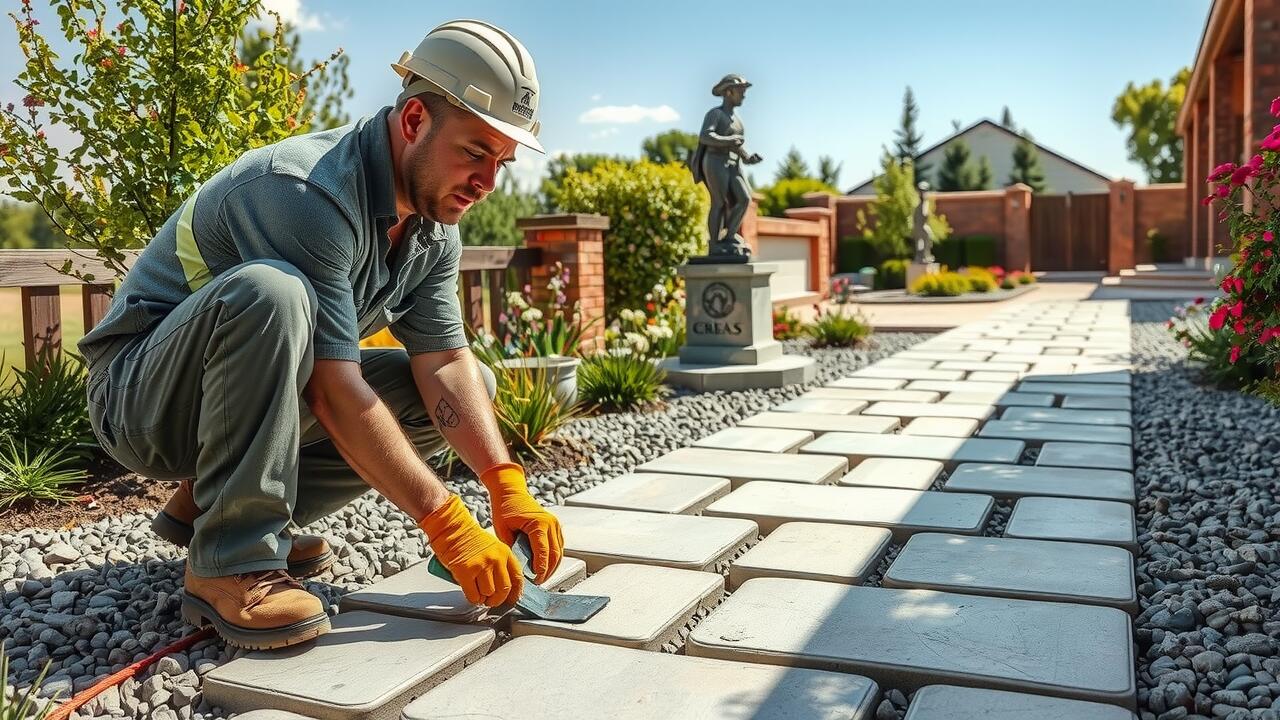
Excavate the Ground
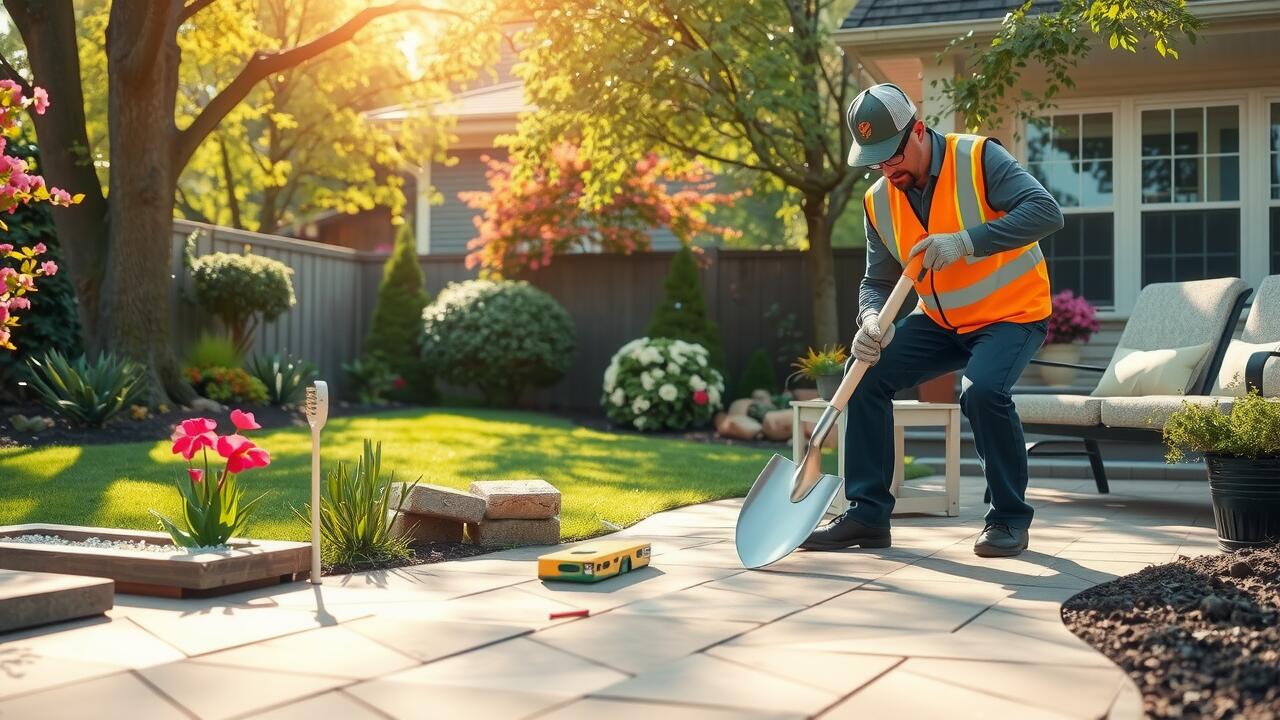
Excavating the ground for a walkway requires careful planning and precise execution. First, mark the area where the walkway will be placed, ensuring to account for the desired width and length. Use stakes or spray paint to outline the path clearly. Once marked, begin removing the top layer of soil using a shovel or a mechanical excavator, depending on the size of the area. Aim for a depth of about four to six inches to allow sufficient space for the base layer and the walkway materials.
During the excavation process, keep in mind the overall layout and slope to facilitate proper drainage. Ensuring that the ground slopes away from buildings or structures will help prevent water accumulation along the walkway. As you dig, remove any rocks, roots, or debris that could interfere with the stability of the installation. Uneven soil or obstacles can lead to problems during the walkway installation, so taking the time to prepare a clean, level surface will pay off in the long run.
Techniques for Removing Soil
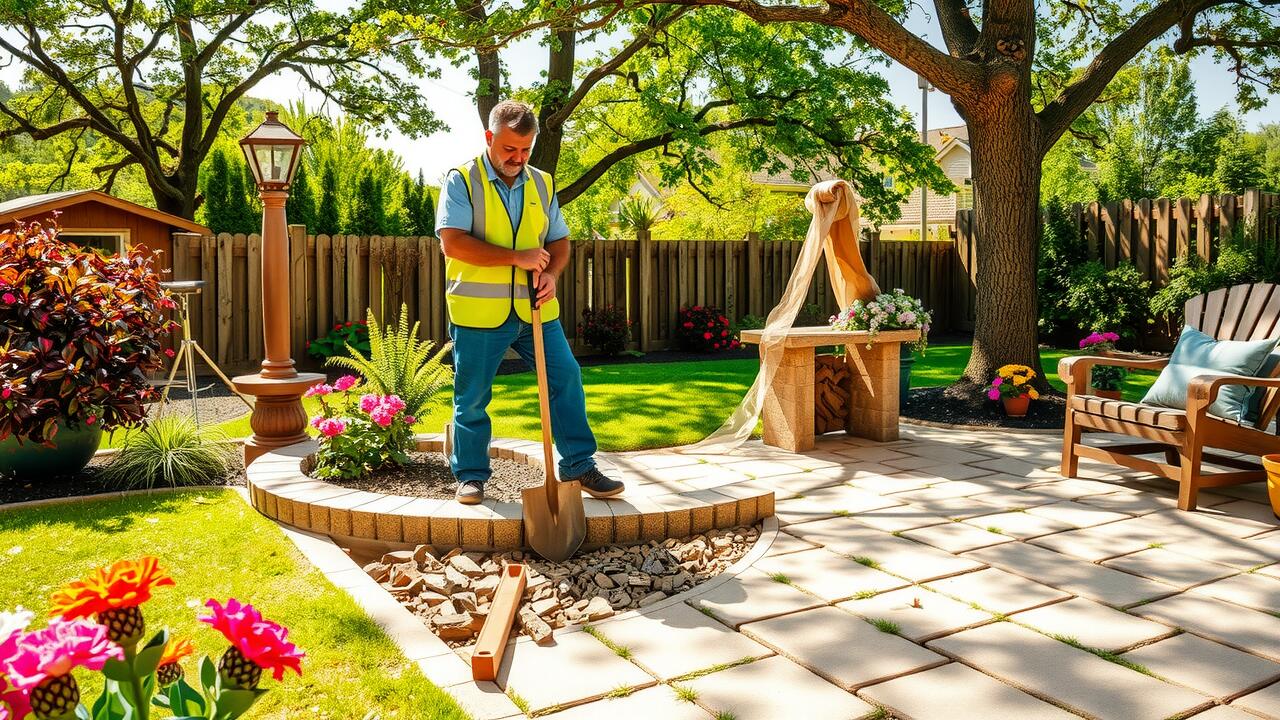
When preparing for walkway installation, the first step involves removing the existing soil. You can use a shovel for small areas or manual work. For larger projects, a powered excavator or a skid-steer loader improves efficiency. Breaking up the soil with a pick or a hoe can make it easier to remove. Pay attention to the surrounding area to avoid disturbing nearby plants or structures.
After the initial removal, consider the depth needed for your walkway installation. This will depend on the type of materials selected. A consistent layer will help prevent uneven surfaces. Using tools like a soil tamper also ensures that the base is compacted. Proper preparation during this phase helps set the stage for a stable and durable walkway.
Creating a Base Layer
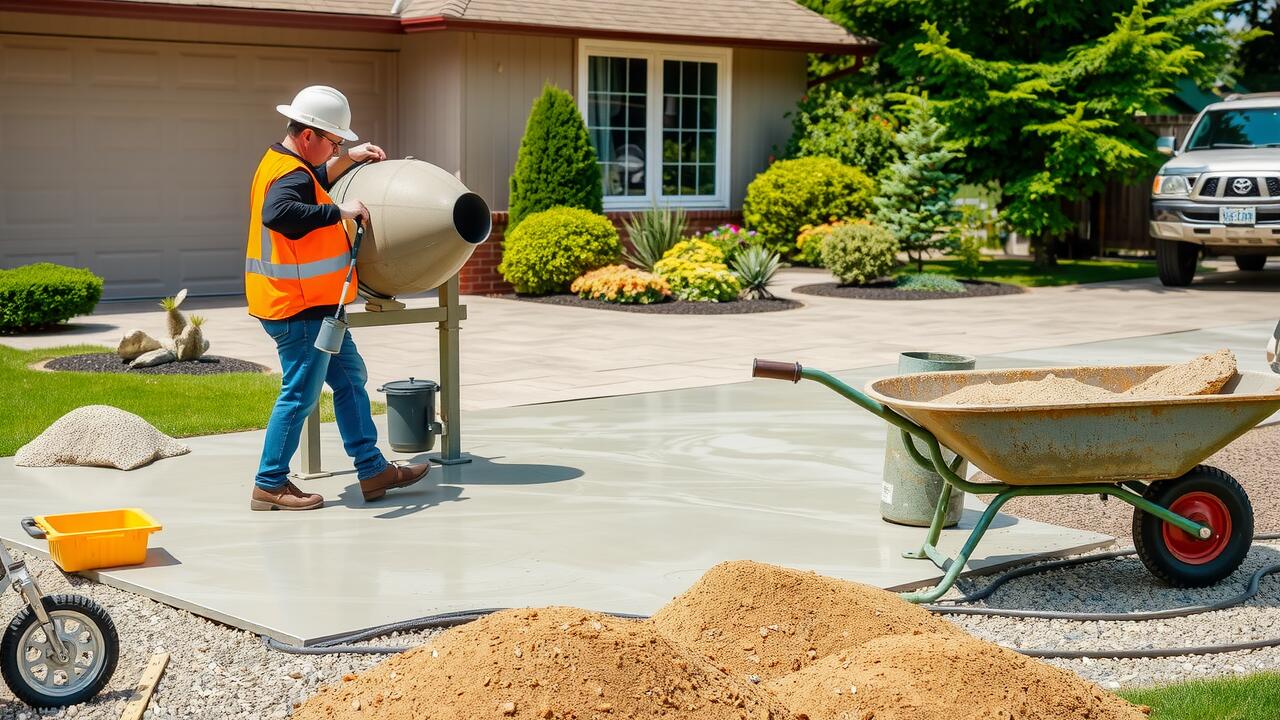
A solid base layer is essential for walkway installation. This layer provides stability and support for the materials used in the walkway. It helps to prevent shifting and settling over time. The choice between sand and gravel often depends on the specific features of the area. Gravel typically offers excellent drainage and is less prone to compaction compared to sand.
When creating the base layer, start by spreading the chosen material evenly across the excavated area. Aim for a depth of about four to six inches, ensuring a consistent level throughout. After spreading the material, use a tamper or a plate compactor to firmly pack it down. Proper compaction is vital for preventing future issues and ensuring longevity.
Choosing Between Sand and Gravel
When preparing for walkway installation, selecting the appropriate base material is crucial. Sand and gravel each have unique properties that can affect the stability and durability of the walkway. Sand is generally easier to work with, providing a smooth surface that can be easily leveled. However, it may compact heavily over time, which could lead to shifting or settling. It is important to assess the specific needs of the walkway, as well as the soil composition of the area, when considering sand as a base layer.
Gravel, on the other hand, offers excellent drainage and stability. With larger particles, gravel allows for better water flow and reduces the likelihood of erosion. Its coarser texture helps to prevent shifting, making it a suitable option for heavier foot traffic areas. When deciding between sand and gravel for your walkway installation, weigh the benefits of each material against the intended use and local climate conditions. Factors such as drainage, soil type, and load-bearing requirements should guide your choice to ensure a long-lasting and functional pathway.
Leveling the Surface
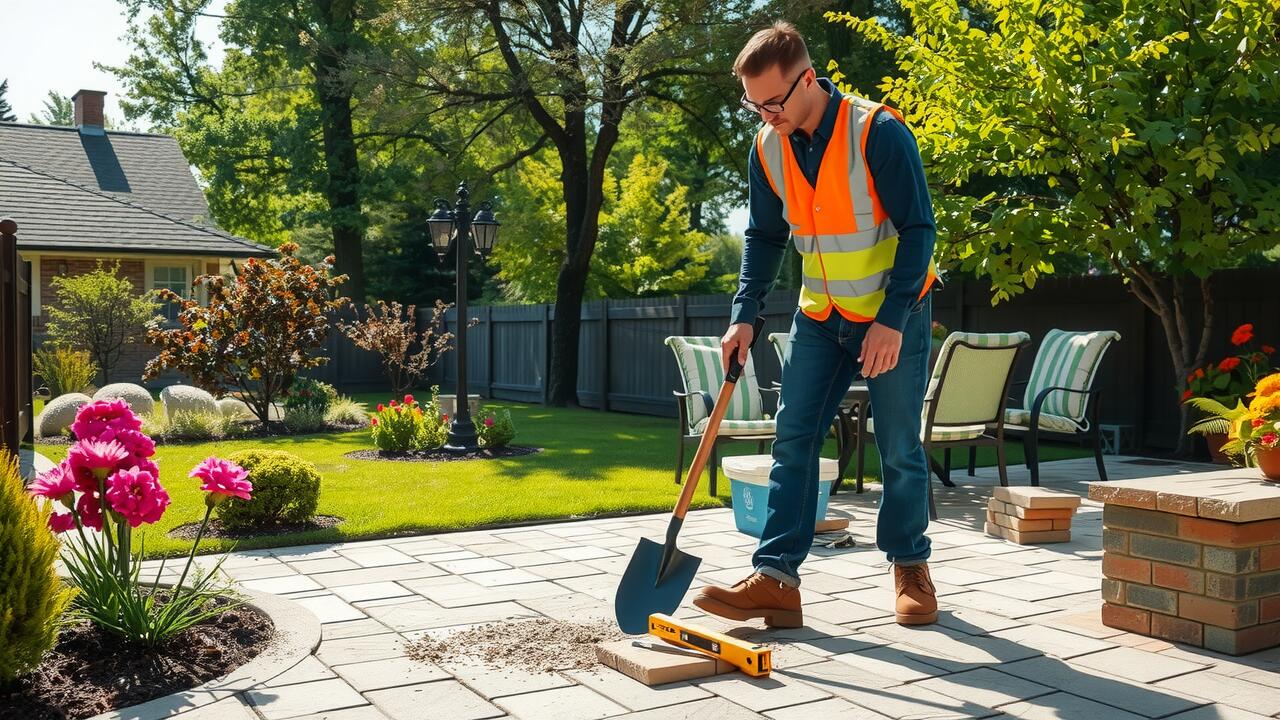
Leveling the surface is a crucial step in the walkway installation process. A properly leveled surface ensures stability and prevents water from pooling on the walkway. Begin by using a long straightedge or board to check the evenness of the soil base. Fill low spots with additional material and compact it to achieve a uniform surface height.
Once the initial leveling is complete, check the slope to ensure proper drainage. A slight slope away from any adjacent structures will help direct water runoff. Use a level tool to confirm that the surface is graded correctly. This attention to detail during the leveling phase will contribute significantly to the durability and functionality of the finished walkway.
Ensuring Proper Drainage
Proper drainage is crucial during walkway installation to prevent water accumulation that can damage the pathway over time. When excavating the ground, it’s essential to create a slight slope away from any adjacent structures. This encourages water runoff and minimizes the risk of pooling. Adding perforated drainage pipes or gravel trenches can further assist in redirecting excess water away from the surface area, ensuring longevity.
After laying the base layer, it’s important to consider how the surface will handle rain and snow. Using materials that promote drainage, such as permeable pavers or gravel, can significantly enhance water flow under and around the walkway. Regular maintenance, such as clearing debris from the surface and ensuring drainage channels remain unobstructed, will help preserve the integrity of the walkway installation over time.
FAQS
What is the first step in preparing the ground for a walkway?
The first step is to excavate the ground where the walkway will be installed. This involves removing any sod, grass, or debris to create a clear workspace.
What are some effective techniques for removing soil during excavation?
Effective techniques for removing soil include using a shovel for smaller areas, a pickaxe for harder ground, or renting a mini-excavator for larger projects to make the process easier and more efficient.
What materials can I use to create a base layer for my walkway?
You can use either sand or gravel to create a base layer. Both materials provide good drainage and stabilization, but your choice may depend on personal preference or specific project requirements.
How do I ensure that the surface of the walkway is level?
To ensure a level surface, use a long, straight board or level to check for evenness across the walkway area. Make adjustments by adding or removing soil as necessary to achieve a flat surface.
Why is proper drainage important when preparing ground for a walkway?
Proper drainage is essential to prevent water pooling on the walkway, which can lead to erosion, cracking, and other damage over time. Ensuring the ground is graded away from structures and the walkway itself will help manage water runoff effectively.
Related Links
Paver Driveways
Paver driveways are known for their aesthetic appeal and versatility. They come in various shapes, sizes, and colors, allowing homeowners to create unique designs that complement their property. This type of driveway can enhance the overall look of a home, providing both functionality and curb appeal. The installation process typically involves preparing the base, placing the pavers, and filling in the joints with sand. Many people appreciate that paver driveways can be laid out in patterns that suit their personal taste while also being manageable for DIY projects.
In terms of installation ease, paver driveways offer several advantages. The process does not usually require specialized equipment, making it accessible for individuals with moderate DIY skills. If a paver becomes damaged, it is often easy to replace without disrupting the entire driveway. Driveway installation with pavers also allows for effective drainage, reducing concerns over flooding and standing water. This versatility makes paver driveways a popular choice for those looking to enhance their outdoor spaces.
Aesthetic Appeal and Installation Ease
Paver driveways offer a unique blend of aesthetic appeal and practicality. Available in various shapes, colors, and materials, they can enhance the charm of any home. The versatility of pavers allows for creative patterns and designs, turning a typical driveway into a stylish focal point. Even after installation, pavers maintain their visual appeal since they are resistant to fading and weather damage.
When it comes to driveway installation, pavers are relatively straightforward. Homeowners can tackle this project with the right tools and guidance, making it accessible for DIY enthusiasts. The interlocking nature of pavers simplifies the process, as they fit together without the need for extensive preparation or concrete setting time. This ease of installation can significantly reduce labor costs while providing a durable surface that stands up to everyday wear.
Permeable Driveways
Permeable driveways are gaining popularity due to their ability to manage stormwater effectively. This type of driveway allows rainwater to pass through, promoting natural filtration and reducing runoff. The installation of permeable materials creates a practical and eco-friendly solution for homeowners seeking to minimize their environmental footprint. Choosing permeable options can lead to a more sustainable landscape and help prevent drainage problems common with traditional pavement.
When considering driveway installation, evaluating the local climate and the soil type can be crucial in determining the best permeable materials. These driveways may require specific aggregates or pavers that encourage water infiltration. While some may perceive permeable driveways as more complex, many installers find that they can be straightforward with the right preparation. Proper grading and base design enhance both the functionality and longevity of the driveway.
Environmental Advantages
Permeable driveways offer significant environmental advantages that make them an appealing choice for homeowners. These systems allow water to infiltrate through the surface, reducing runoff and helping to recharge groundwater supplies. This natural absorption can mitigate issues such as flooding and erosion, which are often exacerbated by traditional impervious driveway materials. Driveway installation using permeable pavers or porous asphalt can contribute to more sustainable urban landscapes.
Moreover, permeable driveways can significantly improve water quality. As rainwater percolates through the surface, it passes through layers of gravel or soil that filter out pollutants before they reach the groundwater. This can lead to cleaner water flowing into local streams and rivers. Choosing permeable materials for driveway installation not only supports environmental health but also aligns with growing concerns over stormwater management and urban development.
Choosing the Right Driveway for Your Space
Selecting the right driveway for your space involves several key considerations. Begin by assessing your budget, as various materials have different costs associated with their installation and maintenance. The size and layout of your property also play a significant role in determining which driveway type will work best. A well-planned driveway installation can enhance your home’s curb appeal while providing functionality.
Additionally, consider the local climate and drainage requirements. Some driveways, such as permeable options, offer solutions for areas with heavy rainfall by managing water runoff effectively. An appropriate choice based on these factors not only simplifies driveway installation but can also contribute to the longevity and durability of the surface. Each type of driveway offers unique benefits, making it essential to align your choice with both practical needs and aesthetic preferences.
Factors to Consider
When considering driveway installation, various factors play a crucial role in determining the best option for your property. Budget is often a primary concern, as different materials come with distinct price points. Additionally, the climate in your region can influence your choice; some surfaces perform better in cold weather, while others are more suited for warmer environments. Homeowners should also think about the intended use of the driveway. Will it accommodate heavy vehicles or simply serve as a path for light foot traffic?
Another important consideration is maintenance. Some driveways require more regular upkeep than others, which can affect long-term costs and labor. Aesthetic preferences should also weigh in. The design of the driveway should complement the overall architecture of the home and the landscape. Lastly, consider the environmental impact of the material chosen. Permeable options can help manage stormwater runoff while traditional materials may have different sustainability implications. Each of these factors contributes to the overall effectiveness and satisfaction with the driveway installation.
FAQS
What is the easiest type of driveway to install?
Paver driveways are often considered one of the easiest types to install due to their modular nature, allowing for straightforward placement and adjustment.
Are permeable driveways difficult to install?
Permeable driveways can be more complex to install than paver driveways, as they require proper drainage systems and specific materials to ensure effectiveness.
What factors should I consider when choosing a driveway?
Key factors to consider include your budget, the climate in your area, the desired aesthetic appeal, maintenance requirements, and environmental impact.
Can I install a driveway myself, or do I need a professional?
While some homeowners may choose to install a paver driveway themselves, hiring a professional is recommended for best results, especially for larger or more complex projects.
How long does it typically take to install a paver driveway?
The installation of a paver driveway can take anywhere from a few days to a week, depending on the size of the area and the specific installation conditions.
Related Links
Wooden Decking as a Patio Option
Wooden decking serves as a popular choice for patio installation due to its natural aesthetic appeal. It can seamlessly blend with various landscapes, enhancing the overall atmosphere of outdoor spaces. Available in different wood types, homeowners often appreciate the warmth and richness it brings. The ability to stain or paint the wood allows for customization, enabling individuals to match their patio to their home’s exterior or garden themes.
In addition to its visual versatility, wooden decking offers durability when properly maintained. Regular sealing and treatment can significantly extend the life of the materials. The installation process remains user-friendly, making it accessible for DIY enthusiasts. With a solid foundation and basic tools, many homeowners can successfully complete their own patio installation, enjoying a functional and stylish outdoor area for years to come.
Natural Look and Versatility
Wooden decking is a popular choice for homeowners seeking a patio that blends seamlessly with natural surroundings. Its organic look enhances the aesthetic appeal of outdoor spaces and provides a warm, inviting atmosphere. The variety of wood types available allows for customization, catering to diverse tastes and preferences. This flexibility ensures that a wooden deck can complement any architectural style and landscape design.
The versatility of wooden decking extends beyond its appearance. It can be easily shaped to fit any area, making it a suitable option for both large and small spaces. During patio installation, considerations such as slope, drainage, and surrounding flora can be easily accommodated, allowing for creative layouts. With the right maintenance, a wooden deck can also offer durability, standing up to various weather conditions while maintaining its charm.
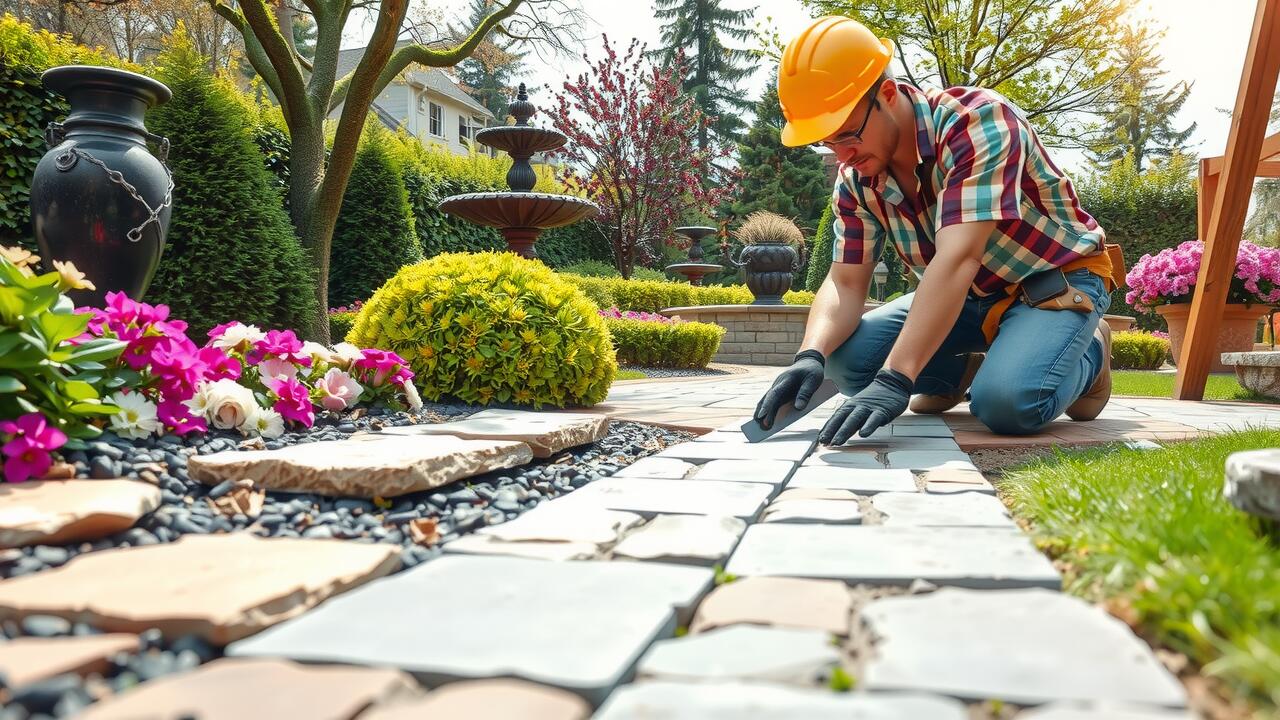
Utilizing Flagstone for Patios
Flagstone is a popular choice for patio installation due to its natural beauty and durability. Each stone offers unique textures and colors, allowing for a custom look that can enhance any outdoor space. The individual pieces can be arranged in various patterns, providing homeowners with ample opportunities for creativity. This versatility enables designers to craft patios that complement both modern and traditional aesthetics, making flagstone a favored option for those looking to elevate their outdoor areas.
In addition to aesthetics, flagstone patios are also practical. The stones are known for their ability to withstand various weather conditions, ensuring longevity in your patio installation. Drainage is typically not a problem, as the natural gaps between the stones allow for water runoff. This feature also leads to fewer maintenance issues, making flagstone an appealing choice for busy homeowners who may not have time for extensive upkeep.
Creativity in Design and Texture
Flagstone offers a unique opportunity for creativity in patio design. With its natural variations in color and texture, each slab creates an individual look that enhances the overall aesthetic of a garden or yard. Homeowners can mix different sizes and shapes of stones to create custom patterns, or they can opt for a more traditional layout. This flexibility allows for personal expression while still maintaining a cohesive appearance.
Incorporating flagstone into patio installation also opens up possibilities for integrating various landscaping elements. The grooves and spaces between stones can be filled with gravel or planted with small ground cover plants, adding depth and visual interest. This not only enriches the design but also enhances the natural feel of the outdoor space, making it an inviting area for relaxation or entertaining.
The Simplicity of Crushed Stone Patios
Crushed stone patios offer a practical solution for those seeking an easy and affordable installation process. These patios require minimal preparation, making them a straightforward choice for DIY enthusiasts and homeowners. By simply leveling the ground and adding a layer of crushed stone, one can create a functional outdoor space that complements any garden or yard. The range of stone sizes allows for customization, providing options that suit personal preferences and aesthetic goals.
In addition to their ease of installation, crushed stone patios are highly versatile. They can be arranged in various patterns or mixed with other materials for added visual interest. This type of patio installation promotes good drainage, helping to prevent water pooling and maintaining the integrity of the surface. With little maintenance required, crushed stone patios are an ideal choice for those looking for a low-effort, durable outdoor area.
Affordable and Straightforward Installation
Crushed stone patios offer an accessible option for those looking to create an outdoor space without the complexities of traditional materials. The installation process is straightforward, requiring minimal tools and expertise. Homeowners can easily clear and level the area, followed by laying down a base layer of crushed stone. This method not only simplifies patio installation but also provides a solid foundation for any future enhancements, like adding outdoor furniture or decorative elements.
Another advantage of using crushed stone is its affordability. The materials are typically less expensive than wood or stone slabs, making it a popular choice for budget-conscious individuals. The quick installation process means that homeowners can enjoy their new patio without a long wait. Crushed stone patios can be customized in terms of color and size to suit personal preferences, leading to a unique outdoor space that remains easy to maintain over time.
FAQS
What is the easiest type of patio to install?
The easiest type of patio to install is often a crushed stone patio, as it requires minimal preparation and can be laid down quickly.
Are wooden decking patios a good choice for beginners?
Yes, wooden decking patios can be a good choice for beginners, especially if pre-cut materials are used, making the installation process more manageable.
How does flagstone compare to other patio materials in terms of installation?
Flagstone can be more challenging to install due to its irregular shapes and the need for proper leveling, but it offers creative design possibilities.
What are the advantages of a crushed stone patio?
Crushed stone patios are affordable, easy to install, and provide good drainage, making them a practical choice for many homeowners.
Can I install a patio myself, or should I hire a professional?
Many homeowners can successfully install a patio themselves, especially with simpler options like crushed stone, but hiring a professional may be beneficial for more complex materials like flagstone.
Related Links
Regional Cost Variations
Regional cost variations significantly impact the overall expense of driveway installation. Prices can differ widely based on geographic location, primarily due to variations in labor costs, materials, and local regulations. In metropolitan areas, where demand for construction services is higher, home and business owners may find that driveway installation costs are elevated. Conversely, rural areas often present lower labor rates and material costs, which can lead to reduced overall prices for similar projects.
The climate and terrain of a region also influence the cost of driveway installation. In areas prone to severe weather conditions, additional measures such as reinforced materials or specialized drainage solutions become necessary, driving up expenses. Local building codes and regulations may further complicate the pricing structure, as homeowners might need to comply with stricter guidelines in certain regions. This variability highlights the importance of obtaining local estimates to accurately gauge the financial implications of driveway installation.
Urban vs. Rural Pricing
Urban areas typically face higher costs for driveway installation. This price increase is often due to greater demand for services, higher labor costs, and the expense associated with obtaining permits in densely populated regions. In cities, limited space may also require specialized equipment for installation, which further drives up the total expense.
In contrast, rural locations often enjoy more competitive pricing for driveway installation. These areas may have lower labor costs and fewer regulations, making it easier for contractors to offer reasonable rates. Additionally, land availability allows for simpler installation processes without the need for complex machinery or logistical considerations, ultimately resulting in a more affordable overall project.
Driveway Size and Layout
The size and layout of a driveway play significant roles in determining overall costs. A standard 100-foot driveway may vary in price depending on its width and the chosen materials. Typically, a wider driveway requires more material, which increases labor and installation costs. Additionally, the layout can impact the complexity of the project. A straight driveway is usually more affordable than one with curves or complicated entry points.
Driveway installation costs also depend on the terrain and site preparation necessary for the project. A level surface is generally less expensive to work on, while a sloped or irregularly shaped lot might require additional grading, thus affecting the total price. If the driveway layout necessitates extensive excavation or the installation of retaining walls, these factors will further influence the final cost.
Impact of Driveway Shape on Cost
The shape of a driveway can significantly influence the overall cost of installation. Straight driveways typically require less material and labor than curved or complex designs. A straightforward layout might also allow for quicker completion, reducing labor costs. In contrast, intricate shapes often necessitate additional planning, grading, and possibly higher-quality materials to achieve the desired aesthetic and functionality. Such complexities can raise both time and financial investment during the construction process.
Furthermore, the driveway’s orientation and its relationship to the home can also affect costs. A shape that requires unique features like retaining walls or additional drainage solutions might increase expenses. Homeowners should consider not just the initial installation costs but also long-term maintenance aspects associated with various shapes. The right design can enhance curb appeal while balancing functionality with budget.
Additional Features and Upgrades
When considering driveway installation, additional features can significantly affect the overall cost. Options such as decorative edging, integrated lighting, or patterns can enhance the aesthetic appeal and functionality of a driveway. Decorative materials like bricks or pavers may also increase expenses, but they offer a custom look that many homeowners desire. Homeowners should weigh the benefits of these upgrades against their budget.
Drainage solutions are another critical aspect of driveway installation that can influence pricing. Proper drainage not only prevents water pooling but also extends the life of the driveway. Implementing features like French drains or grading may add to the initial costs but can save money on repairs over time. Prioritizing effective drainage can ensure the longevity and safety of the driveway, making it a wise investment.
Drainage Solutions
Proper drainage solutions are essential for any driveway installation, especially in areas prone to heavy rainfall or where the soil may retain water. Installing drainage systems can prevent issues such as erosion, pooling water, and structural damage to the driveway. Options include trench drains, surface drains, and French drains, each addressing specific site conditions and water flow patterns. The choice of drainage system impacts the overall cost of the installation, given the labor and materials involved.
Incorporating effective drainage not only enhances the longevity of the driveway but also ensures safety for vehicles and pedestrians. Poor drainage can lead to more significant issues over time, which may require extensive repair or replacement. Homeowners should consider these factors when budgeting for driveway installation. Upfront costs associated with drainage solutions can save money in the long run by mitigating future problems associated with water damage.
FAQS
What is the average cost of a 100 ft driveway?
The average cost of a 100 ft driveway can range from $1,500 to $12,000, depending on materials, location, and additional features.
How do regional variations affect driveway costs?
Regional variations can significantly impact driveway costs, with urban areas typically having higher labor and material costs compared to rural locations.
Does the shape of the driveway influence the overall cost?
Yes, the shape and layout of the driveway can influence the cost, as more complex designs may require additional materials and labor.
Are there additional costs associated with features like drainage?
Yes, incorporating drainage solutions and other upgrades can increase the overall cost of a driveway, potentially adding several hundred to thousands of dollars depending on the complexity.
Can I reduce the cost of my driveway installation?
Yes, you can reduce costs by choosing more affordable materials, simplifying the design, or opting for a DIY installation if you have the necessary skills.
Related Links

Seasonal Considerations for Patios
When homeowners consider patio installation, seasonal factors play a significant role in the overall decision-making process. Regions with harsh winters may see less usage of outdoor spaces during certain months. This reality can influence the types of materials selected, as well as the design, ensuring that the patio remains functional and appealing year-round, even if it is primarily used in the warmer months.
Understanding local climate patterns is essential for maximizing a patio’s value. Choosing weather-resistant materials can extend the patio’s lifespan and maintain its aesthetic appeal despite seasonal changes. Homeowners should also think about seasonal features like fire pits or outdoor heaters, which can enhance comfort. This consideration not only affects the patio’s immediate value but also its market appeal in varying climates.
Year-Round Usage Benefits
A well-designed patio offers opportunities for enjoyment throughout the year, regardless of the season. Families can gather outdoors in the summer for barbecues and relaxation while still utilizing the space for viewing the colorful foliage in the fall. Proper patio installation can enhance these experiences by providing a solid foundation for furniture and accessories, creating a comfortable and inviting atmosphere. When winters arrive, the option to add outdoor heaters or fire pits makes the patio an inviting refuge, allowing for gatherings even in cooler temperatures.
Investing in a functional patio can significantly increase a home’s value due to its versatility. Buyers often look for properties with outdoor living spaces, recognizing that they can host everything from casual gatherings to special celebrations. The benefits of patio installation extend beyond mere aesthetics; they create an additional living area that seamlessly connects indoor comforts with outdoor natural beauty. This year-round utility can make a crucial difference in the perception of a property’s worth.
Hiring Professionals for Patio Installation
Investing in professional patio installation can significantly enhance the quality of the final product. Experts bring specific skills and experiences that can alleviate common pitfalls associated with DIY projects. They understand the nuances of design, materials, and local regulations, ensuring that the patio meets safety standards. This expertise not only streamlines the process but can also provide a warranty for the work completed, adding to the overall peace of mind for homeowners.
Finding the right contractor for patio installation is crucial to achieving the desired result. Homeowners should consider researching multiple options, seeking referrals from friends or family, and reading online reviews. It is beneficial to request quotes and compare services offered by different contractors. This due diligence can help in selecting a professional who aligns with both budgetary needs and quality expectations. Effective communication about project scope and timelines further solidifies the contractor-client relationship.
Finding the Right Contractor
When searching for a contractor for patio installation, it’s essential to focus on experience and reputation. Look for professionals who specialize in outdoor spaces and have a portfolio showcasing their previous work. Reading online reviews and asking for referrals from friends or family can provide insights into a contractor’s reliability and craftsmanship. Establishing a clear communication channel from the outset helps ensure that expectations are aligned and that the project proceeds smoothly.
Once you have a shortlist of potential contractors, consider interviewing them about their approach to patio installation. Discuss timelines, materials, and any permits required for the project. Transparency in pricing is crucial, so request detailed quotes and understand what is included in the cost. This process not only helps gauge the contractor’s expertise but also allows you to build a rapport and trust that will benefit the project.
DIY Patio Projects and Value Impact
Embarking on DIY patio projects can significantly impact the overall value of a property. Homeowners often find this an appealing way to enhance their outdoor spaces without incurring the costs of professional labor. Successful projects rely on careful planning, thorough research, and an understanding of materials. This hands-on approach can not only yield a personalized design but also reflect the homeowner’s taste and commitment to maintaining the property.
While DIY patio installation offers cost savings, it’s essential to consider the potential downsides. Poor execution or a lack of proper materials may lead to long-term issues like drainage problems or structural instability. These factors can detract from the value of the home rather than enhance it. Investing the time to educate oneself about patio construction techniques can mitigate risks and maximize the return on this labor-intensive investment.
Weighing Costs and Benefits
When considering a DIY patio project, it is essential to evaluate the costs versus the potential benefits. While materials and tools can incur significant upfront expenses, the value added to your home can often justify these investments. A well-constructed patio enhances curb appeal and expands usable living space, making it an attractive feature for potential buyers. Assessing whether you have the necessary skills and time to complete the project is crucial, as improperly executed installations can lead to costly repairs down the line.
Hiring professionals for patio installation can also present a favorable return on investment. Experienced contractors bring expertise and efficiency, ensuring a high-quality finish that may be difficult to achieve on your own. The initial expense may be higher than a DIY approach, but the peace of mind that comes from professional workmanship can save future headaches. Additionally, a professionally installed patio can better align with local building codes and design standards, further enhancing property value.
FAQS
Does adding a patio increase my home’s value?
Yes, adding a patio can increase your home’s value by enhancing outdoor living space and improving curb appeal, which can be appealing to potential buyers.
What are the seasonal considerations for having a patio?
Seasonal considerations include how the patio will be used during different times of the year, the climate in your area, and the materials that can withstand seasonal weather changes.
Should I hire professionals or attempt a DIY patio project?
This depends on your budget, skill level, and the complexity of the project. Hiring professionals can ensure high-quality installation, while DIY projects can save costs if you have the necessary skills.
How do I find the right contractor for patio installation?
Look for licensed contractors with good reviews, ask for references, and obtain multiple quotes to compare prices and services before making a decision.
What are the costs vs. benefits of DIY patio projects?
DIY projects can be more cost-effective, but they may require time and effort, and there is a risk of mistakes that could lead to additional costs. Weigh your skills and the potential for added value against these factors.
Related Links
Using Recycled Materials for a Green Patio
Recycled materials have gained popularity as an eco-friendly option for patio installation. Using materials such as reclaimed wood, recycled bricks, or even crushed concrete creates a unique aesthetic while reducing the demand for new resources. These options are often more affordable than traditional materials, leading to cost savings that can be reinvested in other garden features or outdoor décor. The variety offered by recycled elements also allows homeowners to express their creativity and personalize their outdoor spaces.
Incorporating recycled materials not only contributes to a greener environment but also enhances the overall durability of the patio. Many reclaimed items have already proven their strength through years of use in other applications. By choosing recycled options for patio installation, homeowners contribute to waste reduction and environmental conservation. Such choices reflect a commitment to sustainability while providing practical advantages, making them an appealing choice for budget-conscious individuals looking to create beautiful outdoor areas.
Environmental Benefits and Savings
Using recycled materials for patio installation not only proves to be cost-effective but also contributes positively to the environment. Reclaimed bricks, stones, and concrete can give a unique look while reducing landfill waste. This approach diminishes the need for new materials, which often require extensive energy and resources to produce. By opting for recycled options, homeowners can enjoy financial savings while making a sustainable choice.
The environmental benefits extend beyond just choosing materials. A patio created with eco-friendly methods promotes biodiversity and can help manage stormwater. Plants integrated into the patio design can improve air quality and create habitats for local wildlife. Emphasizing these factors during patio installation allows for a space that is both functional and beneficial to the surrounding ecosystem, making this a wise investment for the future.
The Role of Landscaping in Cost Management
Landscaping plays a crucial role in managing the overall costs associated with patio installation. By thoughtfully integrating natural elements into the design, homeowners can enhance both aesthetics and functionality without significantly increasing expenses. Selecting native plants and low-maintenance greenery can reduce ongoing care costs while simultaneously improving the patio’s environmental footprint. When layered with strategic hardscaping choices, these plants can create a serene outdoor space that feels more luxurious without breaking the bank.
Incorporating landscaping features can also assist in avoiding unnecessary expenses during the patio installation process. Utilizing features like decorative stones or gravel as a base can minimize the need for more expensive materials. By blending these elements seamlessly, the outdoor area can be transformed into a cohesive environment. Effective landscaping not only elevates the overall look but also ensures that the investment in patio installation remains budget-friendly in the long run.
Integrating Plants and Hardscaping
The integration of plants into a hardscaping design can enhance the overall aesthetic of a patio while potentially lowering costs. Choosing low-maintenance plants that thrive in your climate can reduce the need for extensive watering and care. Using native species not only contributes to a sustainable environment but can also complement the hardscaping materials used in patio installation. The careful selection of greenery can transform an ordinary patio into a vibrant outdoor space without significantly increasing the budget.
Incorporating plants can also help define the patio area and create a sense of depth. Strategically placing shrubs, flowers, or ornamental grasses around hardscaped elements can soften the appearance of stone or concrete surfaces. This approach allows for a more intimate and inviting atmosphere, encouraging outdoor use. When planning for patio installation, considering the interplay between hardscaping and landscaping ensures a unified look and can often lead to cost savings on both materials and maintenance.
DIY vs. Hiring Professionals
When considering patio installation, many homeowners weigh the options between DIY projects and hiring professionals. A DIY approach can significantly reduce costs, as it eliminates labor expenses. Tools and materials can be sourced at competitive prices, and the process can become a fulfilling weekend project, allowing homeowners to customize their patios according to personal taste.
On the other hand, hiring professionals for patio installation brings expertise and efficiency. Experienced contractors understand the nuances of materials and site preparation, ensuring a higher-quality finish. While this option may require a larger initial investment, it often translates to long-term benefits in durability and aesthetics. Careful consideration of both choices can lead to the best decision for individual circumstances.
Cost Analysis of Installation Methods
When considering patio installation methods, the choice between DIY and hiring professionals can significantly impact overall costs. A DIY approach may involve purchasing materials and tools while relying on personal labor, potentially leading to substantial savings. However, this option requires time and skill, which some homeowners may not possess. In contrast, hiring professionals involves upfront labor costs but promises a higher quality finish and adherence to local regulations.
Evaluating the complexity of the patio design can also affect the decision-making process. Simple surface options like gravel or concrete pavers may allow for more straightforward DIY installation. More intricate designs or materials, such as natural stone or intricately patterned tiles, often necessitate professional expertise to ensure proper installation and longevity. Understanding these factors helps homeowners make informed decisions regarding their patio installation, balancing budget constraints with desired outcomes.
FAQS
What is the cheapest material to use for a patio surface?
The cheapest materials for a patio surface typically include gravel, concrete, and recycled materials like old bricks or pallets. Each option varies in price, durability, and aesthetic appeal.
Can using recycled materials save me money on my patio project?
Yes, using recycled materials can significantly reduce costs while promoting sustainability. Materials such as reclaimed bricks, stones, or wood can be much cheaper than new materials and provide unique character to your patio.
How can landscaping help reduce patio costs?
Proper landscaping can enhance the overall look of your patio while reducing the need for expensive hardscaping options. By integrating plants and natural elements, you can create a more inviting space without high installation costs.
Is it more cost-effective to install a patio myself or hire a professional?
Generally, undertaking a DIY patio project can save you money on labor costs. However, if you’re inexperienced, hiring a professional might be worth the investment to avoid costly mistakes and ensure proper installation.
What factors should I consider when choosing a patio surface?
When choosing a patio surface, consider your budget, the climate of your area, maintenance requirements, durability, and the overall design aesthetic you want to achieve. These factors will help you determine the best and most cost-effective option for your needs.
Related Links
Weather Impact on Stamped Concrete
Weather plays a significant role in the longevity of stamped concrete. Extreme temperatures, both hot and cold, can cause the material to expand and contract, leading to surface cracks or other forms of damage. Rain and moisture can also infiltrate the surface, creating additional stress as it freezes and thaws. Proper drainage and protective sealants can mitigate some of these effects, but it’s essential to consider the local climate when planning a stamped concrete installation.
In regions with harsh winters, the use of de-icing chemicals can accelerate wear and tear on stamped concrete. On the other hand, intense sunlight and heat can lead to fading and discoloration over time. With thoughtful maintenance strategies, including regular sealing and appropriate care during extreme weather conditions, homeowners can extend the life of their stamped concrete surfaces. Understanding these weather impacts is crucial for anyone considering a stamped concrete installation for patios, walkways, or driveways.
Effects of Climate on Durability
The durability of stamped concrete is significantly influenced by the local climate and weather conditions. In areas with extreme temperatures, both hot and cold, the material can experience expansion and contraction. This phenomenon can lead to cracking if the installation lacks proper sealing or if inadequate materials were used during the stamped concrete installation process. Rain and humidity can also affect the surface. Excess moisture can cause efflorescence, a white powdery substance that forms as minerals within the concrete react with water.
For regions that experience heavy snowfall, the use of road salts can be detrimental to stamped concrete. These salts can penetrate the surface, resulting in gradual deterioration. Proper care and maintenance following the stamped concrete installation can extend its lifespan, allowing it to withstand the varying effects of climate. Ensuring that the surface is sealed regularly and protected from harsh elements can help mitigate these risks and preserve the aesthetic appeal of the installation over time.
Cost vs. Longevity
When evaluating stamped concrete installation, it’s essential to consider the balance between cost and longevity. The initial investment for stamped concrete can be higher than traditional concrete due to its customization options. However, the aesthetic appeal and durability can make it a worthwhile choice for homeowners looking to enhance their outdoor spaces. With proper maintenance, stamped concrete can last for decades, effectively offering value over time.
Longevity is a critical factor in assessing the overall cost-effectiveness of stamped concrete installation. Unlike other materials that may require frequent replacement, stamped concrete tends to withstand wear and tear better, particularly when sealed appropriately. While upfront costs are significant, the long-term savings associated with reduced repair and replacement needs often justify the expense. This approach allows homeowners to enjoy their investment without the constant worry of upkeep.
Analyzing Long-Term Investment
Investing in stamped concrete installation can be a wise choice for homeowners looking to enhance their property’s aesthetic appeal and durability. This material often mimics more expensive options, such as stone or brick, while providing a cost-effective solution. When considering long-term value, it is essential to factor in initial installation costs, maintenance requirements, and the potential for increased property value over time. Stamped concrete’s resilience makes it suitable for various applications, from patios to driveways, which adds versatility to its appeal.
Long-term investment in stamped concrete installation often pays off due to its durability and low maintenance needs. Unlike other materials prone to cracking or fading, stamped concrete can withstand the elements with proper care. Homeowners should consider factors such as climate, usage, and aesthetic preferences when making their decision. The longevity of stamped concrete typically surpasses that of traditional surfaces, making it a practical addition that balances affordability and visual charm over the years.
Repair Options for Stamped Concrete
Repairing stamped concrete requires careful assessment to determine the best approach. Small cracks and chips can often be addressed with a concrete patching compound that matches the color and texture of the original finish. In cases of more extensive damage, such as large cracks or settling, it may be necessary to consider resurfacing the concrete. This involves applying a new layer of concrete that can restore the surface and improve the appearance of the stamped pattern.
For those looking to maintain the integrity of their stamped concrete installation, regular sealing is essential. Sealing helps protect against water penetration and staining, which can accelerate wear over time. If significant repairs are needed, enlisting the help of professionals can ensure that the work is done correctly. Professional services can provide not only expertise but also access to high-quality materials that can enhance the longevity of the stamped concrete.
When to Consider Professional Help
When it comes to addressing issues with stamped concrete, knowing when to seek professional help can be key to maintaining its longevity and appearance. Homeowners may notice cracks, stains, or fading that could require a deeper assessment. If DIY repair attempts seem overwhelming or the damage is extensive, consulting a professional can ensure the job is done correctly. They have the tools and expertise to provide effective solutions, especially for complex problems that arise from improper installation or wear over time.
Additionally, professional assistance often becomes necessary during the initial installation phase. Stamped Concrete Installation demands precision and knowledge to achieve the desired aesthetic and structural integrity. An experienced contractor can help navigate through the selection of patterns, colors, and sealants, while also addressing any localized environmental factors. Investing in professional installation not only enhances the final product but also contributes to the material’s durability, making future repairs less likely.
FAQS
How long can I expect my stamped concrete to last?
With proper installation and maintenance, stamped concrete can last anywhere from 10 to 30 years. Factors such as climate, usage, and care can significantly influence its longevity.
Does weather affect the durability of stamped concrete?
Yes, weather plays a crucial role in the longevity of stamped concrete. Extreme temperatures, heavy rainfall, and freeze-thaw cycles can impact its structural integrity if not properly managed.
What can I do to extend the life of my stamped concrete?
Regular maintenance, including sealing, cleaning, and addressing any cracks or damage promptly, can help extend the lifespan of stamped concrete. Additionally, avoiding heavy loads and using protective mats can also be beneficial.
Is stamped concrete worth the investment?
Yes, stamped concrete can be a worthwhile investment due to its durability and aesthetic appeal. While the initial cost may be higher than traditional concrete, its long lifespan and low maintenance needs often make it a cost-effective choice in the long run.
When should I consider hiring a professional for stamped concrete repairs?
If you notice significant cracks, uneven surfaces, or other major issues that you cannot address on your own, it is advisable to consult a professional. They can assess the damage and recommend appropriate repair options to ensure the longevity of your stamped concrete.
Related Links
Integral Color vs. Surface Color
When considering stamped concrete installation, the choice between integral color and surface color plays a significant role in the final appearance. Integral color involves adding pigment directly to the concrete mix before pouring, resulting in a uniform color that penetrates the entire slab. This method offers vibrancy and depth, as the color becomes part of the concrete itself, making it less prone to fading or wear over time.
In contrast, surface color is applied after the concrete has been poured and set. This technique typically involves the use of color hardeners or stains that are either broadcast onto the surface or applied with a roller or sprayer. While surface coloring can achieve a wide range of effects and customization, it may be more susceptible to chipping or wearing away, particularly in high-traffic areas. By understanding these differences, clients can make informed decisions during their stamped concrete installation.
Choosing the Right Coloring Technique
When considering the coloring of your stamped concrete installation, it is essential to explore various techniques to achieve the desired aesthetic. Integral color involves mixing pigments directly into the concrete before pouring, resulting in a uniform hue throughout the surface. This method allows the color to remain consistent even as the surface wears down over time. On the other hand, surface color relies on applying stain or sealer on top of the cured concrete. This technique provides a unique appearance and can enhance the texture but requires careful maintenance to ensure longevity.
Choosing the right coloring technique also depends on the climate and the intended use of the concrete surface. For outdoor projects exposed to harsh weather, integral color may be more beneficial due to its durability. In contrast, surface coloring can offer greater design versatility, allowing for intricate patterns and effects. Homeowners should consider the desired visual outcomes alongside performance factors. Engaging with a professional during stamped concrete installation can provide valuable insights into which method best suits the individual project’s needs.
Sealing Stamped Concrete
Sealing stamped concrete plays a crucial role in the longevity and appearance of the surface. During stamped concrete installation, applying a sealant helps protect the concrete from stains, moisture, and UV damage. It enhances the colors and textures achieved during the stamping process, ensuring the final product showcases its full aesthetic potential. A well-applied seal can also create a barrier that reduces the likelihood of surface cracking or spalling, which can occur over time without proper protection.
The sealing process typically involves choosing the right type of sealant, which can either be film-forming or penetrating. Film-forming sealants provide a glossy finish and are ideal for decorative surfaces, while penetrating sealants offer a more natural look and protect the concrete from within. Proper application requires thorough cleaning and drying of the surface before the sealant is applied. Regular maintenance of the sealant will ensure that the stamped concrete continues to look vibrant and withstand the elements, making it essential for homeowners to incorporate sealing into their care routine.
Importance of Proper Sealing
Proper sealing is essential in ensuring the longevity and enhanced appearance of stamped concrete installation. A good seal protects the surface from water damage, stains, and UV rays, which can lead to fading over time. Without adequate sealing, the decorative finish can deteriorate more quickly, resulting in costly repairs or replacements.
Sealing also helps to prevent the growth of mold and mildew, which can thrive in damp conditions. A well-sealed surface allows for easier cleaning, maintaining the vibrant colors and patterns that make stamped concrete an attractive choice for driveways, patios, and walkways. Taking the time to apply a high-quality sealant after installation ensures that your stamped concrete remains durable and visually appealing for years to come.
Maintenance Tips for Longevity
Proper maintenance is crucial for ensuring the longevity of stamped concrete after installation. Regular cleaning helps prevent the buildup of dirt and debris, which can dull the appearance over time. A gentle pressure wash or a mild detergent mixed with water can be effective. Avoid using harsh chemicals or heavy-duty scrubbers, as these can damage the surface and disrupt the color integrity.
Additionally, applying a sealant every couple of years reinforces the protective layer over the stamped concrete. This helps shield it from stains and weather-related wear. Inspecting the surface for cracks or wear is also important. Addressing any issues promptly can prevent more extensive damage down the line, ensuring that your stamped concrete installation remains vibrant and structurally sound for many years.
Routine Care and Cleaning
Routine care and cleaning are essential for preserving the beauty of stamped concrete. Regular cleaning helps to remove dirt and debris that can accumulate on the surface. Use a broom or a leaf blower to clear away leaves and larger particles. For more thorough cleaning, a pressure washer with a mild detergent can effectively eliminate stubborn stains and restore the surface’s appearance. This regular upkeep is crucial, especially after stamped concrete installation, as it helps maintain the intended aesthetic and finish.
Avoid using harsh chemicals or acidic cleaners, as these can damage the surface and compromise the seal. Instead, stick to pH-neutral products specifically designed for concrete. After cleaning, ensure the surface is completely dry before applying any sealant to maintain its integrity. Keeping up with these maintenance practices will prolong the life of your stamped concrete and keep it looking fresh for years to come.
FAQS
What is stamped concrete?
Stamped concrete is a decorative concrete technique that involves pouring concrete and then imprinting it with patterns and textures to resemble natural materials like stone, brick, or tile.
How is integral color different from surface color in stamped concrete?
Integral color is added to the concrete mix before pouring, providing a uniform color throughout the concrete. Surface color is applied after the concrete has cured, allowing for a variety of colors but may require more maintenance.
What steps are involved in sealing stamped concrete?
Sealing stamped concrete involves cleaning the surface, allowing it to dry completely, and then applying a sealant to protect the concrete from stains, moisture, and UV damage. This process is crucial for enhancing the color and longevity of the stamped design.
Why is proper sealing important for stamped concrete?
Proper sealing is important because it protects the surface from dirt, stains, and weathering, enhances the appearance of the color and texture, and helps prevent cracks and surface damage.
What are some maintenance tips for ensuring the longevity of stamped concrete?
To maintain stamped concrete, regularly sweep or hose off debris, clean with a mild detergent, avoid harsh chemicals, and reseal the surface every few years to protect it from wear and tear.
Related Links
Exploring Paver Patios
Paver patios offer an attractive and durable solution for homeowners looking to enhance their outdoor spaces. These patios consist of individual paving stones or bricks, which can be arranged in various patterns, allowing for creative designs. The versatility of paver materials provides a range of color and texture options. This flexibility helps homeowners match their patios to existing landscapes or home exteriors. Additionally, the interlocking nature of pavers contributes to their stability, making them less prone to cracks compared to poured concrete.
When considering patio installation, the initial cost and long-term value are important factors. While the upfront investment for paver materials may be higher than some alternatives, they often prove more cost-effective over time due to their longevity and low maintenance needs. A well-installed paver patio can withstand various weather conditions without significant wear, translating to fewer repairs and replacements in the future. This enduring quality can make paver patios a wise choice for those seeking an economical yet stylish outdoor solution.
Advantages of Interlocking Pavers
Interlocking pavers offer a versatile and appealing option for patio installation, as they come in a variety of colors and shapes. This allows homeowners to create unique patterns that enhance the outdoor aesthetic. The modular design of interlocking pavers ensures ease of installation, making it a project that can be tackled by DIY enthusiasts. Additionally, they provide stability once laid out properly, reducing the risk of shifting or settling over time.
Another significant advantage of interlocking pavers is their durability. Made from materials such as concrete or stone, they withstand varying weather conditions, making them suitable for different climates. Their resistance to cracking and fading ensures that the patio maintains its visual appeal with minimal effort. If necessary, individual pavers can be easily replaced without affecting the overall layout, making this an economical choice for long-term patio maintenance.
Choosing Wood for Your Patio
When selecting wood for your patio, several factors come into play. Cedar and redwood are popular choices due to their natural resistance to decay and insect damage. These woods provide aesthetic appeal with their rich colors and can withstand outdoor conditions well. However, they tend to be on the pricier side. Another option includes pressure-treated lumber, which is often more affordable and durable. This wood is treated to resist moisture and pests, making it a practical choice for patio installation.
Considering the budget, it’s essential to balance cost with quality. While cheaper lumber options like pine are available, they may not hold up as well in outdoor environments. Taking the time to research and compare options ensures that you choose wood that fits your budget without compromising on longevity. Proper patio installation techniques, such as ensuring proper drainage and sealing the wood, can also enhance durability and protect your investment over time.
Cost-Effective Lumber Options
When considering wood for your patio installation, choosing the right type of lumber can significantly impact costs. Pressure-treated pine is a popular choice due to its affordability and resistance to rot. It’s widely available and easy to work with, making it ideal for DIY projects. Other options like cedar and redwood offer natural resistance to insects and decay but come at a higher price point.
Reclaimed wood provides another cost-effective alternative for patio installation. Not only does it add character and charm, but it can also save money compared to buying new lumber. Sourcing local salvaged wood from old buildings or fences can yield beautiful materials while being environmentally friendly. Each of these options allows homeowners to create a durable and visually appealing patio without breaking the bank.
Patio Maintenance on a Budget
Maintaining a patio on a budget involves simple strategies that can significantly extend its lifespan. Regular cleaning is essential to prevent dirt and debris buildup. Tools like brooms, pressure washers, and mild detergents can be used to keep surfaces looking fresh. Sealing pavers or wood every few years can protect them from weather damage and stains, minimizing long-term repair costs.
In addition to cleaning, consider the seasonal maintenance tasks to prepare your patio for various weather conditions. Inspecting for cracks or wear after patio installation helps catch issues early. Clearing leaves and debris in the fall prevents them from trapping moisture and causing mold or rot. These practices reduce the need for expensive repairs, allowing you to enjoy your outdoor space without the hefty price tag.
Tips for Low-Cost Upkeep
Maintaining a patio on a budget requires a few strategic approaches. Regular cleaning prevents the buildup of dirt and grime, which can lead to more expensive repairs down the line. A simple rinse with a hose can do wonders and shouldn’t take much time. Using a broom or a leaf blower can also help keep debris from accumulating, ensuring your patio remains inviting and safe for use.
When it comes to repairs after patio installation, addressing small issues promptly can save you money in the long run. Inspect for cracks or loose stones and tackle these problems early. For wood patios, checking for splintering or rotting wood is crucial. A timely coat of sealant not only protects your investment but also extends the life of the materials without breaking the bank. Staying proactive in upkeep will minimize costly replacements or extensive maintenance in the future.
FAQS
What is the cheapest method for building a patio?
The cheapest method for building a patio often involves using gravel or crushed stone as the base material, which is more affordable than pavers or wood.
Are interlocking pavers a cost-effective option?
Yes, interlocking pavers can be a cost-effective option as they are durable and require minimal maintenance, which can save you money in the long run.
What types of wood are the most affordable for patio construction?
Pressure-treated lumber and cedar are typically considered cost-effective options for building a wooden patio due to their availability and resistance to rot.
How can I maintain my patio on a budget?
To maintain your patio on a budget, you can regularly clean it, seal surfaces when necessary, and repair any damage promptly to avoid costly fixes down the line.
What are some low-cost alternatives to traditional patio materials?
Low-cost alternatives to traditional patio materials include using recycled bricks, concrete slabs, or even creating a natural stone patio with locally sourced materials.
Related Links
Enhancing Your Concrete Slab
Enhancing your concrete slab not only improves aesthetics but also increases its functionality. One popular option is to incorporate decorative elements during the patio installation process. Techniques such as stamping or staining can transform an ordinary slab into a visually appealing outdoor space. These treatments can mimic the look of stone or brick, adding character while maintaining the durability of concrete.
Another way to enhance a concrete slab is through the addition of functional features. Consider integrating built-in seating or planters during patio installation. These additions not only maximize the use of space but also create a cohesive design. Strategic placement of outdoor lighting can further elevate the atmosphere, making the area usable and inviting after dark.
Surface Treatments
Surface treatments for concrete slabs can significantly enhance both aesthetics and durability. By applying various coatings or finishes, homeowners can customize the look of their concrete surfaces. Popular options include staining, sealing, and polishing. Staining adds rich colors that can mimic stone or create unique patterns. Sealing protects the slab from moisture and stains while offering a glossy or matte finish. Polished concrete provides a sleek, high-end appearance, making it popular for indoor spaces and outdoor areas alike, such as during patio installation.
Incorporating surface treatments during patio installation can also improve traction and reduce the risk of slips and falls. Textured finishes can create a non-slip surface, ideal for areas exposed to rain. Additionally, surface treatments can help prevent cracking and weathering over time. Homeowners should consider their specific needs and preferences when choosing a treatment, balancing aesthetics with functionality. Proper application and maintenance of the chosen finish will ensure the longevity of the concrete slab.
DIY vs. Hiring Professionals
Many homeowners consider a DIY approach for patio installation due to the potential cost savings. With proper research and planning, individuals can manage the project efficiently. Tasks such as measuring, pouring, and finishing the concrete can be tackled if one has the right tools and some basic construction knowledge. Additionally, the satisfaction of completing a project independently can be rewarding for many.
On the other hand, hiring professionals for patio installation guarantees a high level of expertise. Experienced contractors understand the nuances of mixing and pouring concrete, ensuring durability and proper drainage. They can navigate any unforeseen issues during the project, which may be challenging for inexperienced individuals. The investment in skilled labor often results in a polished finish and minimizes the risk of costly mistakes.
Pros and Cons of Each Option
Choosing to tackle a patio installation project yourself can be appealing due to potential cost savings. DIY enthusiasts often enjoy the satisfaction of creating something with their own hands. However, without the proper skills or experience, mistakes can lead to additional expenses and frustration, especially when ensuring the slab’s durability and levelness.
Hiring professionals for patio installation offers expertise and efficiency. Contractors possess the knowledge to navigate challenges that may arise during construction. Nonetheless, this option typically comes with a higher upfront cost. Homeowners must weigh the benefits of quality and time against the budget they have allocated for the project.
Permitting and Code Requirements
When planning for a 24×24 concrete slab, it’s essential to understand local permitting and code requirements. Many municipalities require permits for patio installation, especially if the slab is intended for a permanent structure. Before beginning your project, check with your local zoning board or building department. This step ensures compliance with local regulations that cover aspects like drainage, distance from property lines, and other safety considerations.
Understanding these regulations is crucial to avoid unexpected delays or fines. Each locality may have specific codes regarding the depth of the slab, reinforcement standards, and how the slab interacts with existing structures. Failing to adhere to these requirements can lead to significant problems down the line, including the necessity for costly modifications or the complete removal of the slab. Proper planning in line with local codes sets the foundation for a successful patio installation.
Understanding Local Regulations
Local regulations play an essential role in any patio installation project. Homeowners must be aware of zoning laws, building codes, and permits required for construction. These regulations can vary widely depending on the municipality. It’s important to check with local authorities to ensure compliance with all necessary guidelines.
Ignoring local regulations can lead to fines or complications down the road. In some cases, failure to obtain the required permits may result in the need to remove or modify the installed slab. Proper planning involves understanding and adhering to these rules to avoid potential issues. Being proactive about local regulations can save time and money in the long run.
FAQS
How much does a 24×24 concrete slab typically cost?
The cost for a 24×24 concrete slab can vary widely but typically ranges from $1,200 to $2,400, depending on factors like location, materials, and labor.
What factors can influence the price of a concrete slab?
Several factors can influence the price, including the thickness of the slab, surface treatments, local labor rates, and any additional features like reinforcement or excavation needed.
Can I save money by pouring the slab myself?
Yes, pouring the slab yourself can save money on labor costs, but it’s important to consider your skill level, tools required, and the amount of time it will take.
Are there any permits required for pouring a concrete slab?
Yes, many local jurisdictions require permits for pouring concrete slabs, especially for larger projects. It’s best to check with your local building department for specific requirements.
What surface treatments can enhance my concrete slab?
Surface treatments such as staining, sealing, or applying a decorative overlay can enhance the appearance and durability of your concrete slab, adding to the overall cost.