Category: Uncategorized
Exploring Paver Patios
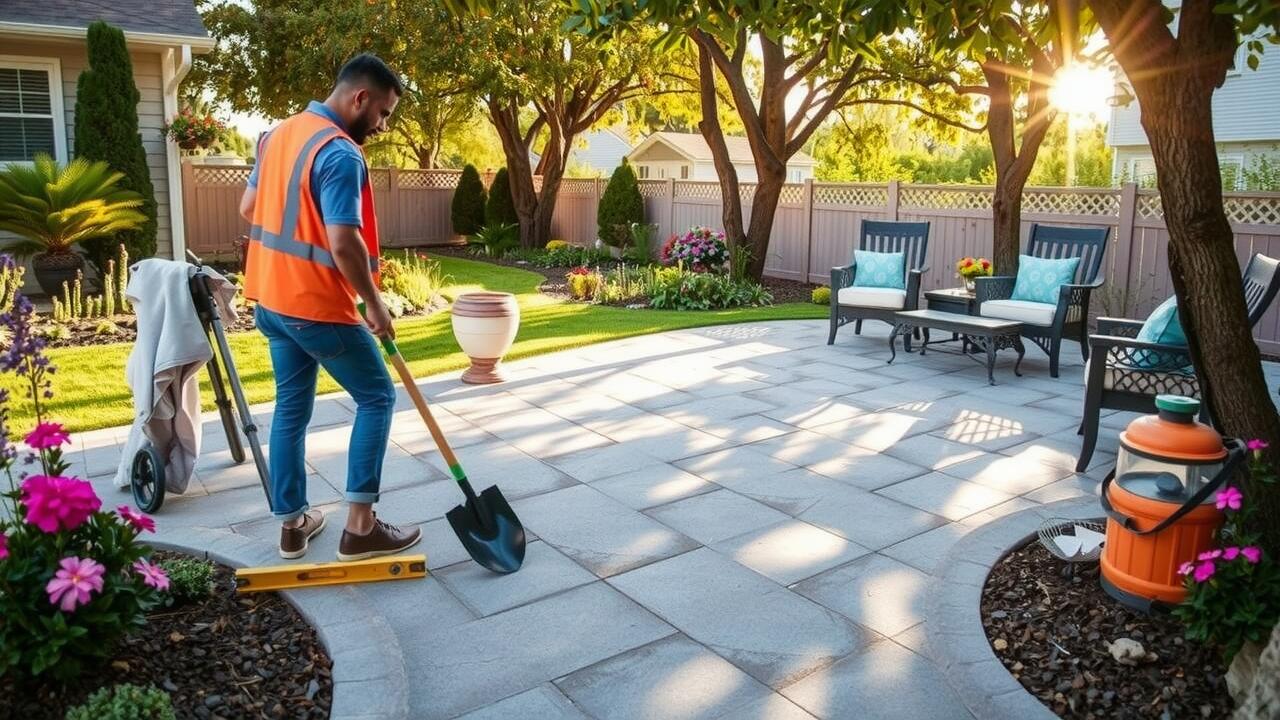
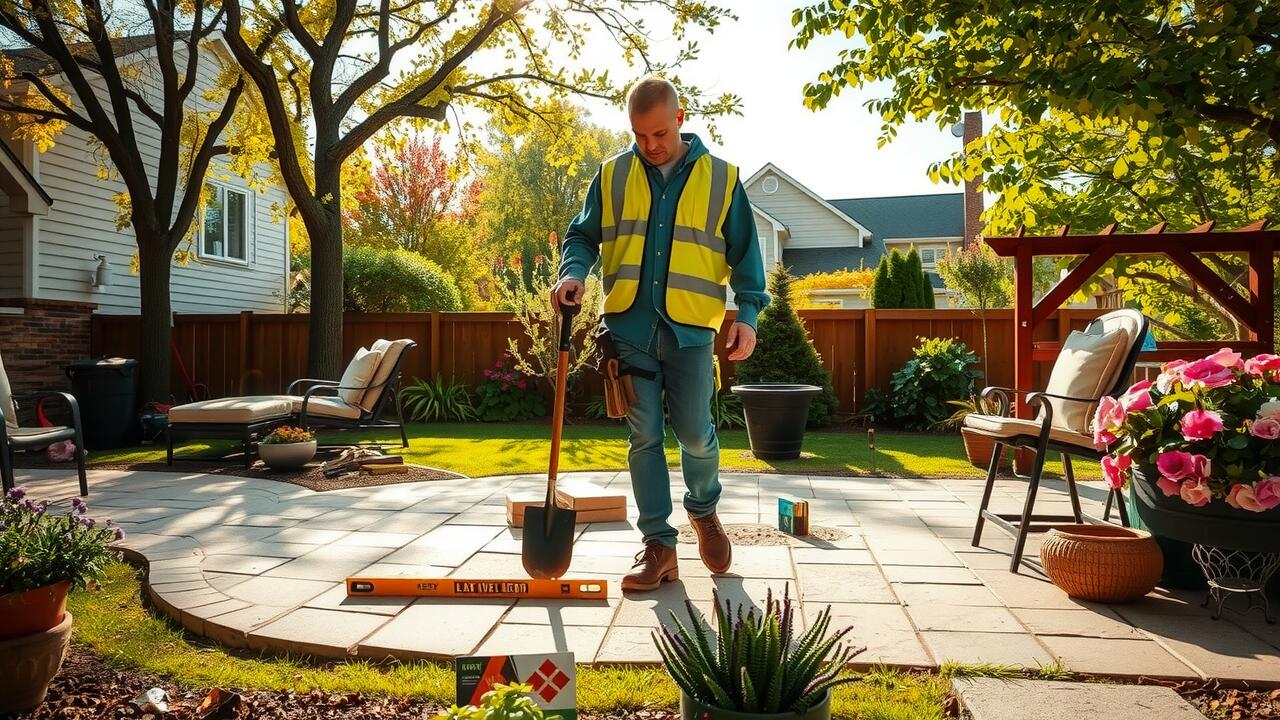
Paver patios offer an attractive and durable solution for homeowners looking to enhance their outdoor spaces. These patios consist of individual paving stones or bricks, which can be arranged in various patterns, allowing for creative designs. The versatility of paver materials provides a range of color and texture options. This flexibility helps homeowners match their patios to existing landscapes or home exteriors. Additionally, the interlocking nature of pavers contributes to their stability, making them less prone to cracks compared to poured concrete.
When considering patio installation, the initial cost and long-term value are important factors. While the upfront investment for paver materials may be higher than some alternatives, they often prove more cost-effective over time due to their longevity and low maintenance needs. A well-installed paver patio can withstand various weather conditions without significant wear, translating to fewer repairs and replacements in the future. This enduring quality can make paver patios a wise choice for those seeking an economical yet stylish outdoor solution.
Advantages of Interlocking Pavers
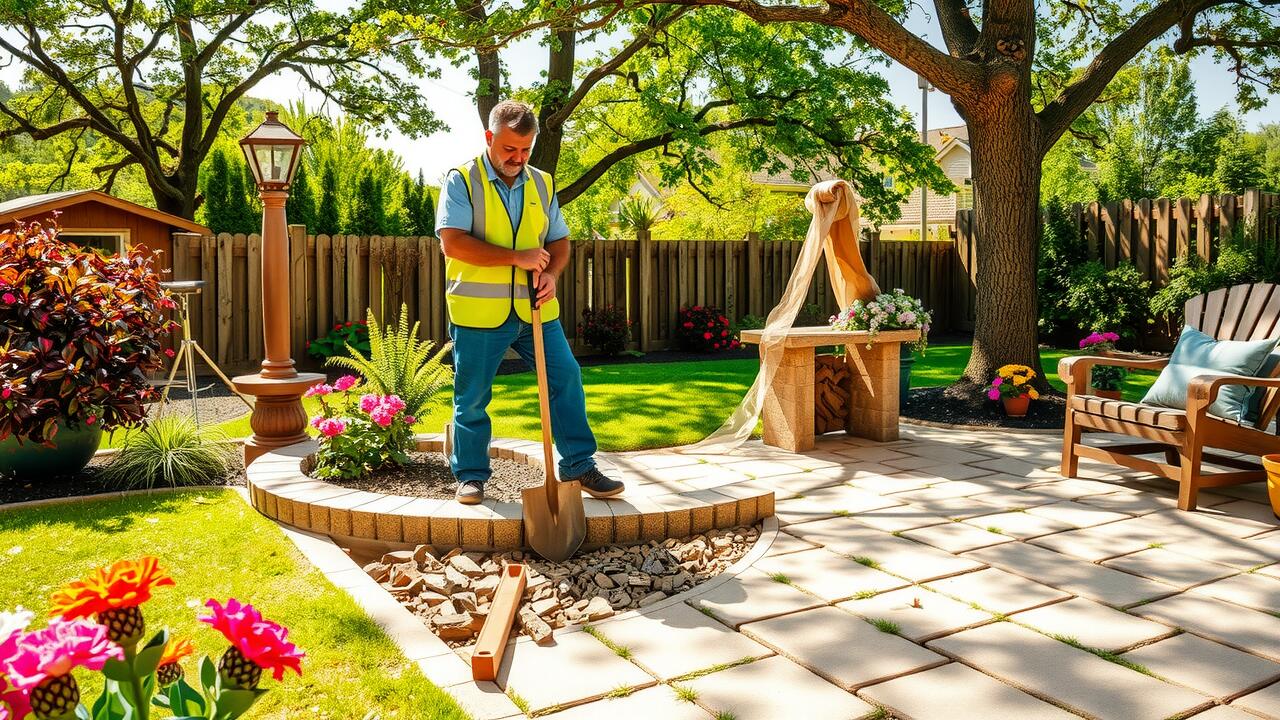
Interlocking pavers offer a versatile and appealing option for patio installation, as they come in a variety of colors and shapes. This allows homeowners to create unique patterns that enhance the outdoor aesthetic. The modular design of interlocking pavers ensures ease of installation, making it a project that can be tackled by DIY enthusiasts. Additionally, they provide stability once laid out properly, reducing the risk of shifting or settling over time.
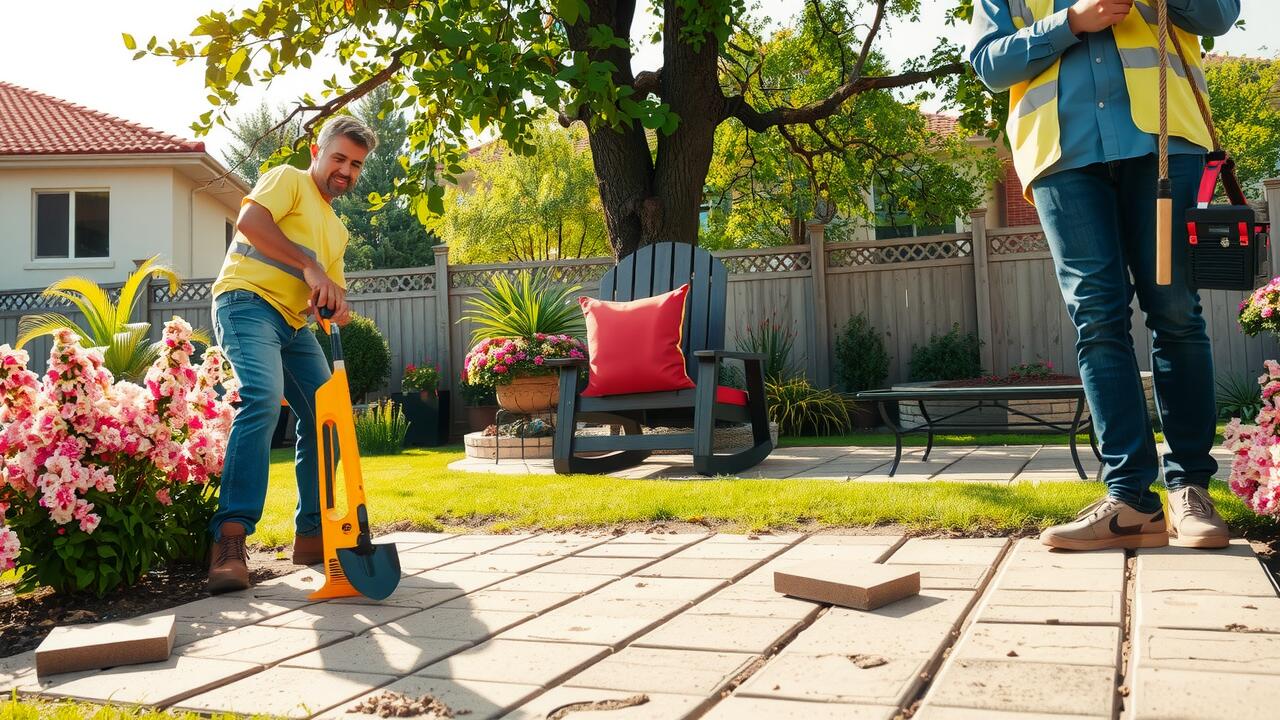
Another significant advantage of interlocking pavers is their durability. Made from materials such as concrete or stone, they withstand varying weather conditions, making them suitable for different climates. Their resistance to cracking and fading ensures that the patio maintains its visual appeal with minimal effort. If necessary, individual pavers can be easily replaced without affecting the overall layout, making this an economical choice for long-term patio maintenance.
Choosing Wood for Your Patio
When selecting wood for your patio, several factors come into play. Cedar and redwood are popular choices due to their natural resistance to decay and insect damage. These woods provide aesthetic appeal with their rich colors and can withstand outdoor conditions well. However, they tend to be on the pricier side. Another option includes pressure-treated lumber, which is often more affordable and durable. This wood is treated to resist moisture and pests, making it a practical choice for patio installation.
Considering the budget, it’s essential to balance cost with quality. While cheaper lumber options like pine are available, they may not hold up as well in outdoor environments. Taking the time to research and compare options ensures that you choose wood that fits your budget without compromising on longevity. Proper patio installation techniques, such as ensuring proper drainage and sealing the wood, can also enhance durability and protect your investment over time.
Cost-Effective Lumber Options
When considering wood for your patio installation, choosing the right type of lumber can significantly impact costs. Pressure-treated pine is a popular choice due to its affordability and resistance to rot. It’s widely available and easy to work with, making it ideal for DIY projects. Other options like cedar and redwood offer natural resistance to insects and decay but come at a higher price point.
Reclaimed wood provides another cost-effective alternative for patio installation. Not only does it add character and charm, but it can also save money compared to buying new lumber. Sourcing local salvaged wood from old buildings or fences can yield beautiful materials while being environmentally friendly. Each of these options allows homeowners to create a durable and visually appealing patio without breaking the bank.
Patio Maintenance on a Budget
Maintaining a patio on a budget involves simple strategies that can significantly extend its lifespan. Regular cleaning is essential to prevent dirt and debris buildup. Tools like brooms, pressure washers, and mild detergents can be used to keep surfaces looking fresh. Sealing pavers or wood every few years can protect them from weather damage and stains, minimizing long-term repair costs.
In addition to cleaning, consider the seasonal maintenance tasks to prepare your patio for various weather conditions. Inspecting for cracks or wear after patio installation helps catch issues early. Clearing leaves and debris in the fall prevents them from trapping moisture and causing mold or rot. These practices reduce the need for expensive repairs, allowing you to enjoy your outdoor space without the hefty price tag.
Tips for Low-Cost Upkeep
Maintaining a patio on a budget requires a few strategic approaches. Regular cleaning prevents the buildup of dirt and grime, which can lead to more expensive repairs down the line. A simple rinse with a hose can do wonders and shouldn’t take much time. Using a broom or a leaf blower can also help keep debris from accumulating, ensuring your patio remains inviting and safe for use.
When it comes to repairs after patio installation, addressing small issues promptly can save you money in the long run. Inspect for cracks or loose stones and tackle these problems early. For wood patios, checking for splintering or rotting wood is crucial. A timely coat of sealant not only protects your investment but also extends the life of the materials without breaking the bank. Staying proactive in upkeep will minimize costly replacements or extensive maintenance in the future.
FAQS
What is the cheapest method for building a patio?
The cheapest method for building a patio often involves using gravel or crushed stone as the base material, which is more affordable than pavers or wood.
Are interlocking pavers a cost-effective option?
Yes, interlocking pavers can be a cost-effective option as they are durable and require minimal maintenance, which can save you money in the long run.
What types of wood are the most affordable for patio construction?
Pressure-treated lumber and cedar are typically considered cost-effective options for building a wooden patio due to their availability and resistance to rot.
How can I maintain my patio on a budget?
To maintain your patio on a budget, you can regularly clean it, seal surfaces when necessary, and repair any damage promptly to avoid costly fixes down the line.
What are some low-cost alternatives to traditional patio materials?
Low-cost alternatives to traditional patio materials include using recycled bricks, concrete slabs, or even creating a natural stone patio with locally sourced materials.
Enhancing Your Concrete Slab
Enhancing your concrete slab not only improves aesthetics but also increases its functionality. One popular option is to incorporate decorative elements during the patio installation process. Techniques such as stamping or staining can transform an ordinary slab into a visually appealing outdoor space. These treatments can mimic the look of stone or brick, adding character while maintaining the durability of concrete.
Another way to enhance a concrete slab is through the addition of functional features. Consider integrating built-in seating or planters during patio installation. These additions not only maximize the use of space but also create a cohesive design. Strategic placement of outdoor lighting can further elevate the atmosphere, making the area usable and inviting after dark.
Surface Treatments
Surface treatments for concrete slabs can significantly enhance both aesthetics and durability. By applying various coatings or finishes, homeowners can customize the look of their concrete surfaces. Popular options include staining, sealing, and polishing. Staining adds rich colors that can mimic stone or create unique patterns. Sealing protects the slab from moisture and stains while offering a glossy or matte finish. Polished concrete provides a sleek, high-end appearance, making it popular for indoor spaces and outdoor areas alike, such as during patio installation.
Incorporating surface treatments during patio installation can also improve traction and reduce the risk of slips and falls. Textured finishes can create a non-slip surface, ideal for areas exposed to rain. Additionally, surface treatments can help prevent cracking and weathering over time. Homeowners should consider their specific needs and preferences when choosing a treatment, balancing aesthetics with functionality. Proper application and maintenance of the chosen finish will ensure the longevity of the concrete slab.
DIY vs. Hiring Professionals
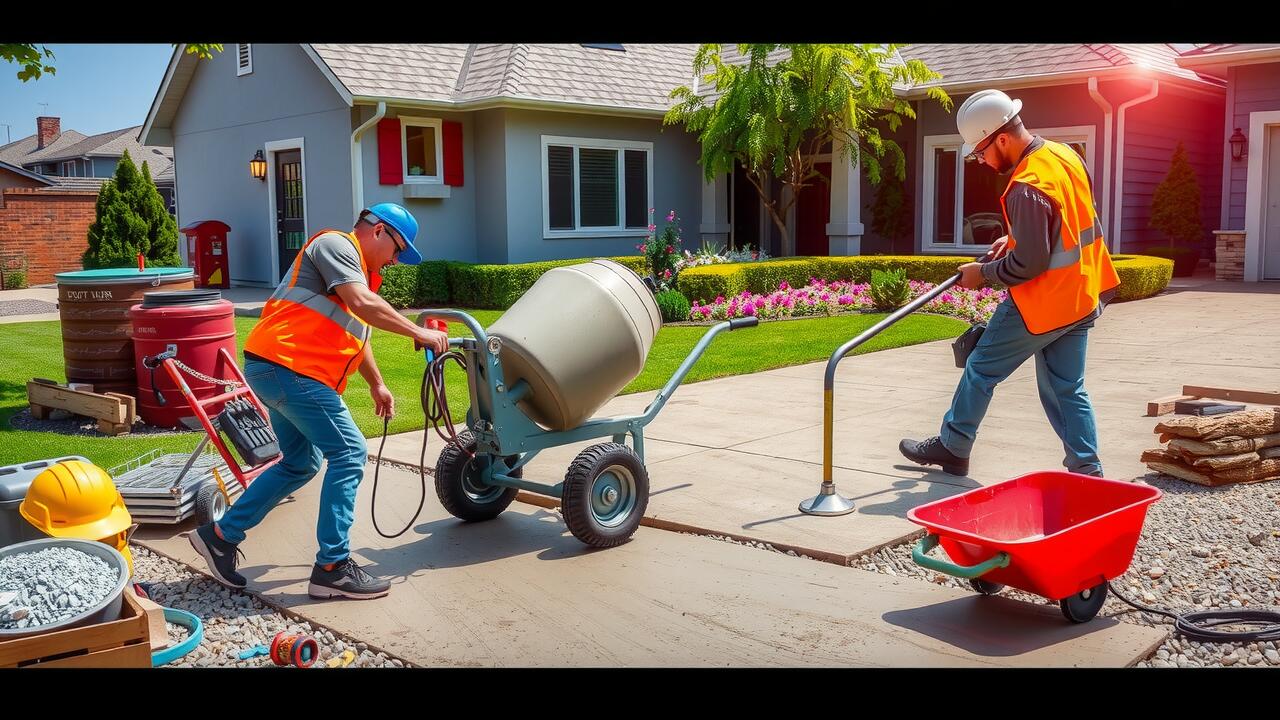
Many homeowners consider a DIY approach for patio installation due to the potential cost savings. With proper research and planning, individuals can manage the project efficiently. Tasks such as measuring, pouring, and finishing the concrete can be tackled if one has the right tools and some basic construction knowledge. Additionally, the satisfaction of completing a project independently can be rewarding for many.
On the other hand, hiring professionals for patio installation guarantees a high level of expertise. Experienced contractors understand the nuances of mixing and pouring concrete, ensuring durability and proper drainage. They can navigate any unforeseen issues during the project, which may be challenging for inexperienced individuals. The investment in skilled labor often results in a polished finish and minimizes the risk of costly mistakes.
Pros and Cons of Each Option
Choosing to tackle a patio installation project yourself can be appealing due to potential cost savings. DIY enthusiasts often enjoy the satisfaction of creating something with their own hands. However, without the proper skills or experience, mistakes can lead to additional expenses and frustration, especially when ensuring the slab’s durability and levelness.
Hiring professionals for patio installation offers expertise and efficiency. Contractors possess the knowledge to navigate challenges that may arise during construction. Nonetheless, this option typically comes with a higher upfront cost. Homeowners must weigh the benefits of quality and time against the budget they have allocated for the project.
Permitting and Code Requirements
When planning for a 24×24 concrete slab, it’s essential to understand local permitting and code requirements. Many municipalities require permits for patio installation, especially if the slab is intended for a permanent structure. Before beginning your project, check with your local zoning board or building department. This step ensures compliance with local regulations that cover aspects like drainage, distance from property lines, and other safety considerations.
Understanding these regulations is crucial to avoid unexpected delays or fines. Each locality may have specific codes regarding the depth of the slab, reinforcement standards, and how the slab interacts with existing structures. Failing to adhere to these requirements can lead to significant problems down the line, including the necessity for costly modifications or the complete removal of the slab. Proper planning in line with local codes sets the foundation for a successful patio installation.
Understanding Local Regulations
Local regulations play an essential role in any patio installation project. Homeowners must be aware of zoning laws, building codes, and permits required for construction. These regulations can vary widely depending on the municipality. It’s important to check with local authorities to ensure compliance with all necessary guidelines.
Ignoring local regulations can lead to fines or complications down the road. In some cases, failure to obtain the required permits may result in the need to remove or modify the installed slab. Proper planning involves understanding and adhering to these rules to avoid potential issues. Being proactive about local regulations can save time and money in the long run.
FAQS
How much does a 24×24 concrete slab typically cost?
The cost for a 24×24 concrete slab can vary widely but typically ranges from $1,200 to $2,400, depending on factors like location, materials, and labor.
What factors can influence the price of a concrete slab?
Several factors can influence the price, including the thickness of the slab, surface treatments, local labor rates, and any additional features like reinforcement or excavation needed.
Can I save money by pouring the slab myself?
Yes, pouring the slab yourself can save money on labor costs, but it’s important to consider your skill level, tools required, and the amount of time it will take.
Are there any permits required for pouring a concrete slab?
Yes, many local jurisdictions require permits for pouring concrete slabs, especially for larger projects. It’s best to check with your local building department for specific requirements.
What surface treatments can enhance my concrete slab?
Surface treatments such as staining, sealing, or applying a decorative overlay can enhance the appearance and durability of your concrete slab, adding to the overall cost.
Choosing the Right Material
Choosing the right material for driveway installation is essential for achieving durability and aesthetic appeal. Various options are available, including concrete, asphalt, pavers, and gravel. Each material comes with its own set of characteristics that affect not only the appearance of the driveway but also its longevity and maintenance requirements. For example, concrete offers a sleek and modern look, while gravel may provide a more rustic charm.
Cost is another important factor when selecting a material for driveway installation. Prices can vary significantly based on the type chosen. Concrete and pavers generally have higher upfront costs compared to asphalt and gravel. However, considering factors such as lifespan, maintenance, and the potential need for repairs can help homeowners make a more informed decision. Understanding these differences before committing can lead to a more satisfying investment in your property.
Pros and Cons of Concrete
Concrete is a popular choice for driveway installation due to its durability and strength. It can withstand heavy loads, making it ideal for areas with frequent vehicle traffic. Additionally, concrete driveways require minimal maintenance, usually needing only periodic cleaning and resealing. The surface can be easily customized with various finishes and colors, enhancing curb appeal.
On the downside, concrete can be susceptible to cracking over time, especially in regions with extreme temperature fluctuations. Repairing cracks can be time-consuming and costly. Another drawback is that concrete tends to be less permeable, leading to potential drainage issues. This can be a concern in areas with heavy rainfall where water pooling may occur.
Environmental Impact and Options
Driveway installation can significantly impact the environment, primarily due to the materials used and the energy consumed during the process. Traditional concrete and asphalt driveways often involve the extraction of natural resources and the emission of greenhouse gases, contributing to environmental degradation. Additionally, the impervious nature of these materials can lead to stormwater runoff, which may contain pollutants that harm local ecosystems.
In response to these concerns, many homeowners are exploring eco-friendly alternatives for driveway installation. Options like permeable pavers allow water to infiltrate the surface, reducing runoff and promoting groundwater recharge. Other materials, such as recycled asphalt or crushed stone, can minimize environmental impact by utilizing previously discarded materials. These choices not only enhance sustainability but also offer diverse aesthetic options for homeowners looking to align their outdoor spaces with eco-conscious values.
Eco-Friendly Materials
Choosing eco-friendly materials for driveway installation can greatly reduce environmental impact. Options such as permeable pavers allow water to filter through, minimizing runoff and reducing the risk of flooding. These materials can be made from recycled products, further enhancing their sustainability. In addition to their functional benefits, permeable surfaces can enhance the aesthetic appeal of a property.
Another popular choice is stabilized decomposed granite, which provides a natural look while promoting water infiltration. This material is often made from recycled stone and does not require extensive processing, making it a more sustainable option. By selecting environmentally friendly materials, homeowners can contribute to conservation efforts while enhancing the aesthetics and functionality of their driveways.
Regional Price Variations
Regional pricing variations for driveway installation can significantly affect the overall cost of your project. Factors such as local labor rates, availability of materials, and regional demand all contribute to these differences. For instance, urban areas may experience higher prices due to increased demand and limited space, while rural locations might offer more competitive rates owing to lower labor costs and greater material availability.
In addition to geographical factors, regional climate can influence the choice of materials and, subsequently, their cost. Areas with harsh winters may require more durable options like concrete or asphalt, leading to higher installation fees. Conversely, warmer regions might favor alternative options, which can sometimes be more inexpensive but might not withstand extreme weather fluctuations as effectively. Understanding these regional differences is crucial for homeowners looking to budget for their driveway installation.
Geographic Considerations
Geographic location plays a significant role in the cost of driveway installation. Different regions often have varying labor rates and material availability, which can influence total expenses. For example, areas with a high demand for construction services may see increased labor costs compared to regions with lower demand. Additionally, local regulations and building codes can affect the types of materials that are permissible, leading to variations in pricing structures.
Climate can also impact the choice of material and overall costs associated with driveway installation. In regions that experience extreme weather conditions, such as heavy snowfall or intense heat, certain materials may perform better and prove more durable. The need for specific installations to combat shifting soil or drainage issues is more prevalent in some areas, which can result in additional labor and material costs. Being aware of these geographic factors can help homeowners make informed decisions regarding their driveway projects.
FAQS
How much does a 20×20 driveway typically cost?
The cost of a 20×20 driveway can vary significantly based on materials and installation, but on average, you can expect to pay between $1,200 to $3,500.
What factors influence the cost of a 20×20 driveway?
Several factors can influence the cost, including the type of material chosen, labor costs in your region, site preparation requirements, and any additional features like edging or drainage systems.
Are there cheap alternatives to traditional materials for driveways?
Yes, there are several economical alternatives such as gravel or asphalt, which can be less costly than concrete or brick, but may require more maintenance over time.
How does the choice of material affect the driveway’s lifespan?
Different materials have varying lifespans; for example, concrete can last 30 years or more with proper maintenance, while gravel may require more frequent upkeep and replacement every few years.
Is it worth investing in eco-friendly materials for my driveway?
While eco-friendly materials may have a higher upfront cost, they can provide long-term benefits such as reduced environmental impact, improved drainage, and potentially lower maintenance costs.
Brick Patios
Brick patios are a popular choice among homeowners due to their timeless appeal and durability. The initial investment can vary, depending on the type of brick and the complexity of the design. A well-installed brick patio can enhance the aesthetic appeal of any outdoor space while providing a sturdy surface for gatherings and relaxation. However, it is essential to consider the long-term maintenance costs associated with brick, such as potential repairs and the need for periodic sealing.
When evaluating patio installation options, it’s important to factor in both the labor and material costs. Professional installation may increase the upfront expense, but it can also ensure a more precise and durable finish. For those who choose a DIY approach, understanding the proper techniques for laying bricks is vital to achieving a stable patio. The investment in tools and materials can be balanced against the money saved on labor.
Analyzing Long-Term Affordability
When considering patio installation, it’s essential to evaluate the long-term costs associated with different materials. Brick patios may have a higher initial cost, but their durability often results in lower maintenance expenses over time. Unlike other options that might deteriorate or require frequent replacement, brick can withstand weathering and heavy foot traffic. This means homeowners might save money in the long run by opting for bricks, even if the upfront investment is greater.
On the other hand, patio tiles come in various price ranges, with some options being quite affordable. However, the longevity of these tiles can vary significantly. Cheaper tile options might degrade faster, leading to more frequent repairs or replacements. Analyzing the overall affordability of patio installation should take into account not only the initial expenses but also the potential for long-term maintenance and replacement costs of the chosen material. Evaluating these factors can help in making a financially sound decision.
Patio Tiles
Patio tiles offer a versatile option when considering materials for outdoor spaces. They come in various styles, colors, and textures, making it easy to customize a patio to match personal preferences and existing landscapes. The cost of patio tiles can vary significantly based on the type chosen, with options ranging from ceramic and porcelain to natural stone. Each material has its own price point, which can impact the overall budget for patio installation.
Durability is a critical factor in choosing tile materials for outdoor use. Porcelain tiles tend to be more resistant to moisture and temperature fluctuations, making them a popular choice for patios. While some tiles may require more maintenance or are prone to cracking, others can withstand the elements with minimal upkeep. Assessing the long-term viability and ongoing costs associated with tile options can help in making an informed decision about patio installation.
Cost and Durability of Tile Options
Tile options for patio installation come in various materials, including ceramic, porcelain, and natural stone. Each type offers a unique blend of appearance and functionality. Ceramic tiles are often the most affordable, making them a popular choice for budget-conscious homeowners. Porcelain tiles, while typically more expensive, are known for their superior durability and resistance to moisture. Natural stone tiles, such as slate or granite, provide a luxurious look but can significantly increase the overall cost of installation.
Durability is a crucial consideration when selecting tiles for a patio. Ceramic tiles, although cost-effective, may chip or crack under heavy impacts. Porcelain tiles excel in handling outdoor conditions due to their low porosity and strength, ensuring they remain intact over time. Natural stone tiles offer exceptional longevity and aesthetic appeal, but they require regular sealing to protect against stains and weathering. Weighing these factors can help homeowners make informed decisions regarding their patio installation.
DIY vs Professional Installation
Choosing between DIY and professional patio installation can significantly impact both the cost and the outcome of the project. Many homeowners opt for the DIY route to save money and engage in a hands-on experience. However, this approach requires careful planning and a solid understanding of the materials and techniques involved. Those with prior experience in similar projects may find it rewarding. Others, lacking the necessary skills or time, might risk making costly mistakes.
On the other hand, hiring professionals can ensure a higher level of craftsmanship and reliability. Experienced contractors are familiar with the various aspects of patio installation, from material selection to proper drainage techniques. This investment often brings peace of mind, knowing that the job is done correctly and efficiently. While the upfront costs may be higher, the long-term benefits of a professionally installed patio can outweigh the initial expenditure for many homeowners.
Evaluating Your Skills and Budget
When considering patio installation, it’s essential to assess your skill level and available resources. Some homeowners may feel confident in their ability to tackle a DIY project, while others might prefer to leave the task to professionals. Evaluating past experiences with similar projects can provide insight into potential challenges. Factors like the complexity of the patio design and the time you can dedicate to the installation will influence this decision.
Budget is another critical factor when planning a patio installation. DIY projects may save on labor costs but can lead to unexpected expenses if mistakes occur. On the other hand, hiring professionals guarantees a certain level of expertise, which could result in fewer long-term issues. Considering both the immediate and future costs will help ensure that your chosen approach fits your financial situation.
FAQS
What is the cheapest type of patio to install?
The cheapest type of patio to install typically includes materials such as gravel or concrete, as they require less labor and are often less expensive than more elaborate options like brick or stone.
How do brick patios compare to other materials in terms of cost?
Brick patios can be more expensive due to the cost of materials and labor. However, they can be more durable and aesthetically pleasing, possibly offering better long-term value.
Are patio tiles a cost-effective option for a new patio?
Patio tiles can be cost-effective depending on the type of tile selected. While some options can be pricey, there are affordable tile choices that offer a good balance between cost and durability.
Should I consider DIY installation to save money on my patio?
Yes, DIY installation can significantly reduce costs, but it requires the right skills and tools. If you are confident in your abilities and have the time, it can be a great way to save money.
What factors should I consider when choosing the cheapest patio option?
Consider the initial material costs, the long-term durability, maintenance requirements, installation expenses (DIY vs. professional), and whether the patio will meet your aesthetic and functional needs.
DIY Installation Techniques
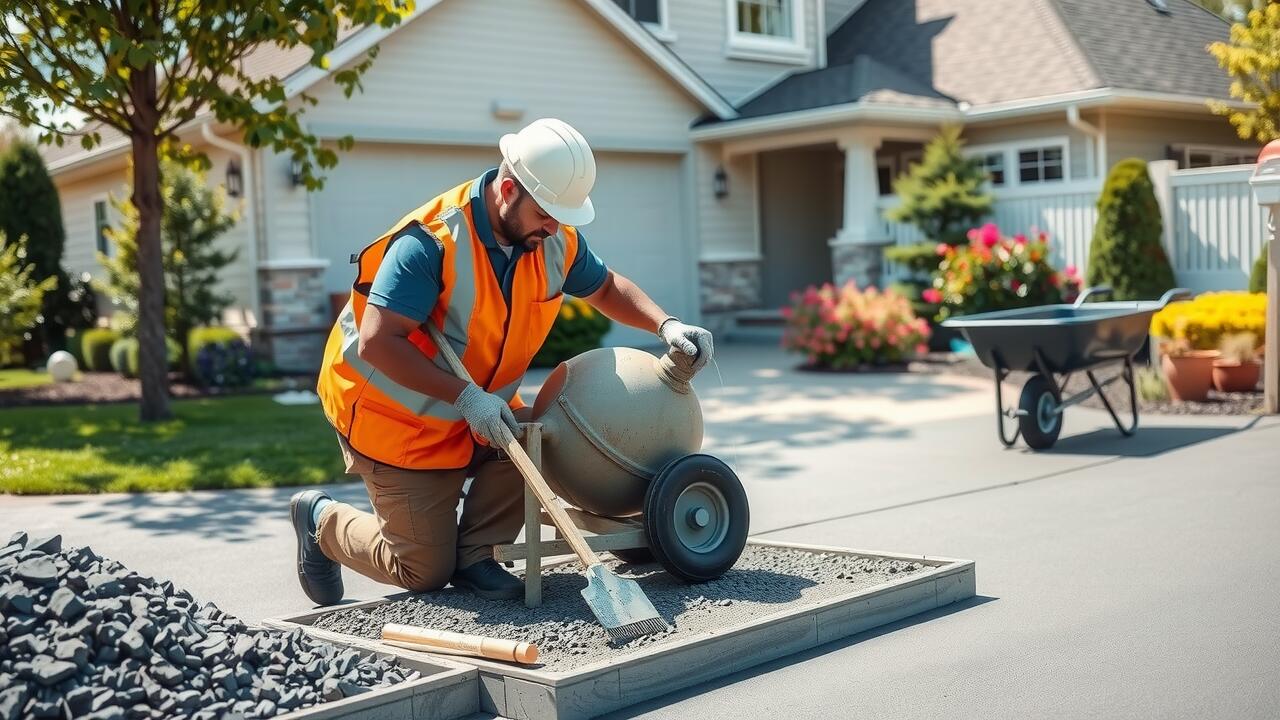
There are several DIY techniques for driveway installation that can help save money while achieving a durable surface. Start by assessing your space to determine the best materials based on your budget and climate. Gravel, asphalt, and concrete are popular choices, each offering unique benefits. For those opting for gravel, preparing a solid base with landscaping fabric and edging materials ensures longevity. If asphalt or concrete appeals more, mixing and pouring the materials may require additional tools but can lead to impressive results.
Preparation is crucial in any driveway installation project. Begin with clearing the area of vegetation, debris, and any old pavement. This creates a clean slate for your new driveway. Next, layout a plan with specific measurements. Using stakes and string can provide clear boundaries. Proper grading directs water away from your driveway, reducing the risk of damage over time. Whatever material you choose, following these steps can ensure a successful DIY project.
Step-by-Step Guide to Installation
Driveway installation begins with careful planning and preparation. Measure the area where the driveway will be placed to determine the necessary materials. Clear the site of any vegetation, debris, or existing pavement to create a level surface. Consider the drainage system to prevent water pooling. Mark the boundaries using stakes and string to ensure accurate dimensions.
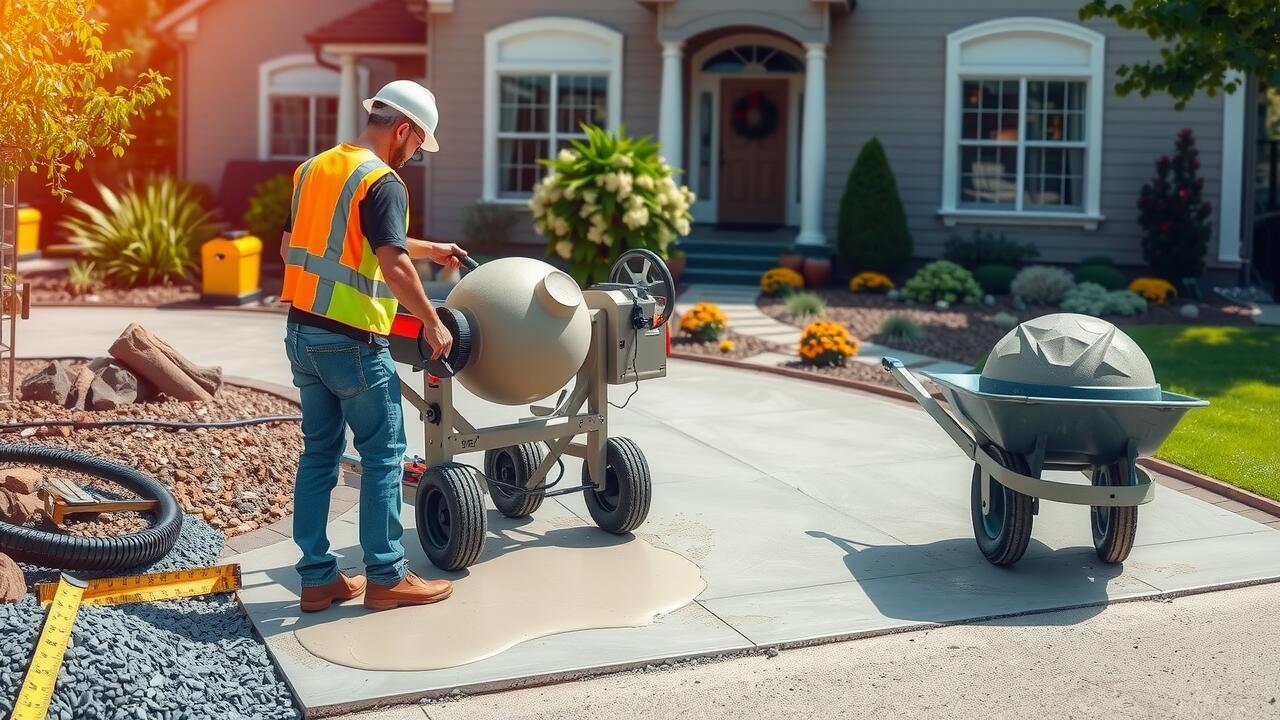
Next, start the installation process by digging out the area to the required depth, typically about 4 to 6 inches for gravel and a bit more for concrete or asphalt. Lay a strong base using crushed stone or gravel to provide stability. Compact the material to create a firm foundation. If you are opting for concrete, mix it according to the package instructions before pouring it into the excavated space. Smooth out the surface before it begins to set for a neat finish. Let the driveway cure properly to ensure durability and strength.
Maintenance Tips for Longevity
Regular maintenance is essential for prolonging the life of your driveway. After driveway installation, it’s important to keep an eye out for cracks or surface deterioration. Promptly filling any cracks with a suitable sealant will prevent them from expanding and causing further damage. Additionally, periodic sweeping and washing can help remove debris and prevent stains from settling, ensuring that the surface remains clean and visually appealing.
Applying a seal coat every few years can significantly enhance durability. This protective layer not only keeps moisture at bay but also provides a barrier against UV rays and harsh weather conditions. Furthermore, when planning any heavy activities on your driveway, such as parking large vehicles or placing heavy objects, consider using a protective mat to distribute the weight and reduce stress on the surface. These small efforts can greatly extend the lifespan of your driveway while maintaining its overall integrity and functionality.
Keeping Your Driveway in Good Shape
Regular maintenance is essential to keeping your driveway in good shape. After driveway installation, ensure to inspect the surface frequently for cracks or wear. Addressing minor issues promptly can prevent more significant problems down the line, such as larger cracks that might require costly repairs. Routine cleaning is also beneficial, as it removes dirt, debris, and stains that can deteriorate materials over time.
Sealing your driveway can extend its lifespan significantly. A sealant helps protect against moisture, oil spills, and other harmful substances. Depending on the material used during your driveway installation, the frequency of sealing may vary. Generally, a seal every few years is advisable to preserve the integrity and appearance of the driveway, ensuring it remains both functional and aesthetically pleasing.
Enhancing Curb Appeal on a Budget
Improving the curb appeal of your driveway can be achieved without breaking the bank. Simple enhancements such as adding borders made from bricks or stones can give your driveway a distinctive look. Planters with colorful flowers on either side can create an inviting atmosphere. These elements not only beautify the space but also lead the eye towards your home, creating an appealing first impression.
Incorporating unique patterns into your driveway installation can also elevate its appearance. Many homeowners opt for creative spray painting techniques to add designs. Stenciling with non-slip paint can create a personalized touch while ensuring safety. Using recycled materials, like old tiles or reclaimed wood for decorative features, can enhance the visual interest without incurring high costs.
Affordable Aesthetic Improvements
Creating an appealing driveway doesn’t have to break the bank. Simple enhancements can make a significant difference in appearance. Consider adding decorative borders with inexpensive materials like bricks or stones. These create a defined edge and introduce texture without requiring extensive work. Another approach is to use outdoor paint or sealers to add color or pattern to your driveway surface. This can brighten up the area and make it look more intentional.
Incorporating lighting can also enhance the aesthetic of your driveway. Affordable solar-powered lights provide illumination and create a welcoming atmosphere. Strategically placing lights along the path or borders gives it a polished look. Additionally, planting low-maintenance flowers or shrubs along the sides can soften the hard edges of the driveway. This greenery adds life and color, contributing to the overall appeal of your home while keeping costs down during the driveway installation process.
FAQS
What are some affordable materials I can use to create a driveway?
Some budget-friendly materials for driveway construction include gravel, recycled asphalt, concrete, and permeable pavers. Each option has its own benefits and can be selected based on your specific needs and aesthetic preferences.
How can I prepare my driveway area before installation?
Preparing your driveway area involves clearing the site of any debris, rocks, or vegetation, leveling the ground, and ensuring proper drainage to prevent water pooling. This preparation is crucial for a successful installation.
What are some low-cost maintenance tips for my driveway?
To maintain your driveway on a budget, regularly remove debris, fill in any cracks or holes with appropriate fillers, and seal the surface periodically to protect it from the elements. Keeping it clean and well-maintained can extend its lifespan.
Can I enhance the appearance of my driveway without spending a lot?
Yes! You can enhance curb appeal by adding decorative edging, planting flowers or shrubs along the sides, or using inexpensive decorative stones or gravel. Simple improvements can make a significant impact without heavy costs.
How long can I expect my budget driveway to last?
The lifespan of a budget driveway varies based on the materials used, installation quality, and maintenance. Generally, gravel driveways can last 5-10 years, while properly maintained concrete driveways can last 20-30 years or more.
Regional Preferences in Driveway Types
Regional preferences for driveway types often reflect local climate, topography, and cultural influences. In areas with heavy rainfall or snow, homeowners typically favor materials that can withstand harsh weather conditions. Concrete and asphalt driveways are common choices in urban environments due to their durability and ease of installation. Conversely, more rural settings may see a trend towards gravel or brick driveways, which complement the natural landscape and offer a unique aesthetic appeal.
Driveway installation varies by region based on these preferences. In the South, for example, homeowners often opt for decorative concrete or interlocking pavers that can withstand the heat and humidity. In contrast, the Northwest might see an inclination towards permeable options that promote drainage and reduce runoff in areas prone to heavy rain. Tailoring driveway choices to meet local expectations not only enhances the property’s value but also ensures functionality within the community context.
Tailoring Choices to Local Trends
Understanding regional preferences plays a crucial role in choosing the right driveway design. Homeowners should consider the materials and styles popular in their area. For instance, suburban neighborhoods may prioritize concrete or asphalt for their durability, while more rural settings might favor gravel or stone for aesthetics and cost-effectiveness. Aligning with local trends can significantly enhance a property’s appeal.
Driveway installation choices should reflect not only personal taste but also community standards. Influences such as climate, local architecture, and neighborhood demographics can guide decisions. A driveway that harmonizes with surrounding homes often increases property value. Additionally, selecting a driveway style that resonates with regional characteristics may attract potential buyers, ensuring a strong return on investment.
Eco-Friendly Driveway Options
Eco-friendly driveway options are increasingly popular among homeowners seeking sustainable choices. Materials such as permeable pavers and recycled asphalt not only reduce environmental impact but also provide practical benefits. Permeable pavers allow water to pass through, minimizing runoff and promoting groundwater recharge. Recycled asphalt offers a durable alternative that repurposes old materials, reducing the demand for new resources.
When considering driveway installation, selecting eco-friendly materials can enhance a property’s value while contributing to environmental sustainability. Homeowners can also explore options like crushed stone or gravel, which require less energy to produce and can blend seamlessly with natural landscapes. Adopting green practices in driveway design can attract environmentally conscious buyers and improve the overall appeal of a home.
Benefits of Sustainable Materials
Sustainable materials in driveway installation offer a host of benefits that appeal to environmentally conscious homeowners. Using products like permeable pavers, recycled asphalt, or reclaimed concrete reduces the ecological footprint associated with traditional driveway options. These materials often require less energy to produce and can contribute to reduced landfill waste, making them a greener alternative.
Moreover, sustainable driveways can enhance property value while providing long-term economic advantages. Durable materials tend to require less maintenance and offer greater longevity compared to their conventional counterparts. This reliability translates to savings over time, as homeowners face fewer repair costs. Investing in sustainable options not only benefits the planet but also proves to be a wise financial decision.
Enhancing Functionality with Driveway Design
A well-designed driveway can significantly enhance both accessibility and usability. When planning a driveway installation, it is essential to consider factors such as size, shape, and materials. Wider driveways can accommodate multiple vehicles, providing convenience for larger households or guests. Consideration for additional features like turnarounds or angles can further improve traffic flow, ensuring that residents do not struggle with tight spaces.
Incorporating effective drainage solutions in driveway design is crucial. A driveway installation that includes proper slope and drainage channels can prevent water pooling, reducing potential damage over time. This not only extends the lifespan of the driveway but also minimizes maintenance costs. Additionally, integrating landscaping elements, such as borders or carefully placed plants, can enhance the aesthetic value while maintaining functionality.
Incorporating Features Like Drainage and Space
Effective driveway design goes beyond surface aesthetics; it incorporates practical features like drainage and space optimization. Proper drainage systems divert water away from the driveway, preventing pooling and reducing maintenance needs. This not only extends the life of the surface materials but also protects the surrounding landscape from erosion. Integrating these systems during the driveway installation process ensures functionality is prioritized alongside visual appeal.
Space is another crucial element to consider during driveway installation. Adequate width allows for easy access and parking, accommodating multiple vehicles without creating congestion. Additionally, thoughtful design can incorporate space for landscaping or additional features like lighting and pathways, further enhancing curb appeal. When a driveway meets both functional and aesthetic needs, it often sees a positive impact on property value.
FAQS
What type of driveway is most popular in urban areas?
In urban areas, concrete and asphalt driveways tend to be the most popular due to their durability, low maintenance, and ability to withstand heavy traffic.
How can eco-friendly driveways increase property value?
Eco-friendly driveways made from sustainable materials can increase property value by appealing to environmentally conscious buyers and potentially lowering long-term maintenance costs.
What features should I consider for enhancing driveway functionality?
Consider incorporating features like proper drainage systems, ample space for parking, and even decorative elements that complement your home’s aesthetics to enhance driveway functionality.
Are there specific driveway materials that are better for resale value?
Yes, materials like stamped concrete, pavers, and natural stone often provide better resale value due to their aesthetic appeal and durability, making them attractive to potential buyers.
How can regional trends influence my driveway choice?
Regional trends influence driveway choices as different areas may have specific preferences based on climate, local regulations, and aesthetic styles, so it’s important to tailor your driveway selection to what’s popular and functional in your location.
Comparing Stamped Concrete to Other Patio Materials
When selecting materials for outdoor patios, many homeowners find themselves weighing the pros and cons of various options. Stamped concrete stands out due to its versatility and aesthetic appeal, mimicking the look of stone, brick, or tile at a fraction of the cost. Other materials like pavers and natural stone may provide a similar look but often come with higher labor costs and require additional maintenance over time. Stamped concrete installation can significantly reduce these expenses, making it an attractive option for budget-conscious projects.
Additionally, the durability of stamped concrete is noteworthy. It is resistant to cracking, fading, and weathering compared to wood or traditional concrete alternatives. Unlike pavers that can shift and require re-leveling, stamped concrete provides a stable surface that minimizes maintenance needs. In terms of long-term value, stamped concrete installation offers homeowners a combination of style, longevity, and cost-effectiveness that other materials may not match.
Cost-Effectiveness of Stamped Concrete
Stamped concrete offers a cost-effective alternative to various patio materials while maintaining aesthetic appeal. The initial investment may be higher compared to basic concrete, but the durability and longevity of stamped concrete often result in lower maintenance costs over time. Homeowners appreciate the versatility in design and color options, allowing for a customized look without the premium price typically associated with natural stone or brick.
When considering a patio project, stamped concrete installation can provide significant savings in the long run. Many factors contribute to the overall value, including the lack of required sealing and fewer repairs needed than traditional materials. This makes it an attractive option for budget-conscious homeowners seeking both functionality and style in their outdoor spaces.
Seasonal Trends in Pricing
The pricing for stamped concrete installation can fluctuate significantly throughout the year. Spring and summer are peak seasons for contractors, leading to higher demand and increased costs. Homeowners often seek outdoor enhancements during warmer months, which can drive up labor rates. Conversely, during fall and winter, fewer projects take place. This lull often results in more competitive pricing and potential discounts as contractors look to fill their schedules.
Weather can also influence the overall cost of stamped concrete installation. Cold temperatures or excessive rain may not only delay a project but also necessitate special measures to ensure proper installation. Such environmental factors can lead to unforeseen costs that homeowners should consider. Planning a project during more temperate months can help mitigate some of these risks and expenses.
Best Times of Year to Install
The best times of year for stamped concrete installation often align with milder weather conditions. Spring and early fall are ideal, as temperatures remain moderate and rainfall is typically less frequent. During these seasons, contractors can work efficiently without the complications that extreme heat or cold can cause. This can help ensure the integrity of the installation process and the final quality of the patio.
Winter is generally not recommended for stamped concrete installation due to the risk of freezing temperatures, which can adversely affect the curing process. However, late spring or early fall can also create a window of opportunity for budget-conscious homeowners. Contractors may have more availability during these times, potentially leading to more competitive pricing and favorable scheduling. Planning installation during these peak times can lead to a successful and cost-effective project.
Hidden Costs to Be Aware Of
When planning a stamped concrete patio, it’s essential to consider hidden costs that can affect your overall budget. Stamped Concrete Installation often involves additional expenses beyond the initial quote. For example, site preparation may require grading, excavation, or removal of existing materials, which can add significant costs. In some cases, homeowners might also need to invest in landscaping adjustments around the new patio. These additional tasks can easily inflate the final bill if not accounted for upfront.
Another factor to consider is the need for sealing and maintenance over time. While stamped concrete is known for its durability, it still requires periodic sealing to protect its surface and colors from fading. The cost of sealants, as well as occasional touch-ups, should be included in your long-term budgeting. Not all contractors will include these costs in their initial quotes, so it is wise to discuss this aspect of Stamped Concrete Installation with your contractor to avoid any surprises later on.
Site Preparation Expenses
Site preparation is a crucial step in the stamped concrete installation process. It typically involves clearing the area, removing any old patio materials, and leveling the ground. This foundational work ensures that the surface can support the weight and absorbs rain properly. Depending on the condition of the site, additional grading or soil stabilization may be necessary, which can increase overall costs.
Moreover, if there is poor drainage or existing landscaping features, extra expenses may arise. Contractors often recommend addressing these issues before beginning the stamped concrete installation. The more complex the preparation, the higher the costs involved. Proper site preparation not only enhances the aesthetic appeal of the patio but also extends its longevity.
FAQS
What is the average cost of a 20×20 stamped concrete patio?
The average cost of a 20×20 stamped concrete patio typically ranges from $2,000 to $4,000, depending on various factors such as design complexity and local labor rates.
How does stamped concrete compare to other patio materials in cost?
Stamped concrete generally offers a more cost-effective solution compared to materials like natural stone or brick, which can be significantly more expensive both in terms of materials and installation.
Are there seasonal trends in the pricing of stamped concrete patios?
Yes, the pricing of stamped concrete patios can fluctuate based on seasonal trends, with prices often being higher during peak construction seasons, such as spring and summer.
What are some hidden costs associated with installing a stamped concrete patio?
Hidden costs may include site preparation expenses, permits, additional materials for edging or reinforcement, and potential landscaping adjustments after installation.
When is the best time of year to install a stamped concrete patio?
The best times to install a stamped concrete patio are typically in the spring or fall when temperatures are moderate, allowing for optimal curing and finishing of the concrete.
Permeable Pavers
Permeable pavers are gaining popularity as an eco-friendly option for driveway installation. These pavers allow water to seep through, reducing runoff and promoting groundwater recharge. They come in various materials, including concrete, brick, and stone, providing aesthetic versatility while offering functional benefits. This drainage capability helps prevent flooding and minimizes erosion, making permeable pavers an excellent choice for environmentally conscious homeowners.
The initial cost of permeable pavers can be higher than traditional materials, but their long-term benefits often justify the investment. With proper installation, they can last for many years while requiring minimal maintenance. This makes them an attractive option for those looking to balance eco-friendliness with affordability. Additionally, considering the water conservation benefits, many homeowners find the investment pays off when factoring in potential savings on water-related issues in the surrounding landscape.
Environmental Benefits and Cost
Permeable pavers offer a sustainable alternative for those considering driveway installation. These materials allow water to seep through the surface, reducing runoff and minimizing the risk of flooding. By promoting natural drainage, permeable pavers also help replenish groundwater supplies, contributing to local ecosystems. Their ability to manage stormwater efficiently makes them an environmentally friendly choice for homeowners prioritizing sustainability in their landscaping decisions.
In terms of cost, permeable pavers can vary based on materials and installation methods. While the initial investment might be higher than traditional pavement options, the long-term benefits often outweigh these costs. Homeowners may save on water management systems and potential fines for excess runoff. Furthermore, many regions offer incentives or rebates for eco-conscious projects, making this an attractive option for budget-minded individuals seeking a balance between affordability and environmental impact.
Recycled Materials
Using recycled materials for driveway installation can significantly reduce costs while also contributing to sustainability. Options such as crushed concrete, reclaimed brick, and recycled asphalt not only provide durable surfaces but also add a unique character to your driveway. These materials are often sourced locally, which further cuts down transportation costs and supports the community.
Incorporating recycled materials can also enhance drainage and reduce the environmental impact of your driveway. Homeowners can combine different textures and colors to create a custom look, making recycled options a versatile choice. With a little creativity and planning, recycled materials can turn a standard driveway installation into an eco-friendly project that lasts for years.
Eco-Friendly and Budget-Friendly Options
Using recycled materials for driveway installation offers an excellent opportunity to reduce costs while being environmentally conscious. Options such as crushed concrete, reclaimed asphalt, or even recycled rubber can provide durable surfaces without the hefty price tag of conventional materials. These choices often require less overall maintenance due to their inherent resilience and stability, making them a wise long-term investment.
Moreover, utilizing eco-friendly materials can lead to significant savings in the overall project budget. Homeowners can often find local suppliers who offer these materials at a reduced rate or even for free. Additionally, incorporating sustainable practices into the driveway installation process can further lower expenses. Simple choices, such as selecting permeable options that minimize stormwater runoff, can ultimately save on future drainage costs.
DIY Driveway Installation
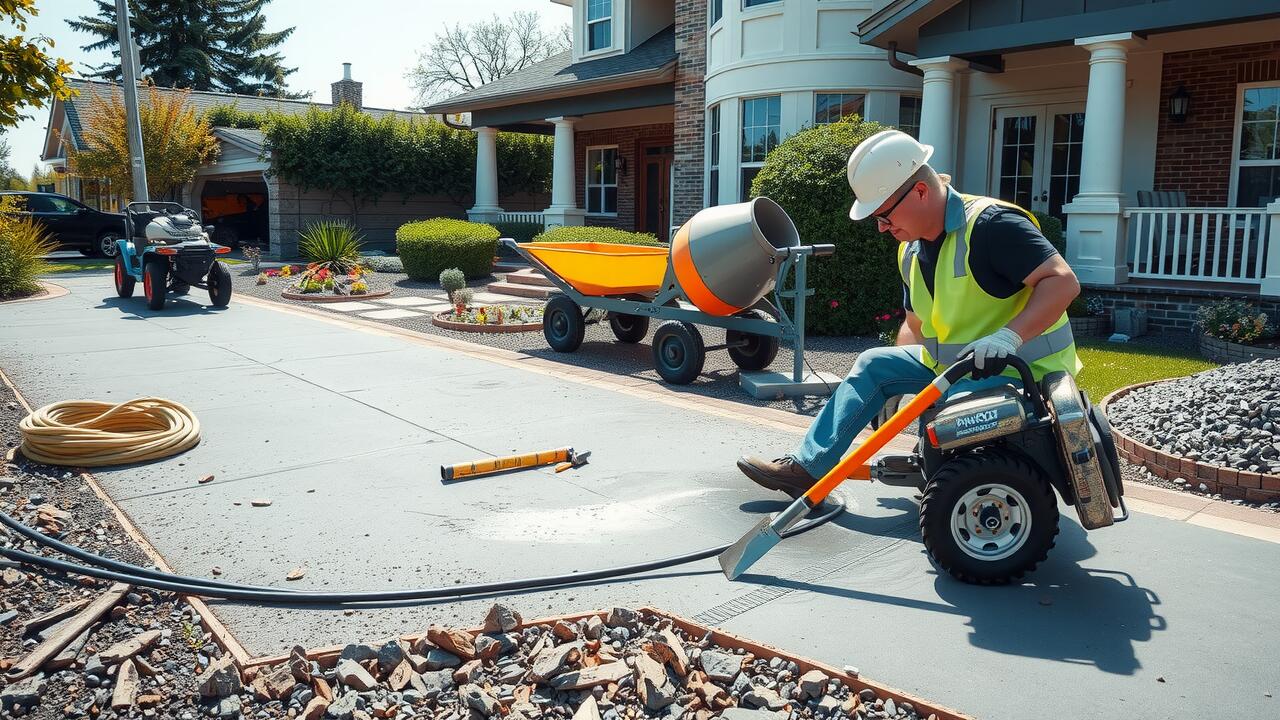
DIY driveway installation can significantly reduce costs associated with hiring professionals. By taking on the project yourself, you can save money on labor costs while also customizing the driveway to suit your preferences. Before beginning, it’s essential to research different materials and tools to ensure you select the right options for your needs. Proper planning and preparation are vital to achieving a successful outcome.
One of the primary benefits of DIY driveway installation is the opportunity to learn new skills. You can gain hands-on experience in landscaping, masonry, or proper drainage techniques, which can be valuable for future projects. Make sure to follow local regulations and obtain any necessary permits before starting. By dedicating time and effort to the installation process, you can create a functional and aesthetically pleasing driveway that enhances your property value.
Tips for Cutting Costs
Choosing the right materials can significantly impact your overall costs during driveway installation. Opting for less expensive options like gravel or asphalt can save you money compared to concrete or pavers. Additionally, considering local suppliers can lead to better pricing and lower transportation expenses. Researching alternative materials, such as recycled asphalt or concrete, may also provide both eco-friendliness and cost savings.
Another effective way to reduce expenses is to handle the installation yourself. This approach minimizes labor costs and allows you to control the entire process. Make sure to educate yourself on the most suitable installation techniques for your chosen material. Seeking help from friends or family can make the project more manageable while further cutting costs. Investing time into planning and preparation can lead to a successful driveway installation without breaking the bank.
FAQS
What is the cheapest material for a new driveway?
The cheapest materials for a new driveway typically include gravel, asphalt, or permeable pavers, with gravel often being the most affordable option.
Are permeable pavers a good option for budget-conscious homeowners?
Yes, permeable pavers can be cost-effective and environmentally friendly, especially when considering their long-term benefits such as reduced stormwater runoff and potential savings on drainage systems.
How can recycled materials help reduce driveway costs?
Using recycled materials, like crushed concrete or reclaimed asphalt, can significantly lower costs while also being an eco-friendly option that contributes to sustainability.
What DIY tips can help cut costs when installing a driveway?
To save money on DIY driveway installation, consider doing the project in phases, renting equipment instead of buying, using cost-effective materials, and enlisting the help of friends or family.
Are there any hidden costs associated with driveway installation?
Yes, potential hidden costs may include site preparation, drainage solutions, landscaping adjustments, and maintenance costs, so it’s important to budget for these additional expenses.
Durability of Stamped Concrete
Stamped concrete offers impressive durability, often making it a strong contender for various outdoor applications. When properly executed, stamped concrete installation involves a careful process of reinforcing the base and adding a high-quality sealant. This combination helps the concrete withstand wear and tear, thereby increasing its lifespan significantly compared to more traditional materials. Additionally, advancements in techniques and materials have enhanced its resistance to scratches, staining, and weather-related damage.
Despite its resilience, the longevity of stamped concrete can vary based on several factors. Regular upkeep, including resealing and cleaning, is essential for preserving the surface integrity. Neglecting maintenance can lead to the formation of cracks or discoloration over time. Homeowners who invest in stamped concrete installation should be proactive in managing these aspects to retain the aesthetic and functional benefits of their investment.
Lifespan and Maintenance Requirements
The lifespan of stamped concrete can be impressive, often lasting upwards of 25 years with proper care and maintenance. Factors such as local climate, application technique, and the quality of materials used during installation can significantly influence longevity. Regular sealing is recommended to protect the surface from wear and tear, particularly in areas exposed to harsh weather conditions. This proactive approach can help maintain its integrity and appearance over time.
Maintenance for stamped concrete is relatively straightforward compared to other materials. Routine cleaning with a pressure washer or mild detergent keeps the surface free of dirt and grime. Inspecting for cracks and applying sealant every few years can prevent further damage. While an initial investment is needed for stamped concrete installation, its low long-term maintenance requirements contribute to its overall affordability and value as a paving option.
Durability of Paving
Paving materials vary widely in their ability to withstand the elements and daily wear and tear. Generally, options like brick and stone offer robust durability, often lasting for several decades with proper maintenance. On the other hand, asphalt and concrete may exhibit vulnerabilities to cracking and deterioration over time, especially when exposed to harsh weather. While regular upkeep can mitigate some issues, the inherent qualities of the material substantially influence its long-term performance.
In contrast, stamped concrete installation provides a solid alternative, characterized by a high level of strength when cured correctly. Though it mimics more expensive materials, its durability often rivals that of natural stone. However, it can still be susceptible to surface damage if not properly sealed and maintained. Overall, the longevity of paving choices not only depends on the material but also on installation practices and environmental factors.
How Different Paving Materials Hold Up
Different types of paving materials vary significantly in terms of durability and resilience. Concrete pavers boast excellent strength and can withstand heavy loads, making them suitable for driveways and high-traffic areas. Natural stone, while appealing, may require more maintenance due to potential cracking or chipping. Asphalt is known for its flexibility and quick installation; however, it can deteriorate more quickly under extreme weather conditions and typically requires sealing to protect it from the elements.
In contrast, the stamped concrete installation process creates a monolithic slab that eliminates joints, making it less susceptible to weed growth and shifting from freeze-thaw cycles. Although stamped concrete can crack over time, proper sealing and maintenance can help extend its lifespan. Generally, while paving stones can offer superior structural stability, they often come with seams that can compromise their longevity if not properly managed. The choice between these options ultimately hinges on specific use cases and the desired aesthetic.
Aesthetic Appeal of Stamped Concrete
One of the most significant advantages of stamped concrete is its versatility in design. Homeowners can choose from a variety of patterns, textures, and colors that can mimic the look of more expensive materials like stone or brick. This adaptability allows for a customized aesthetic that fits various architectural styles, from traditional to contemporary. The ability to replicate natural materials adds to its appeal while ensuring a cohesive look throughout outdoor spaces.
The stamped concrete installation process itself plays a crucial role in enhancing visual appeal. Skilled craftsmen can create intricate designs that elevate the overall artistic element of driveways, patios, and walkways. This detailed workmanship ensures that the final product is not only functional but also visually striking. The unique patterns achieved during the installation add character and charm, making each project distinct and tailored to the homeowner’s preferences.
Design Options and Customization
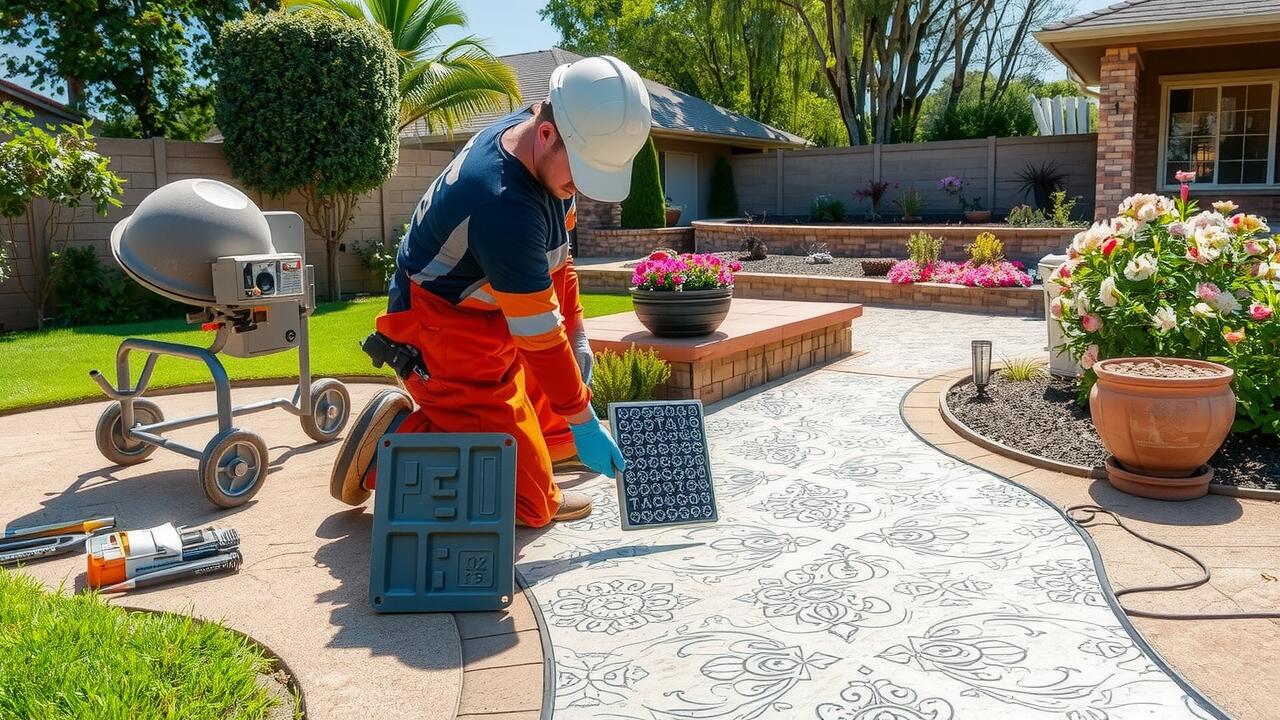
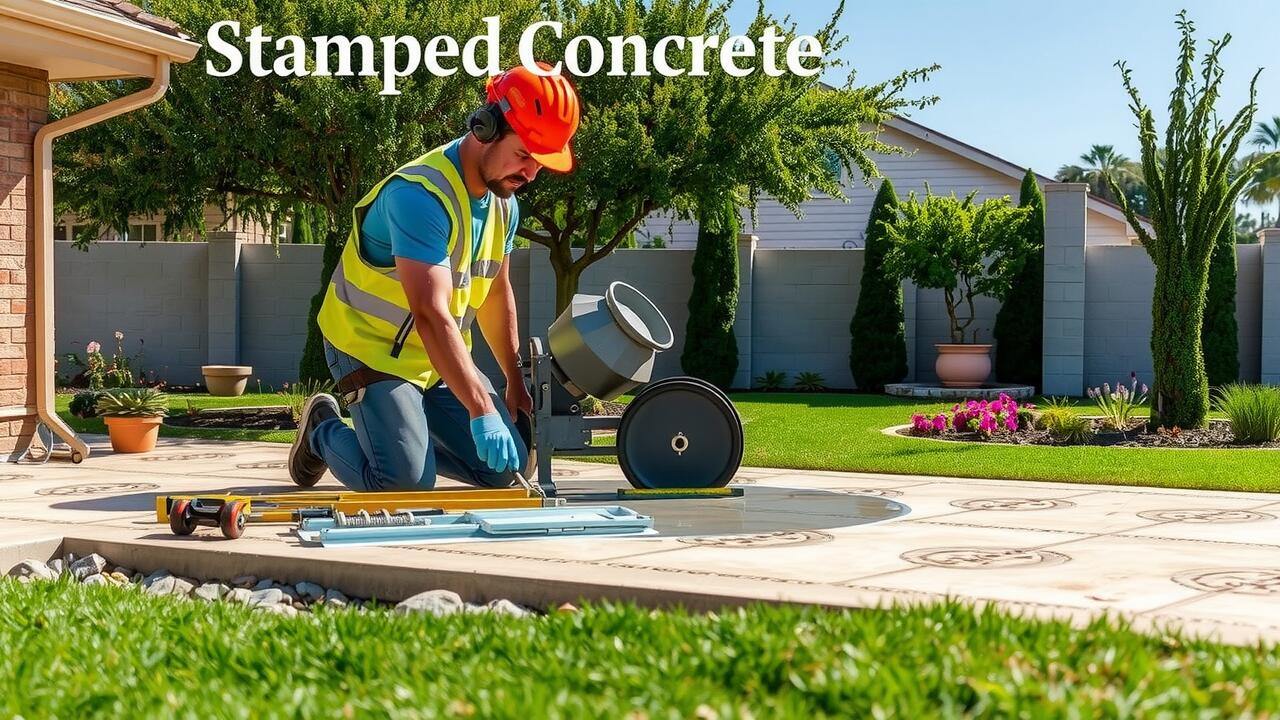
Stamped concrete offers a wide array of design options that can mimic the look of natural materials like stone, brick, or tile. Homeowners appreciate the flexibility in patterns and colors, allowing for a personalized touch to their outdoor spaces. The stamping process involves pressing molds into freshly poured concrete, creating textures that can enhance the overall aesthetic. This versatility makes it easier to match existing architectural features or landscaping, resulting in a cohesive look.
Customization doesn’t stop at color and pattern; techniques such as staining and sealing can further enhance the appearance of stamped concrete. Different finishes can alter the final look, providing various levels of shine and texture to suit individual preferences. Those considering stamped concrete installation should be aware of these options, as they can significantly impact the final result and overall satisfaction with the project. Balancing functionality with artistic expression makes stamped concrete a popular choice for many outdoor applications.
FAQS
Is stamped concrete less expensive than traditional paving options?
Generally, stamped concrete can be less expensive than some traditional paving methods, but the final cost depends on various factors including materials, labor, and design complexity.
What factors influence the cost of stamped concrete?
The cost of stamped concrete is influenced by the design complexity, color choices, and the size of the area being covered, as well as labor costs in your region.
How does the maintenance of stamped concrete compare to that of paving?
Stamped concrete typically requires less maintenance than some paving materials; however, it may need occasional sealing to protect against wear and UV damage.
Can stamped concrete mimic the look of traditional paving?
Yes, stamped concrete can be designed to closely resemble traditional paving materials such as bricks, stones, or tiles, providing a versatile aesthetic at potentially lower costs.
What is the average lifespan of stamped concrete compared to paved surfaces?
Stamped concrete can have a lifespan of 20 to 30 years with proper maintenance, while traditional paving materials may vary, often lasting between 15 to 30 years depending on type and installation.
DIY Driveway Installation
Many homeowners consider DIY driveway installation as a way to save money on labor costs. By procuring materials like asphalt, concrete, or gravel and handling the project personally, individuals can reduce expenses significantly. Online resources and local hardware stores offer guidance and tools needed for the task. This hands-on approach often results in a strong sense of accomplishment, as well as the flexibility to customize the driveway according to personal preferences.
However, tackling driveway installation without professional help comes with its set of challenges. Proper preparation and understanding of the materials are crucial for a durable finish. Inexperience may lead to issues such as improper grading or drainage problems, which can have long-term consequences. Additionally, homeowners need to factor in the time commitment involved, as completing the project may take longer than expected, especially without prior experience.
Cost-Effectiveness and Challenges
When considering driveway installation, homeowners often weigh the cost-effectiveness of a DIY approach against hiring professionals. A DIY project can save money on labor costs, but it requires substantial time, effort, and skill. The materials purchased for a DIY installation can vary dramatically in price, with options ranging from gravel to asphalt to concrete. While the initial expense may be lower with a DIY project, hidden costs related to tools, potential mistakes, and the need for future repairs can add up quickly.
Challenges also arise when opting for a DIY installation. Without proper experience, individuals may face difficulties in ensuring the driveway’s slope and drainage are correct, leading to long-term problems such as water pooling or cracking. Additionally, some localities have regulations regarding driveway installation that necessitate permits or adherence to specific standards. These factors can complicate the process for those attempting to cut costs while ensuring their project adheres to local guidelines.
Regional Pricing Variations
Regional variations in pricing can significantly impact the overall cost of driveway installation. In areas where materials are readily available and labor costs are competitive, homeowners may find lower prices for both asphalt and concrete options. Conversely, locations with scarce resources or a high demand for skilled labor often incur higher expenses. For instance, urban centers may experience increased pricing due to elevated market demand and limited space for installation, whereas rural areas may have more affordable rates.
Local regulations and climate conditions also contribute to differences in pricing. Regions prone to severe weather might require thicker or more durable materials, increasing installation costs. Additionally, local building codes can dictate specific materials or installation methods, affecting the overall budget. Understanding these regional nuances helps homeowners better anticipate the financial commitment associated with driveway installation.
How Location Affects Driveway Costs
Factors influencing driveway installation costs often vary significantly between urban and rural areas. Urban locations typically encounter higher labor rates and material costs due to increased demand and limited space. In contrast, rural areas might offer more affordable installation options, but availability of skilled labor and quality materials can become a challenge, affecting the overall pricing.
Additionally, the cost of driveway installation can change dramatically by region. Regions with harsh climates may require different materials and techniques, leading to higher prices. In areas where local regulations impose additional requirements such as permits or specific drainage solutions, homeowners might face extra expenses, contributing to the overall cost of the project.
Seasonal Considerations
Seasonal factors can significantly influence the cost and ease of driveway installation. Spring and early summer are often considered peak seasons for many homeowners to undertake this project. During these months, contractors are more readily available, and the weather conditions are generally favorable, allowing for smoother installations. However, the increased demand can lead to higher prices for labor and materials.
Conversely, late fall and winter might present opportunities for cost savings on driveway installation. Many contractors are willing to negotiate prices during the off-peak season due to a decrease in project demand. Weather can pose challenges during colder months, yet the potential for reduced costs might make it appealing for those willing to take the risk. Homeowners should carefully evaluate the trade-offs of timing to maximize their investment.
Best Times of Year for Installation Savings
Timing plays a crucial role in the overall cost of driveway installation. Many homeowners find that scheduling their projects during the late fall or early spring can lead to significant savings. Contractors tend to have more flexible schedules during these off-peak seasons, often resulting in lower labor costs and better negotiation opportunities. Additionally, materials may be more affordable when demand is reduced.
Another consideration is local climate conditions. In regions with harsh winters, driveway installation may be limited during icy months, driving prices up when the season turns favorable. Conversely, the summer months frequently see increased demand, which can inflate costs due to the overwhelming number of projects booked. Planning driveway installation during quieter times in the year can be beneficial for both budget and scheduling flexibility.
FAQS
What factors influence the cost of installing a driveway?
The cost of installing a driveway can be influenced by several factors, including the material chosen (asphalt, concrete, gravel, etc.), the size and design of the driveway, labor costs in your area, and any necessary permits or preparations, such as excavation or grading.
Is it cheaper to install a driveway myself?
DIY driveway installation can be more cost-effective if you have the necessary skills and tools. However, it’s important to consider the challenges involved and potential mistakes that could lead to additional expenses. If you’re not experienced, hiring a professional may save you money in the long run.
How does location affect the cost of driveway installation?
Regional pricing variations can significantly impact the cost of driveway installation. Areas with a higher cost of living often see increased labor and material costs. Additionally, local regulations and climate conditions can affect pricing, making it crucial to research costs specific to your location.
When is the best time to install a driveway for potential savings?
The best times of year for driveway installation often fall during the shoulder seasons, typically in spring or fall. During these times, demand may be lower, potentially leading to discounts or better rates from contractors.
Are there any hidden costs associated with driveway installation?
Yes, hidden costs can arise during driveway installation, including site preparation (like grading and drainage), permits, and any necessary repairs to existing structures. It’s important to factor in these potential expenses when budgeting for your driveway project.
